Capturing and organising information in your own notes can make it easier for you to understand and remember new knowledge. In this post we’ll review common strategies and introduce Atomic Notes, which can be an easy and incredibly valuable addition to your note-taking.
Common Note-taking Methods
Common strategies include highlighting the important information, summarisation of key points and creating mind maps or other diagrams. These methods help you to engage with and retain new information, and to organise it for when you come back to review it in future. Let’s start by taking a closer look at these common methods:
Highlighting and Annotating
Highlighting draws your attention back to an idea or concept when you revisit a document, and annotations capture your thoughts and ideas that are sparked while reading. Annotations are usually stored within the source document, often next to a highlight.
This method makes your important information easier to refind when you come back to the document. However one of the biggest limitations of highlighting & annotating is accessing your highlighted information outside of the source document.
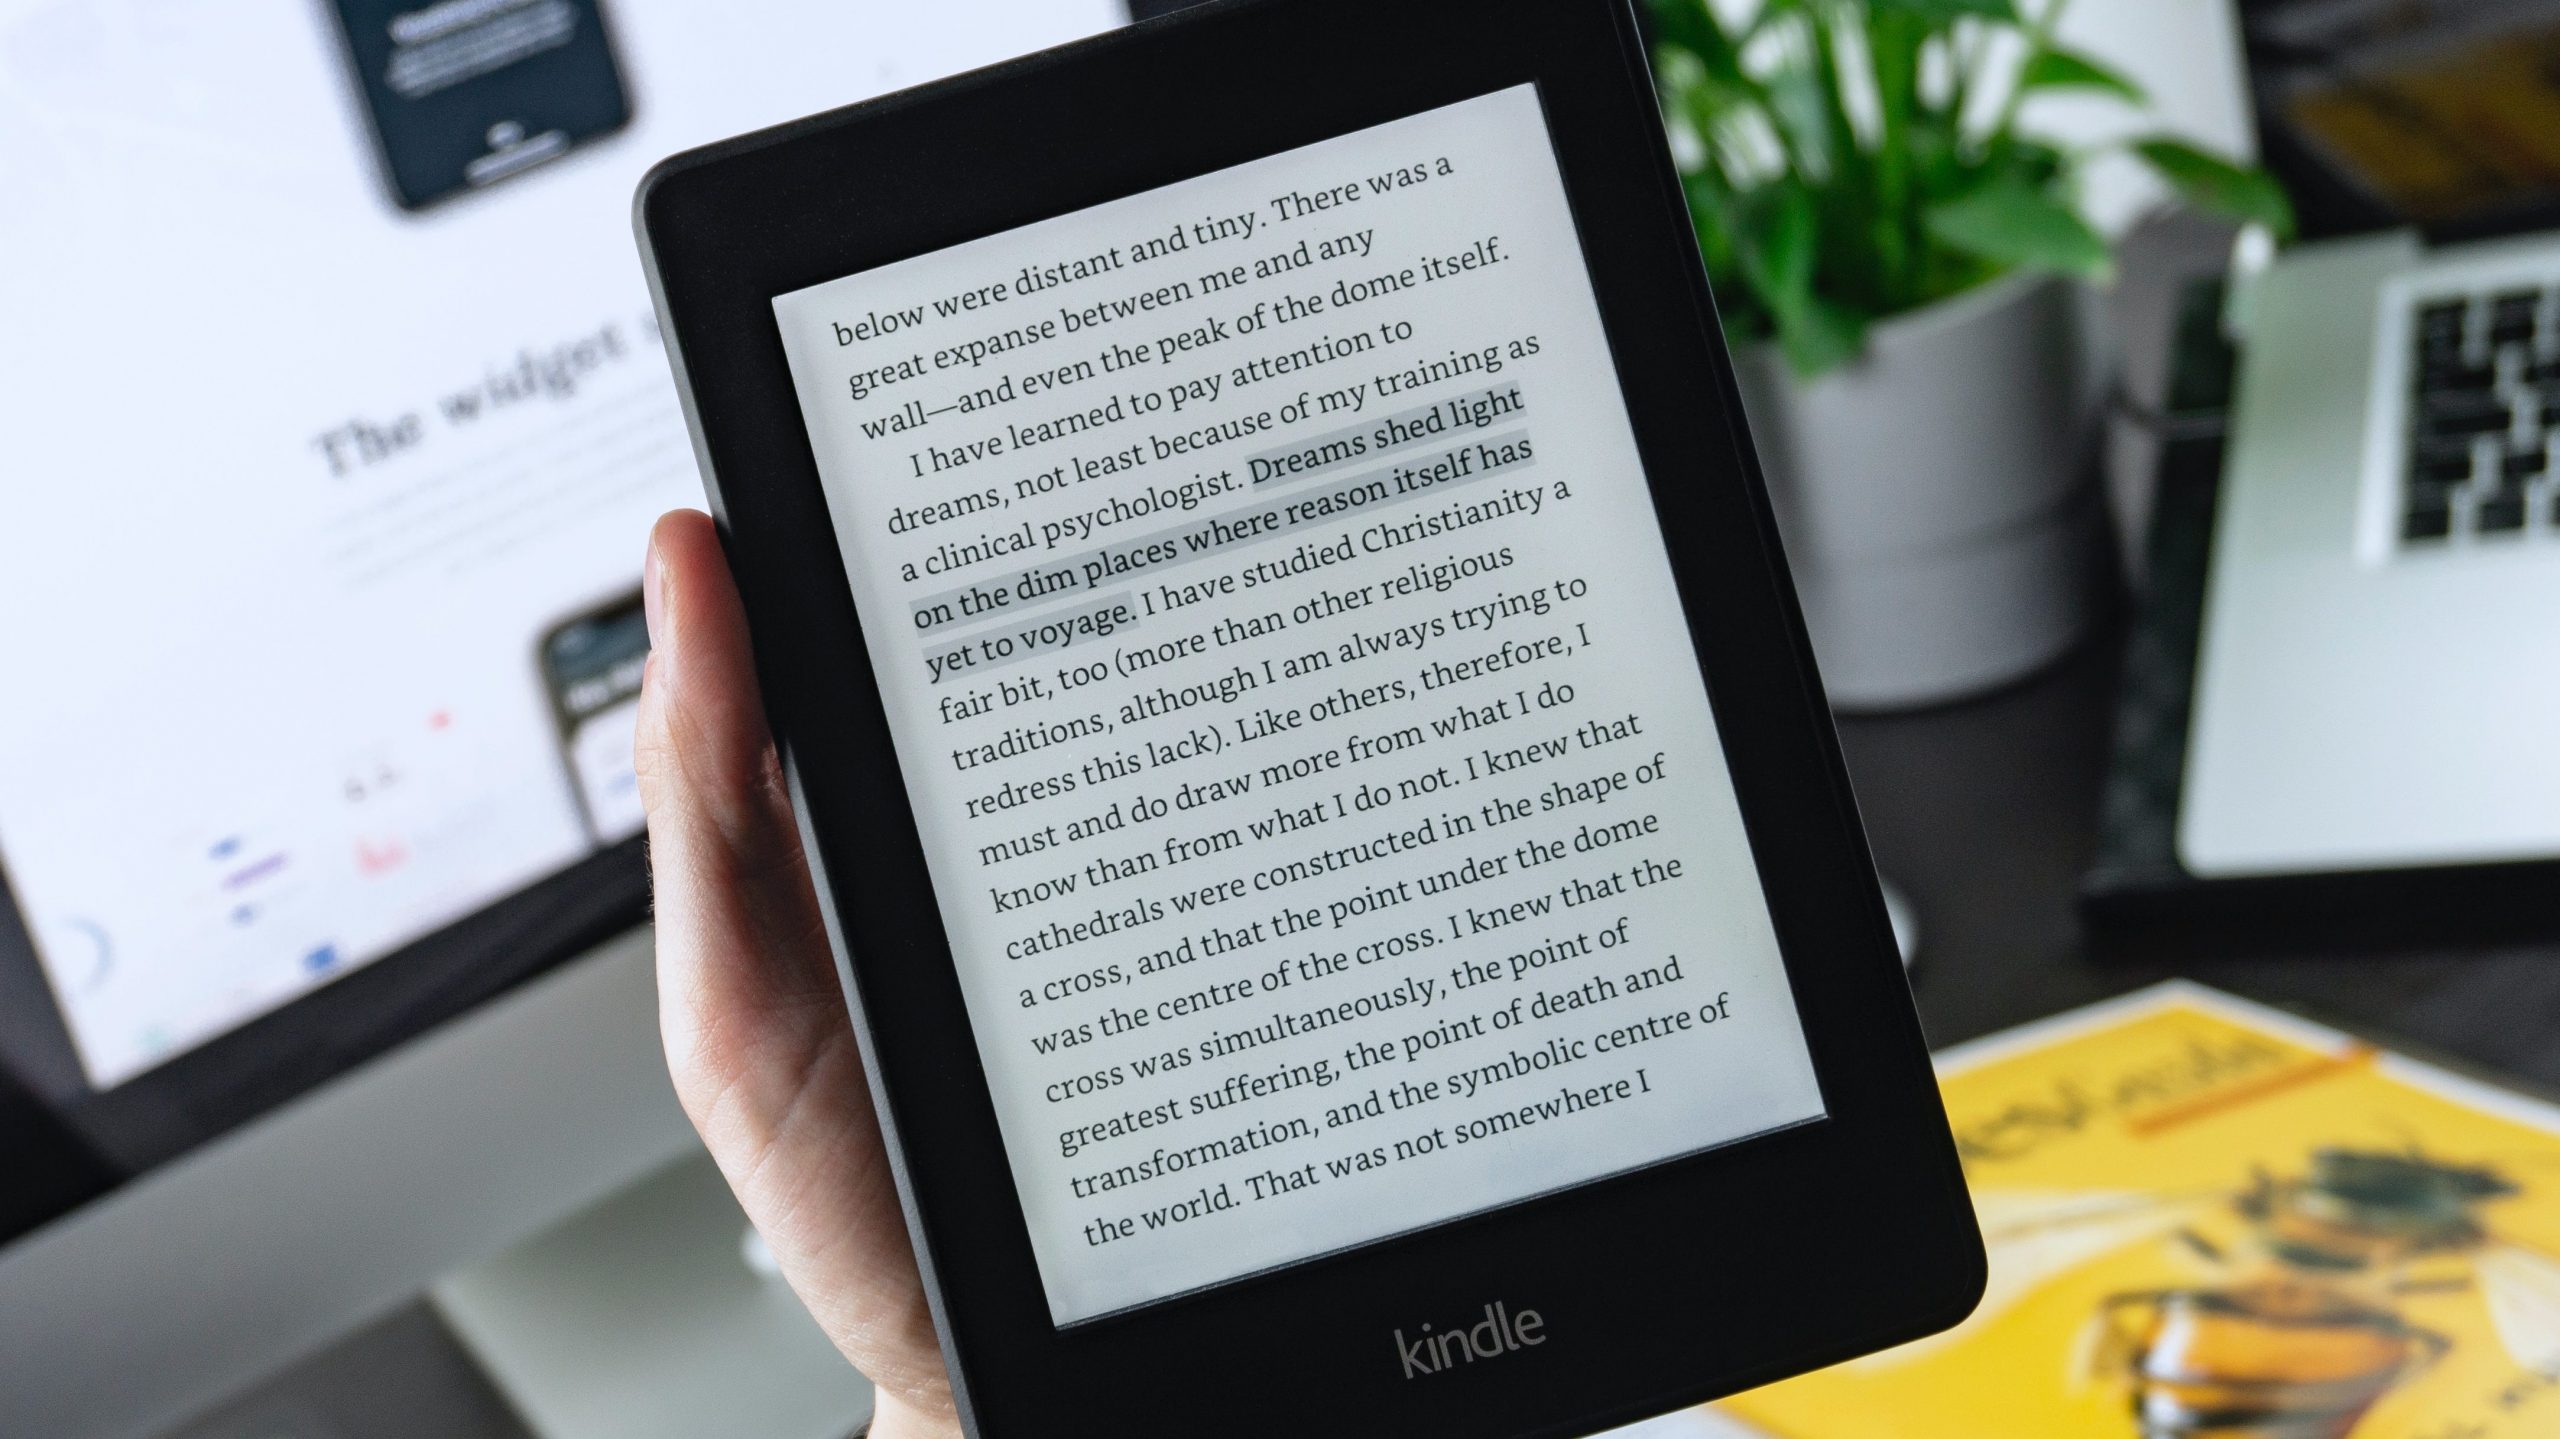
E-readers can lift your highlights and annotations out of the page for you to access outside of the book or article they came from. You can then send all your highlights to a highlights manager for further organising. This is a great example of shifting your note-taking towards atomic notes.
Summarisation
You distill key ideas from your sources, to save them inside another document. Typically you collect several key ideas together as bullet points or write your own summary in a few paragraphs. Your summary is often created separate to the original source material.
Summarisation saves you time as you won’t have to re-read the full source again, but summaries can leave out important details or context for fuller understanding.

Mindmaps & Diagrams
A visual method to organise your ideas while exploring and capturing the connections between them by linking related concepts or ideas together.
Mindmapping moves your ideas out of their sources, allowing you to connect them together in different ways which can lead to deeper understanding. However creating mindmaps on paper or using digital tools can remove the info from it’s original context and can be time-consuming.
Creating Atomic Notes allows you to see all the above benefits and starts to address some of the limitations of each of the methods mentioned above.
What’s an Atomic Note?
Atomic notes are self-contained units of information, that contain a single idea or concept. They are meant to be concise and easily digestible so they can be read and understood without you needing to refer to anything else.
Creating Atomic notes allows you to access the note outside of the original document. Each separate note is organised and connected to all relevant topics for easy retrieval. The connections added quickly collects your related knowledge together around topics and themes.
Atomic Notes are a key part of the Zettelkasten organisational system used by Niklas Luhmann.
Why use Atomic Notes?
Creating a library of atomic notes can help you to break down complex ideas into smaller more manageable pieces. Distilling these smaller pieces can help you to better understand and remember the information you have collected. The distillation process is very similar to both highlighting and creating a summary in that you take note of important information from your source.
Your Atomic notes can also be re-organised and re-assembled together to create new ideas. Organising each idea or concept individually allows you to connect it to other ideas. Tagging starts to organise your Atomic notes around topics and themes.
Benefits of Atomic Notes
Over time your collections of Atomic Notes can lead you to spot new patterns and generate new ideas. Connecting your atoms is similar to generating mindmaps to explore how your ideas relate to each other.
Atomic Notes overcomes the access limitation of highlighting and annotating, by adding the ideas and concepts themselves into your library or knowledge-base. The difference is that in creating an Atomic Note with each idea, you allow that idea to exist on it’s own amongst all your notes.
Connections can also be created to the original source of the atomic note, and so you should always be able to navigate to the source to gain further context.
You can save a lot of time spent searching for highlights inside of your files by switching to Atomic Notes which gives you a searchable list of all your highlights.
How to Get Started with Atomic Notes
If you use highlighting, add annotations and create summaries, then it’s easy to start using Atomic Notes! You are already in the practice of identifying concepts and ideas that you want to remember.
The next step is to create an Atomic Note, by saving just one highlight into it’s own note. Then you can access the information outside of your source file.
To take advantage of the benefits of Atomic notes, and unlock the ability to access all your ideas and knowledge, all that’s needed is to switch your annotation & highlights management system.
In summary Atomic Notes allow you to:
- access information outside of the source document
- connect your ideas and thoughts together
- add a connection to the original source to find further context
Get Started with Atomic Notes on Protolyst
On Protolyst you can highlight information you want to save for the future, and in one click create an Atom, which saves that highlight as an Atomic Note in your workspace. Each Atom you create, has a link to the original source, and you can connect each Atom across your workspace by using Tags.
Let’s take a closer look at using Protolyst for Atomic Notes:
Creating your Atomic Notes
On Protolyst we use the term Atoms for your Atomic Notes.
1) Create your account – get started here
Once registered, you will have your Protolyst Workspace to organise and manage all your sources and knowledge.
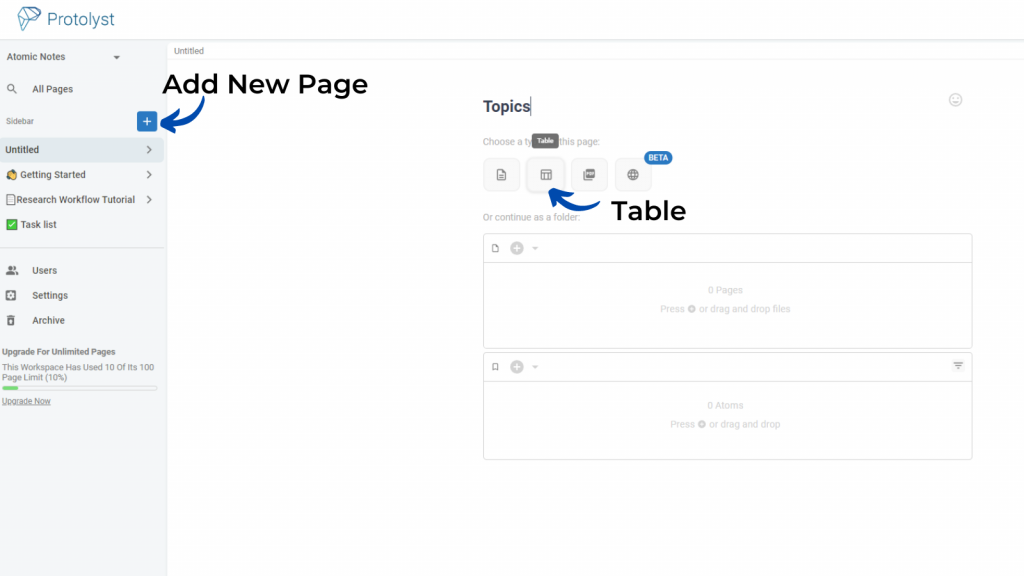
2) Create a Table to add your Topics. Use the Plus button at the top of the left hand side bar to add a new Page, and then Select Table from the button options.
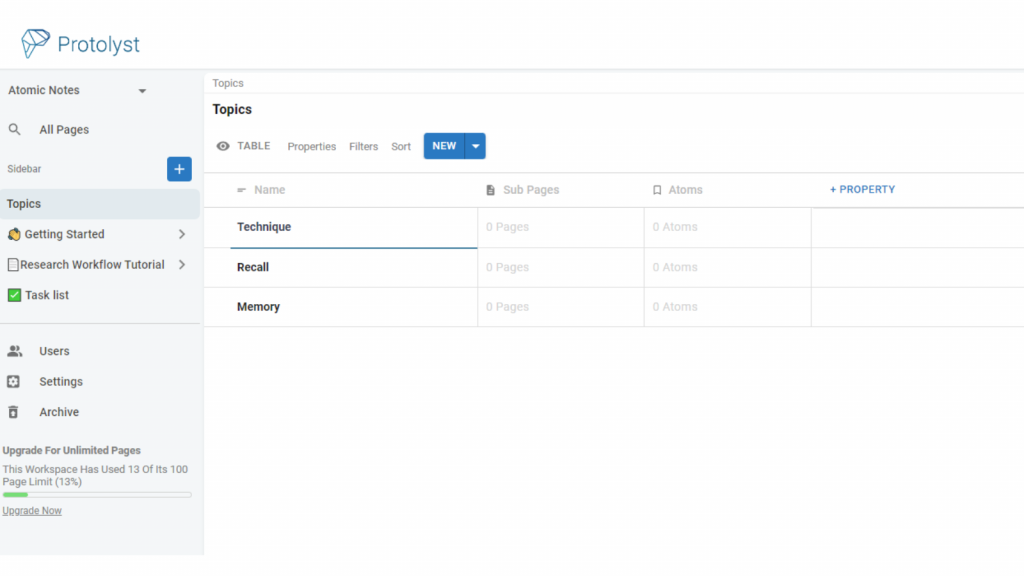
3) Add some Topics of interest to your Table. Pick topics that you want to gain knowledge around and add them as separate rows into the Table. Use the New button at the top of the Table to add a new Row
4) Add your source(s) into Protolyst. Create another Table for your Sources and then you can upload PDFs with drag and drop. You can also import content from a web page or copy paste text into a New Page – see here for further info
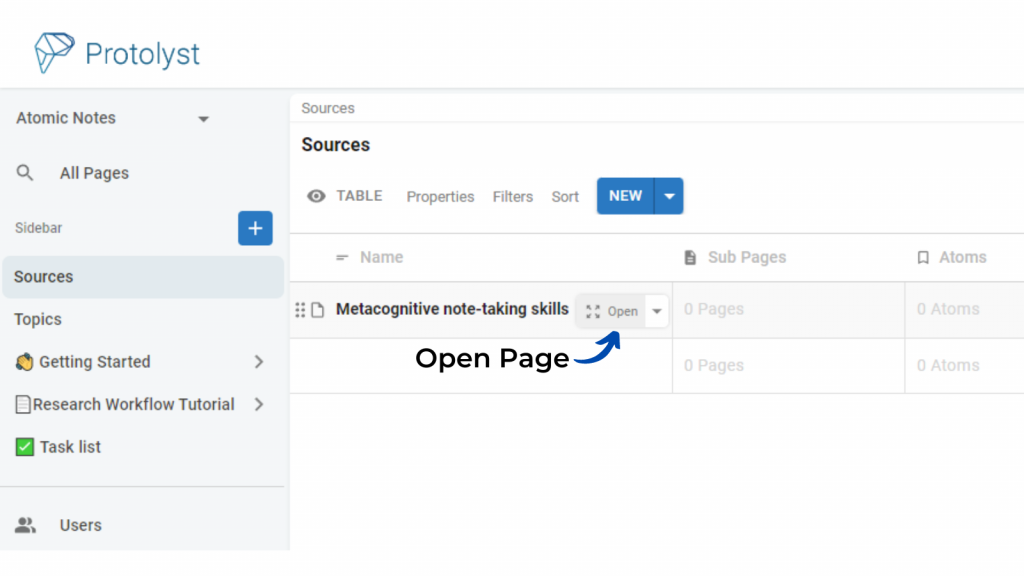
Once uploaded you can open your source to read it in Protolyst – hover over the Row and the Open Page button will appear
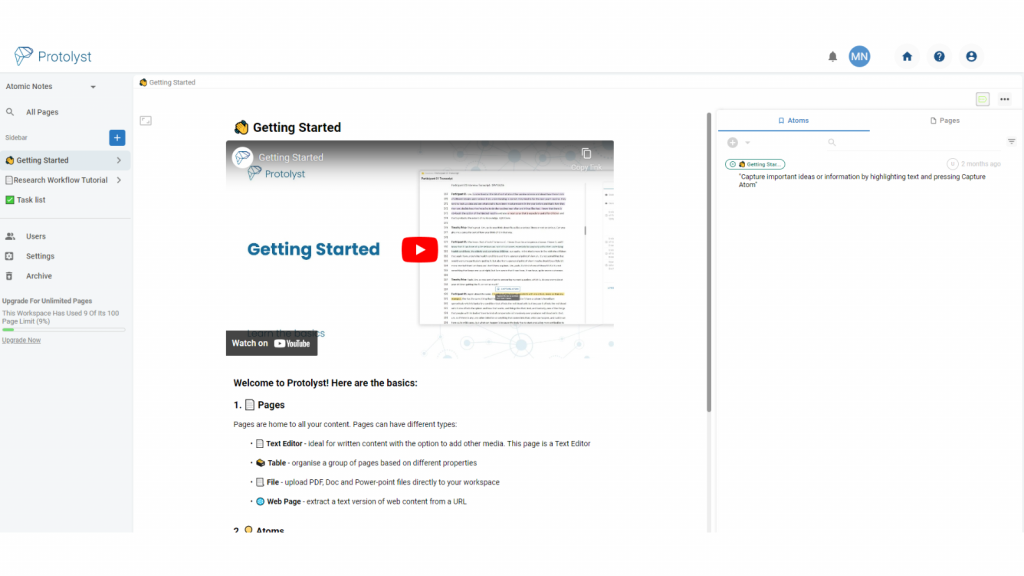
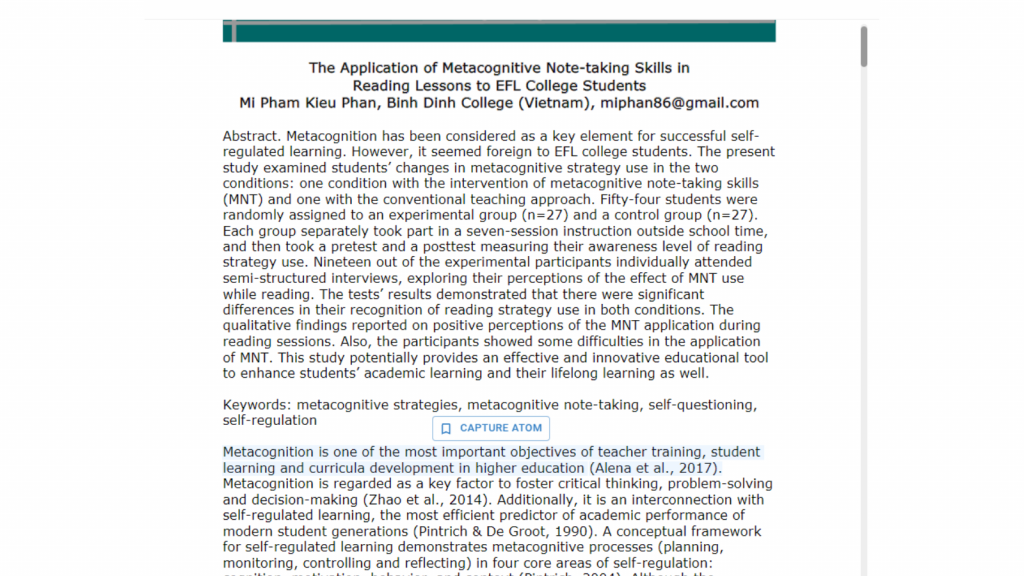
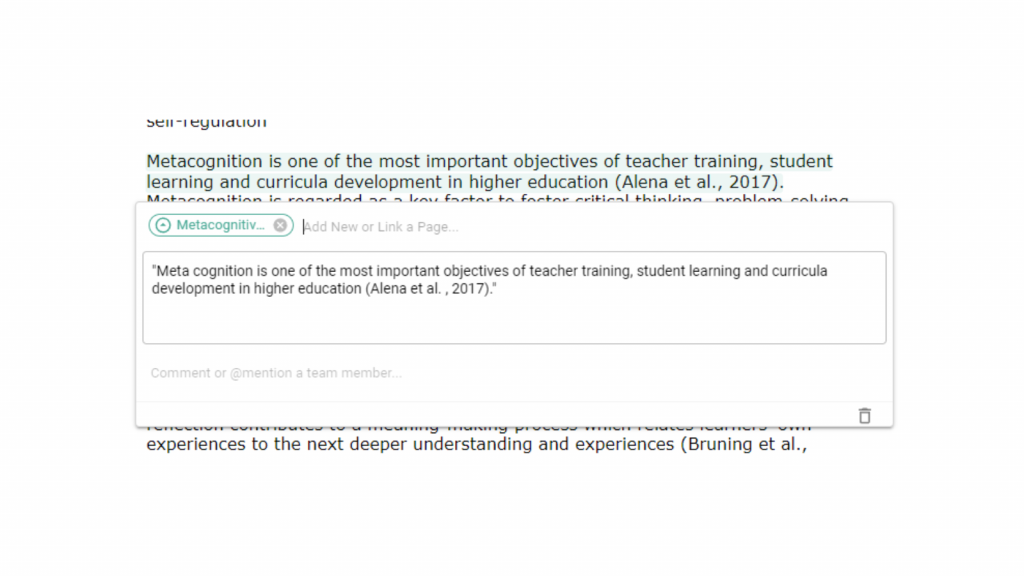
5) Highlight text of interest, and select ‘Capture Atom‘ from the pop up – this saves the piece of text as an Atomic Note in your workspace. Every Atom you Capture will be accessible outside of the source file.
You can also add your thoughts and annotations directly into the Atom box below the Atom text
Repeat for all your highlights in the file to create your Atomic Notes
Browsing your Atomic Notes
There are 2 ways to view your Atomic Notes on Protolyst
1) In a Page
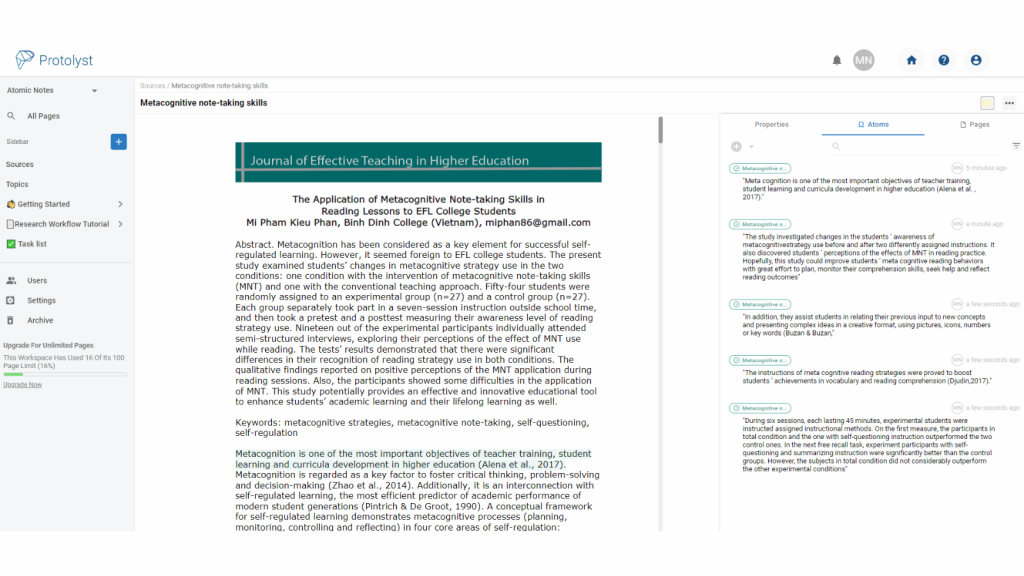
When you are in a Page, open up the Properties Menu on the right hand side. Navigate to the Atoms Tab, to see a list of all the Atoms captured from this Page
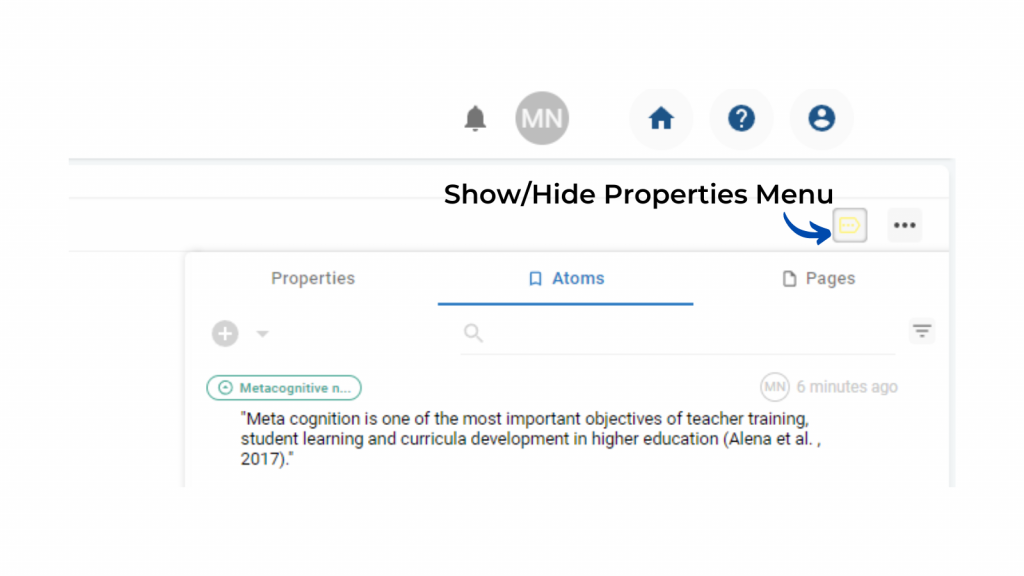
The Atoms will then display alongside your Source.
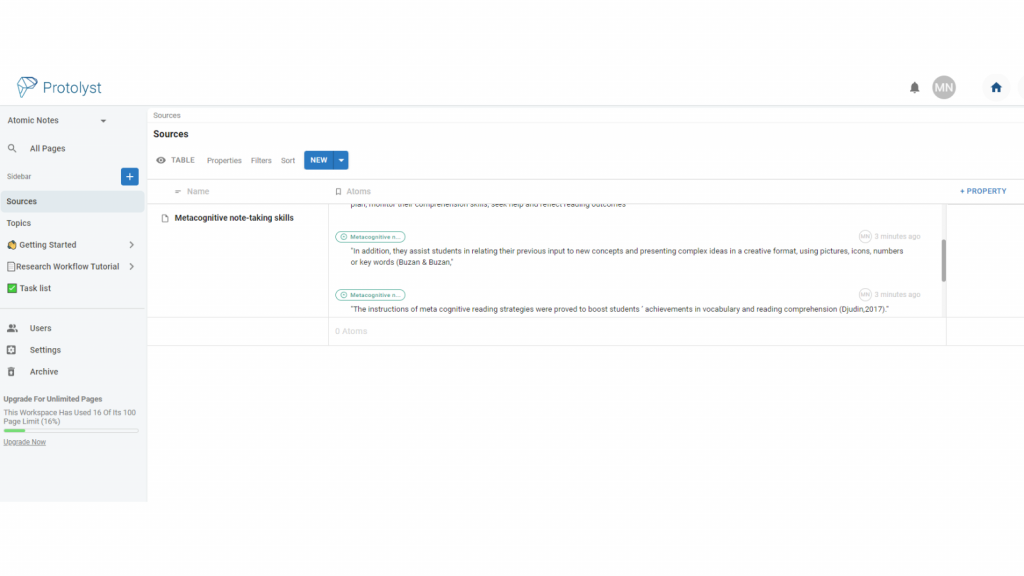
2. In a Table
If your Source is added into a Table, then all the Atoms captured from it will display under the Atoms Property. You can see all the Atomic Notes you created here without needing to open up each file.
You can also use a keyword search, to search through all your Atomic Notes (and everything else added into your Workspace) using the Workspace Search option at the top of your Sidebar on the left side of the screen to quickly find the information you want.
Connecting your Atomic Notes
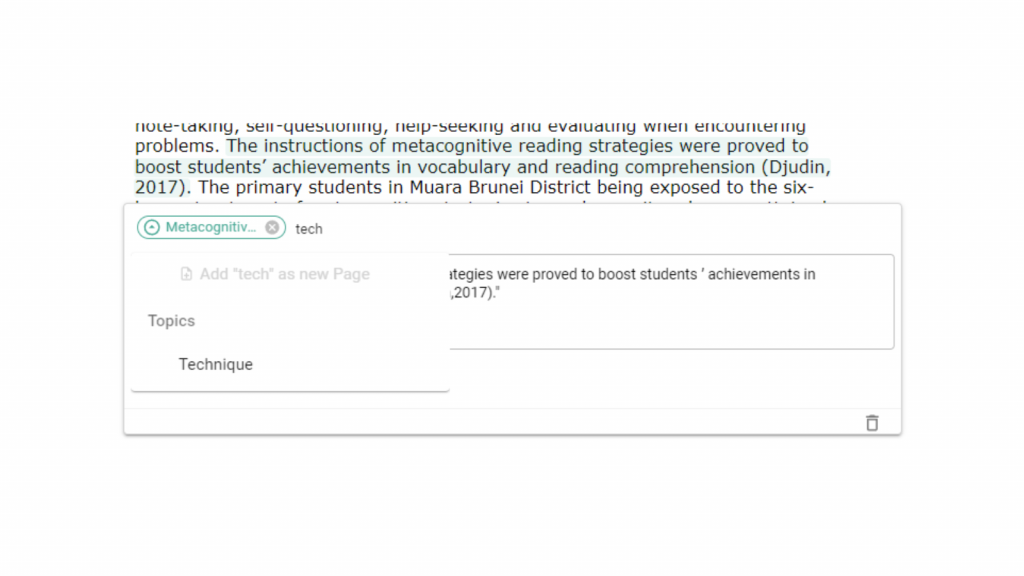
At the top of the Atom box, there’s a bar where you can add Tags. Start typing the Topic to which this Atom relates. If you added it into your Topics table, it will appear in the list. Select it to add a Tag and create a Connection. Repeat for all relevant Topics
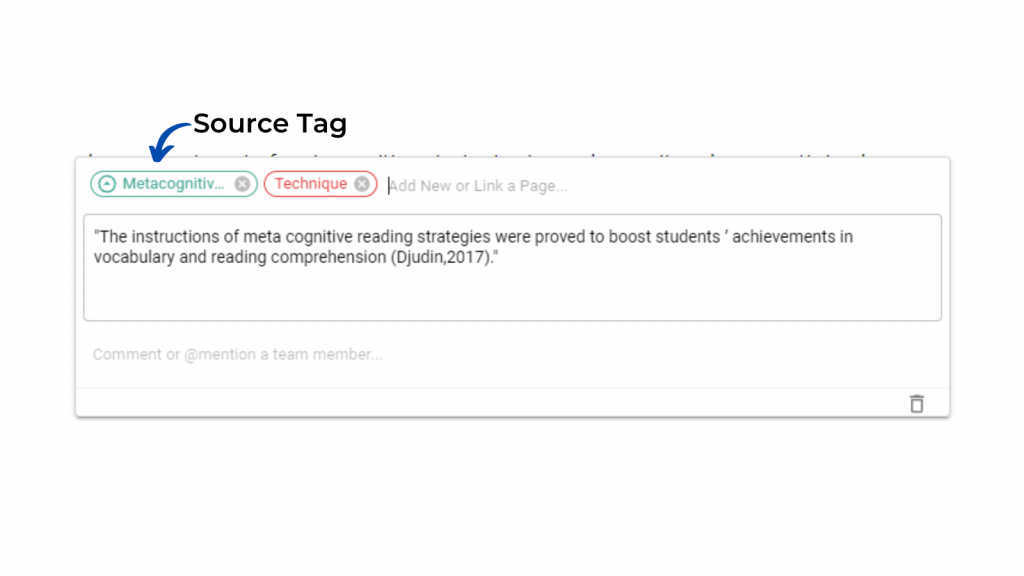
Your Atom will ‘exist’ and display by every Page it has been Tagged to. Your Atoms will also display in your Topics Table next to the Topics they have been Tagged against.
If you ever want to view the original source and get further context, you can click the Source Tag. You’ll be navigated back to the source and location of your Atom.
Protolyst gives you a system very similar to highlighting and annotating, with the added power and benefits of Atomic Notes:
- Capturing Atoms creates Atomic Notes and lifts your highlights and annotations out of the source
- You easily see the original context of your atom by navigating to the source with the Source Tag
- You can add connections to all relevant topics by using Tags
Further Reading
If you’re interested in finding out more about Zettelkasten and Atomic Notes, take a look at the following:
Efficient and Organised Academic Reading on Protolyst
[…] each key detail as it’s own note is known as the Atomic Notes method, and you can create these on Protolyst very […]