Atoms are at the heart of Protolyst and workflows, opening up the possibilities of how you can work with your ideas, collate related concepts and connect facts to deepen your understanding.
What are Atoms? #
Atoms are the “aha” moments, quotes, or ideas that are worth remembering, connecting, and sharing. Capturing atoms allows you to extract and connect those aha moments throughout your workspace so you can quickly access the details needed to move your projects forward.
Saving information as an Atom, frees it from being located only within the source page. Adding Atoms into your workspace creates an additional knowledge layer in your workspace, and builds a collection of Atoms that you can access and use across your workspace. There’s more on Atoms in our blog
Why Atoms? #
Atoms are the building blocks of matter, and in Protolyst, the building blocks of knowledge. Atoms encompasses the analogy of small ideas that can be assembled together into new understanding, opinions and decisions. And so Atoms is the term we use encompassing your highlights, text snippets, and golden nuggets.
Capturing an Atom #
If you can highlight, then you can Capture an Atom!
As you are reading through your Sources and come across a key detail, highlight it and then choose Capture Atom. Once captured as an Atom, that snippet of text has been lifted out of the page and you’ll be able to view and access it across your workspace.
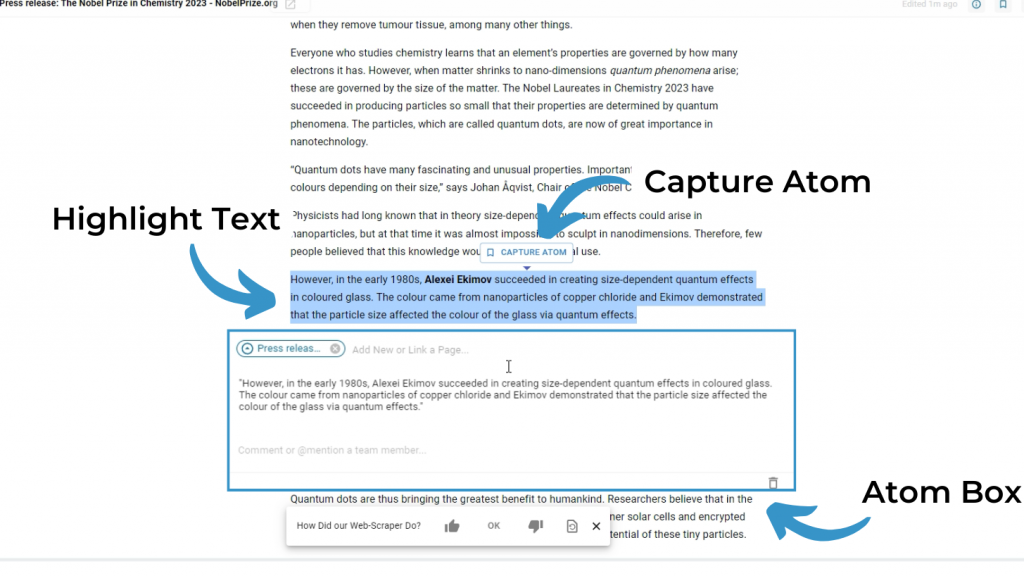
When you Capture an Atom in a Page, the Atom Box will appear. This box displays the text that has been saved as an Atom, and above the text box, there’s a coloured, encircled piece of Text. This is the Source Tag, and connects your Atom to it’s location in this Source Page.
The Source Tag allows you to easily and quickly get back to the original Source of your Atom, from anywhere else in your workspace. Click it to navigate back to the Source of your Atom.
Viewing your Atoms #
When you’ve captured an Atom, it is saved as an individual object in your workspace, so you’ll be able to see it outside of the Source Page.
There’s 3 ways to view your Atoms:
View all your Atoms #
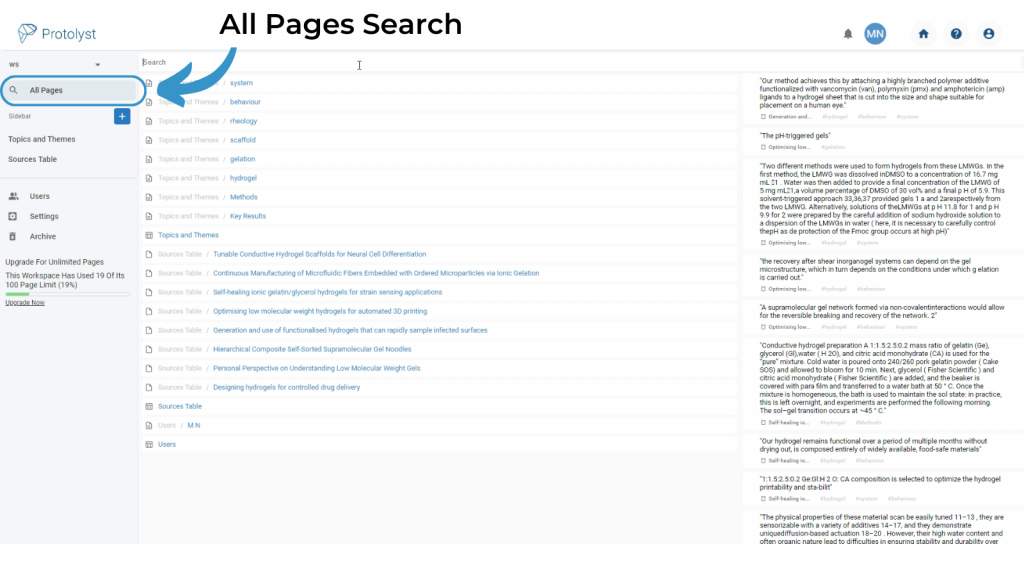
View and search through all the Atoms in your workspace in All Pages search. Open this up at the top of your left hand sidebar, you’ll see a list of all your Pages and all your Atoms on the right. You can search through your collection of Pages and Atoms using the Search Bar at the top
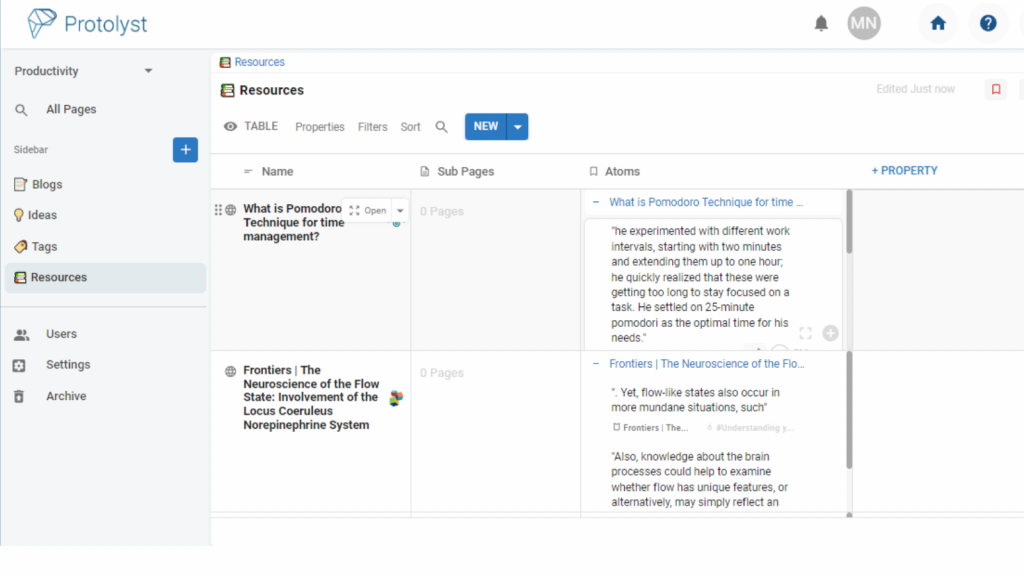
View Atoms in a Table with an Atoms Property #
If you have captured Atoms from a Page that is a Row in a Table, you can view your Atoms in the Atoms Property.
View Atoms in a Page in the Atoms Menu #
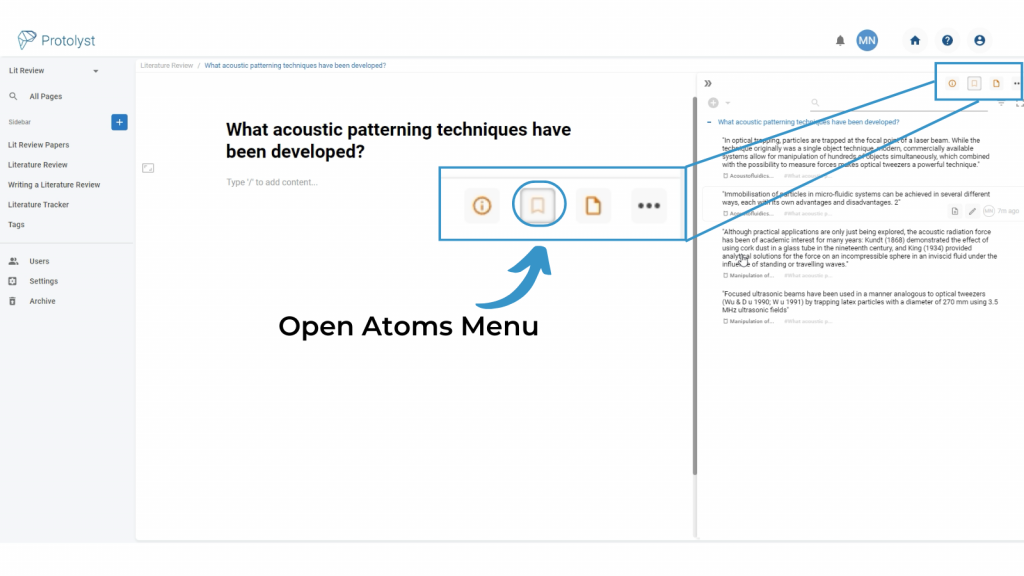
And you can view all the Atoms of a Page when you’re inside that Page by opening the Atoms Menu, to display a list of Atoms down the right side of your Page.
Using your Atoms #
Once captured your Atoms can be embedded into other Pages complete with automatic References and grouped together using Tags.
Using your Atoms to write #
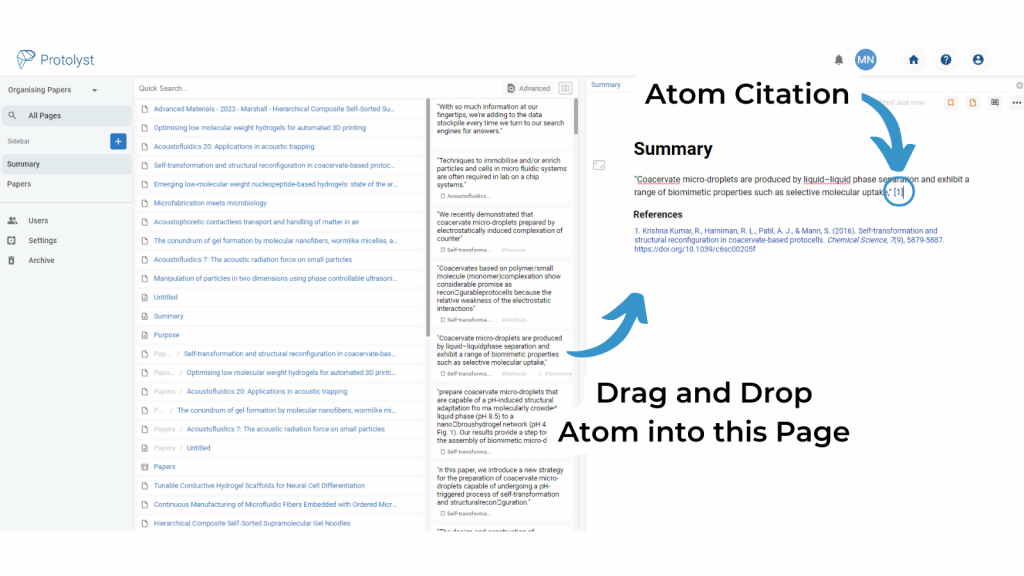
Drag and drop Atoms into a Text Editor page to use them in your writing.
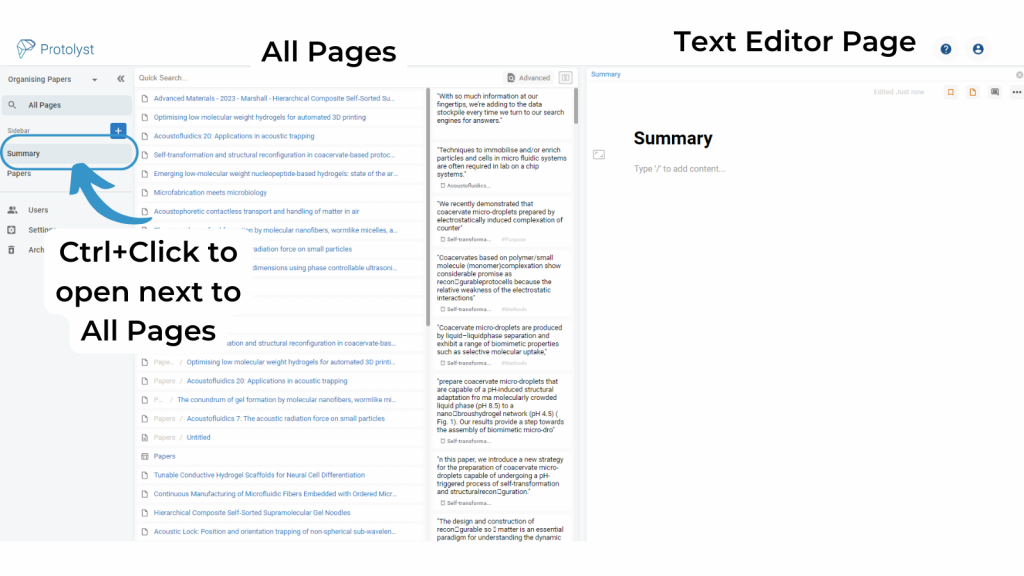
Use Splitscreen view to have a Page with your Atoms open and your new Page where you’ll be writing open side by side. To open a Page in Splitscreen use CTRL+Click.
Drag and drop the Atom into your Page. This will add the Atom text into your Page, alongside a Citation and a References Section will appear at the bottom of your Page.
Repeat for as many atoms as you want. The Atoms are editable in the Page to use in your writing.
Grouping your Atoms together with Tags #
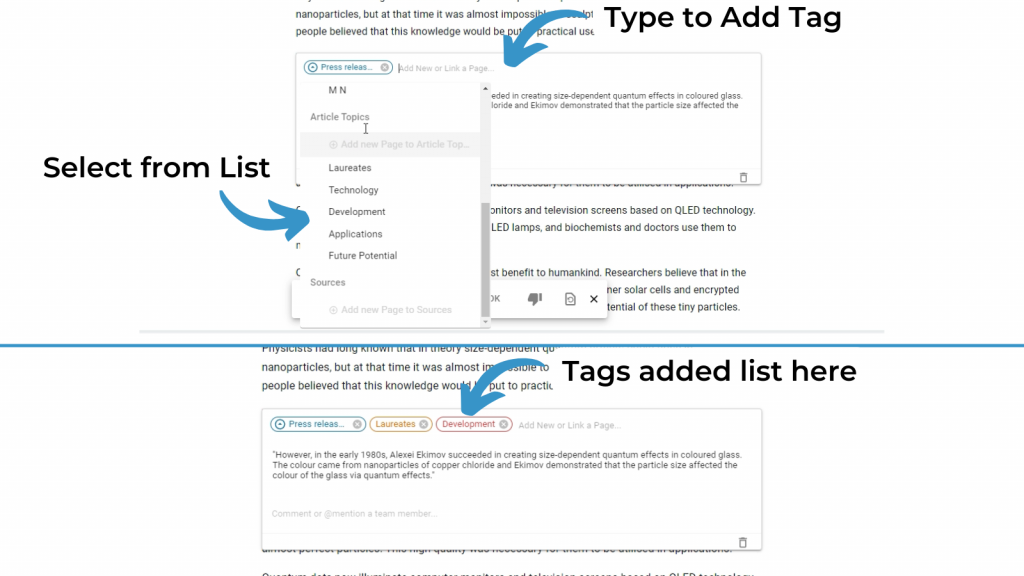
You can also use Tags to organise your Atoms to explore patterns and themes and group related Atoms together.
