During a research project you’ll collect a large amount of information. Often when you return to those notes you want to pull related information together in different ways. If you’ve added your notes into a very long summary document or an Excel sheet, it can be an extra layer of admin to reorganise your notes before you can get started. Here’s how you can take advantage of using Tables, Tags and Atoms to add your notes and annotations into a Document style template that can then be reorganised in different ways so that you can organise your research notes efficiently on Protolyst.
This work flow has been broken down into 5 steps below or for a full walkthrough take a look at our YouTube video
Step 1: Create a Document Style Template #
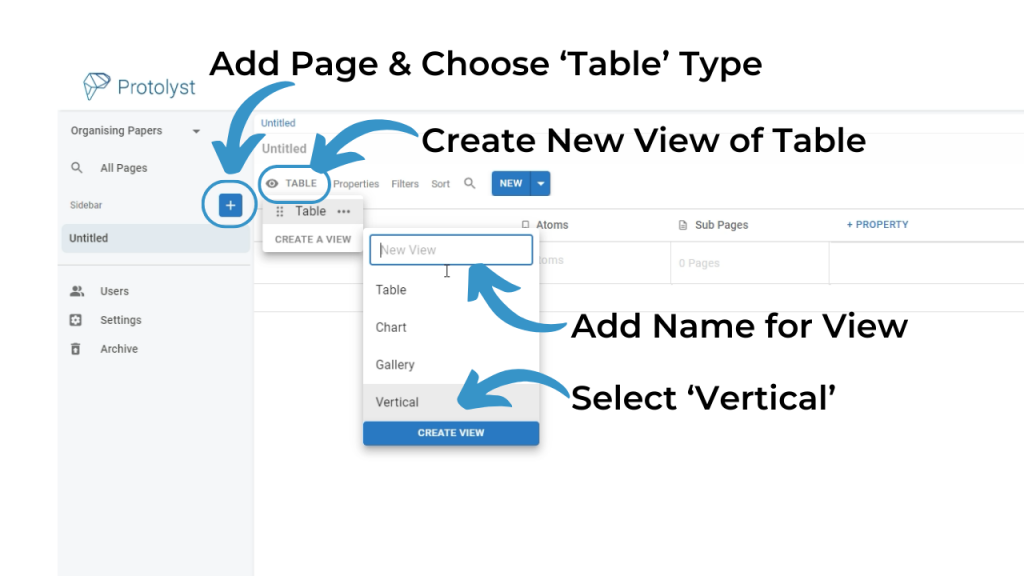
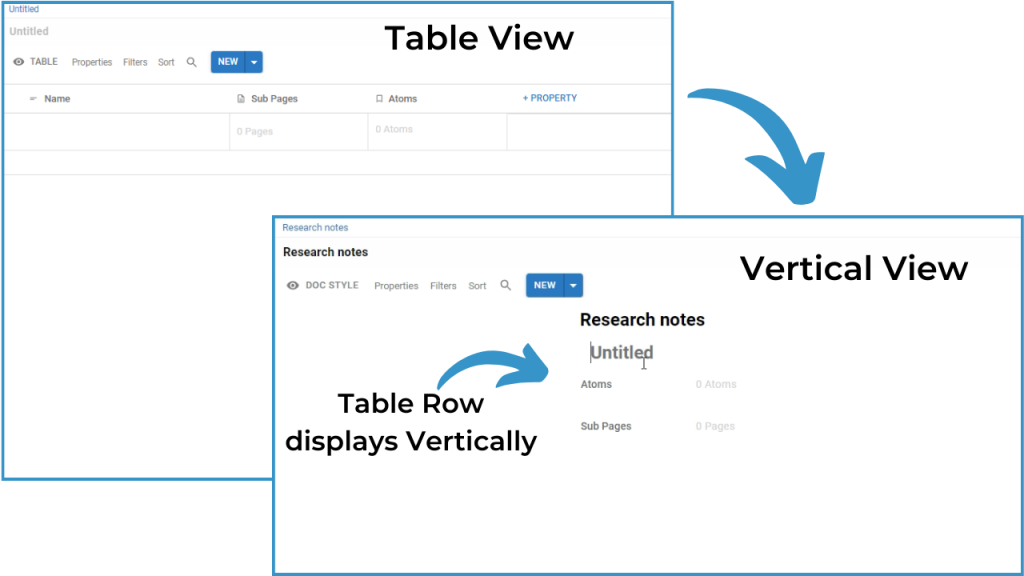
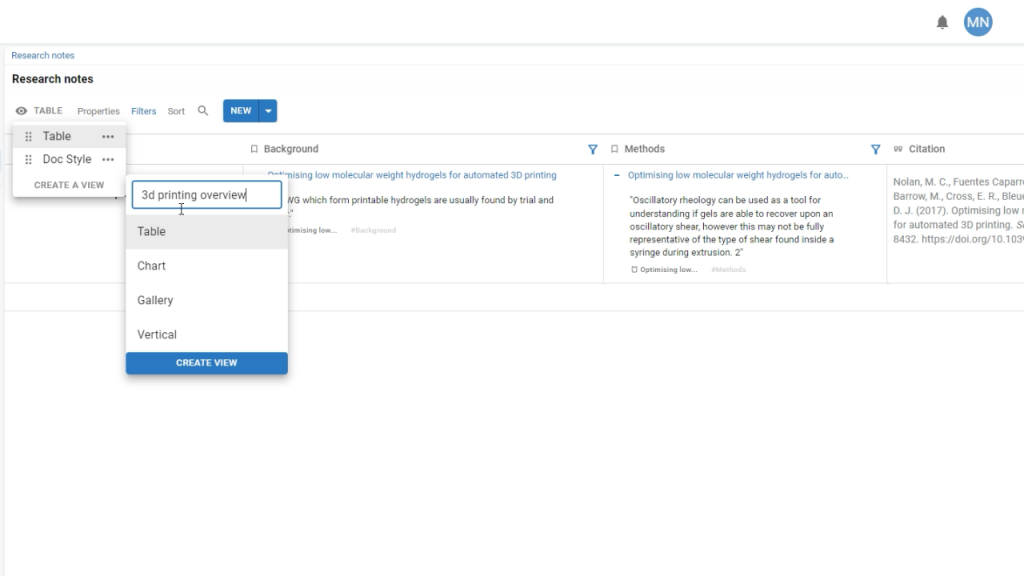
Add a new Table into your Workspace. Then create a Vertical Style View. Vertical View displays each row of your Table in a vertical or document style format.
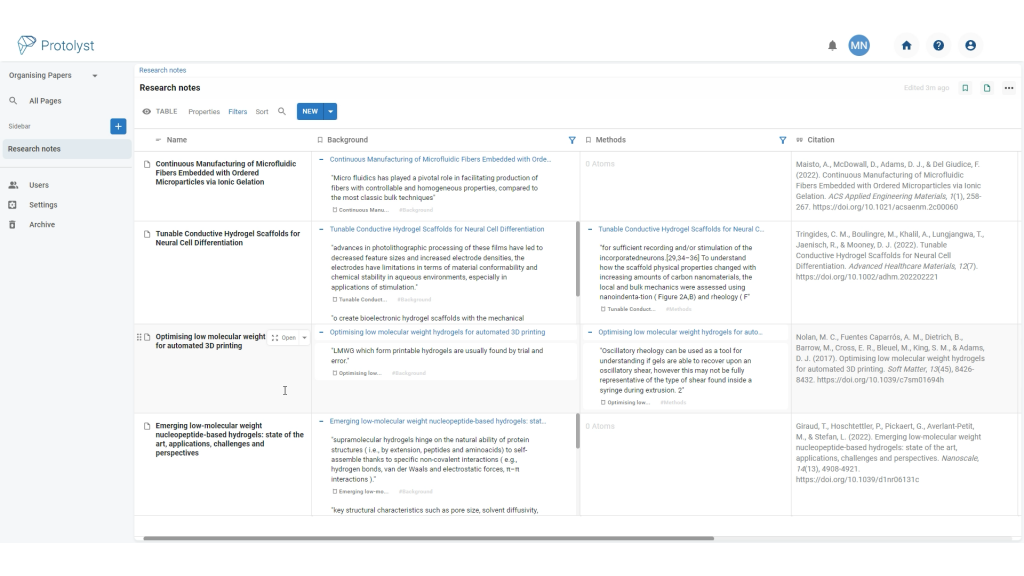
In a Vertical View, each Row you add starts to create a Summary ‘document’ that you can scroll through. This starts to replicate a Summary Document that you might be used to.
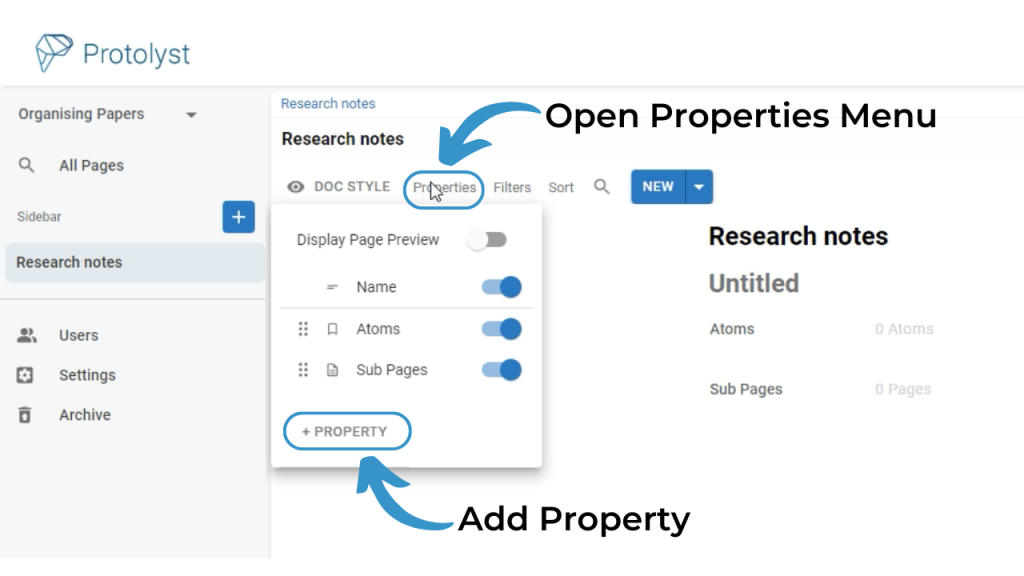
Add different Properties to the Table to reflect the information you want to collect from your Papers and how you’d like to organise them in this Table. Make sure to add a Citations Property to automatically collect Referencing Information from the Papers you upload to your workspace.
In this workflow we’ve added several Atoms Properties and then used Filters to separate out all the Atoms you collect on a Paper based on what kind of information they contain.
Atoms are the highlights that you want to save and use, and they can be accessed and used outside of the Page or Paper in this case.
When you’re reading a Paper, there’s often information you want to collect that falls into different categories like Background, Methods, Results etc. To categorise your Atoms, you can add Tags for each Category you want. This work flow uses Atom Filters to automatically add those Tags to your Atoms as you collect them, while you read a Paper.
To set this up, add an Atoms Property and then open the Property Options. In the Filters section of the Options, you can add a Title for your Tag (e.g. Background, Results)
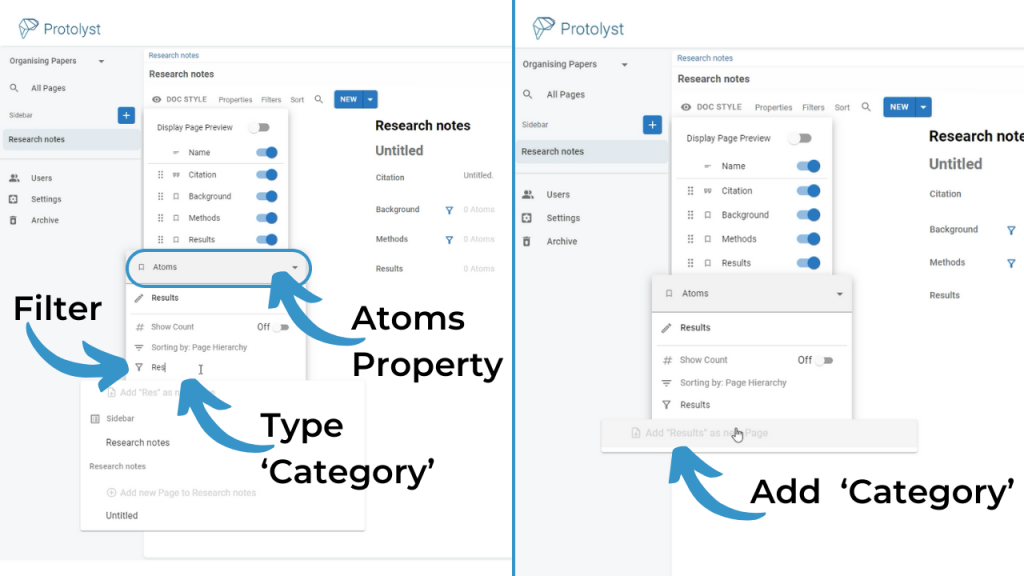
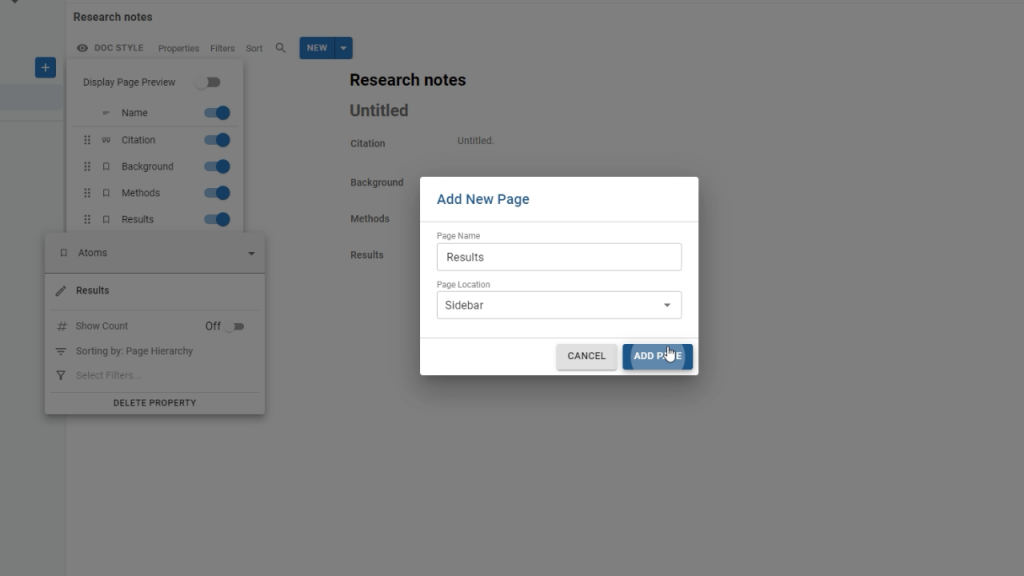
Type out your Tag and then choose ‘Add as New Page‘ option. This will give you the option to choose where your Tag is saved. (Tags are added into your Workspace as Pages) You can save the new Pages wherever you like, as you can always move them somewhere else later.
Repeat for all the different Categories you want to collect information for.
Other Properties added in the work flow video include a Multi-Select Property to organise collections of Papers in the Table based on different Topics or Keywords, and an Image Property to grab any interesting images from Papers.
Step 2: Collecting Notes from your Papers #
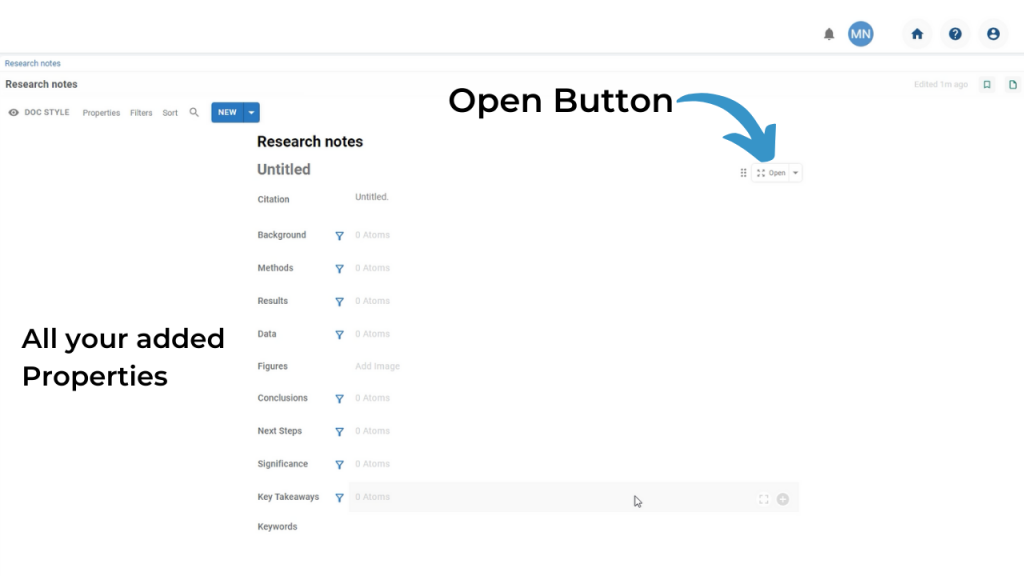
To upload a Paper into the first Row, hover over the ‘Untitled’ title and then use the Open Button
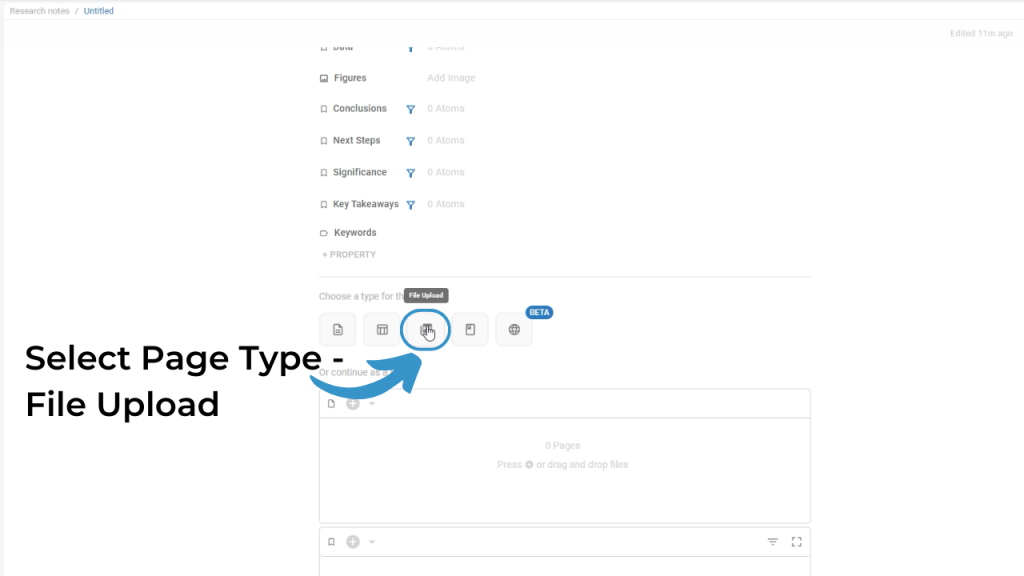
Once the Row is opened, scroll down the list of Properties to the 5 Buttons – this is where you select the Page Type. To upload a Paper, choose ‘File Upload’
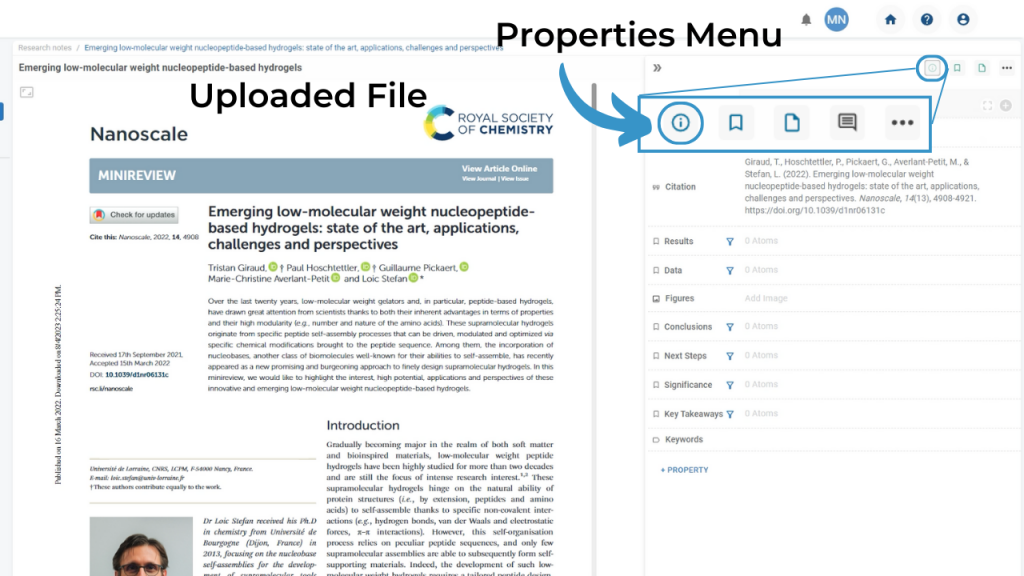
Once your Paper has uploaded it should open up in our PDF reader.
Since this Paper is a Page that sits as a Row of a Table, the Properties Menu displays all the Properties of your Table. You can use this to see all the Filtered Atoms and other Properties you added to your Table, so you can start to populate them with the info from this paper.
In the Top Right of the Page there are several Icons which will expand menus, use the i icon to open up the Properties Menu:
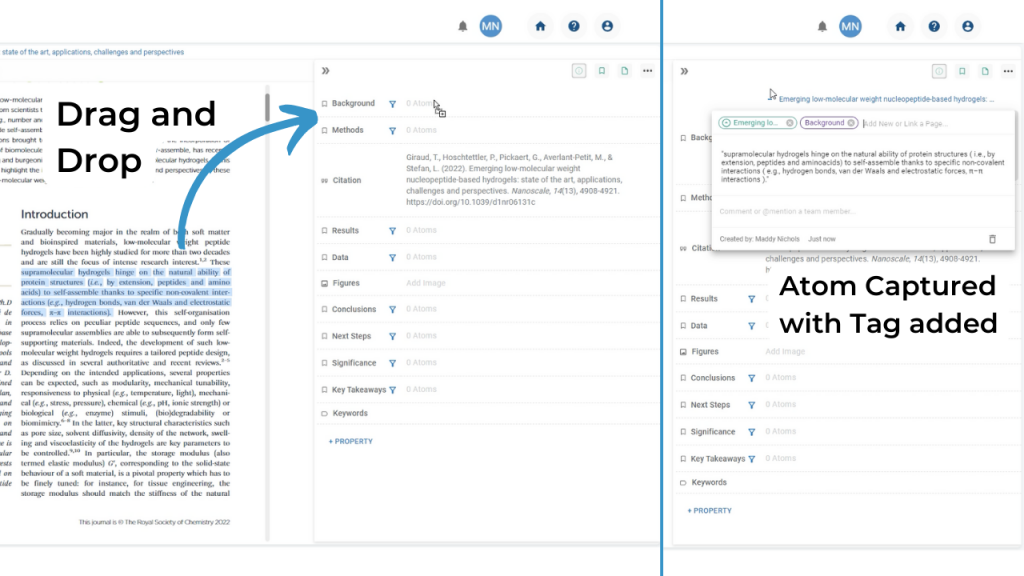
Read the paper and as you identify important information you can highlight it. Once highlighted a ‘Capture Atom’ button will appear. Ignore this and instead Drag and Drop your highlighted text into one of your Atom Properties down the right of your Page.
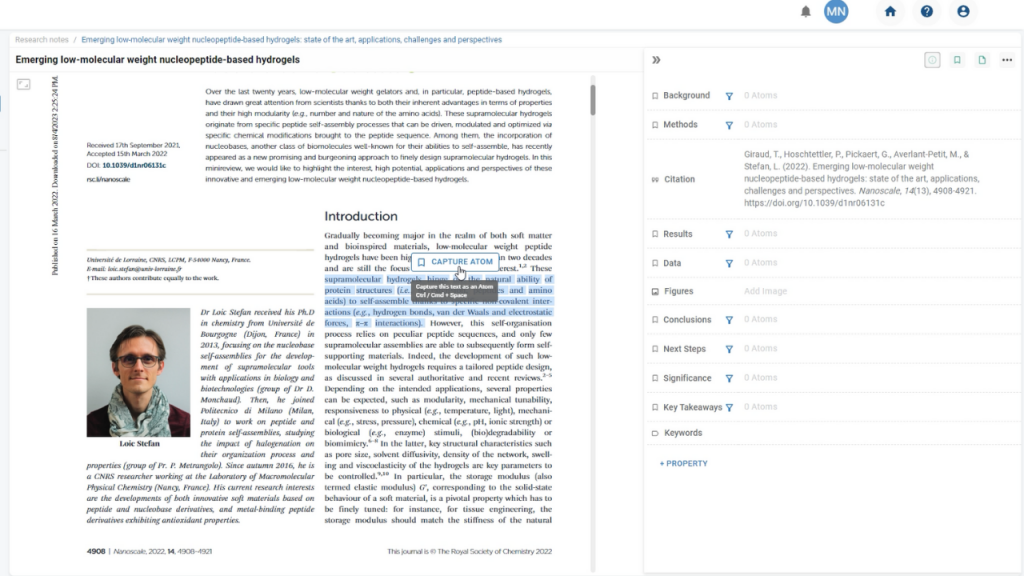
Drag and Drop captures and Labels (Tags) your Atom in one go. Capturing Atoms like this both Captures your Atom and adds a Tag to it which matches the Filter you applied, so make sure to drop your Atom into the relevant property such as Results or Methods or Background.
When you are done collecting Atoms, come out of that page, back to the Table level. You can do this by clicking your Table where it displays in your Left Hand Sidebar or using the breadcrumbs at the top of your Page.
In the Table you’ll see the Atoms organised like you would in a Doc i.e. vertically in your Page – which may look somewhat similar to any Paper Summary Templates you may use in a Document.
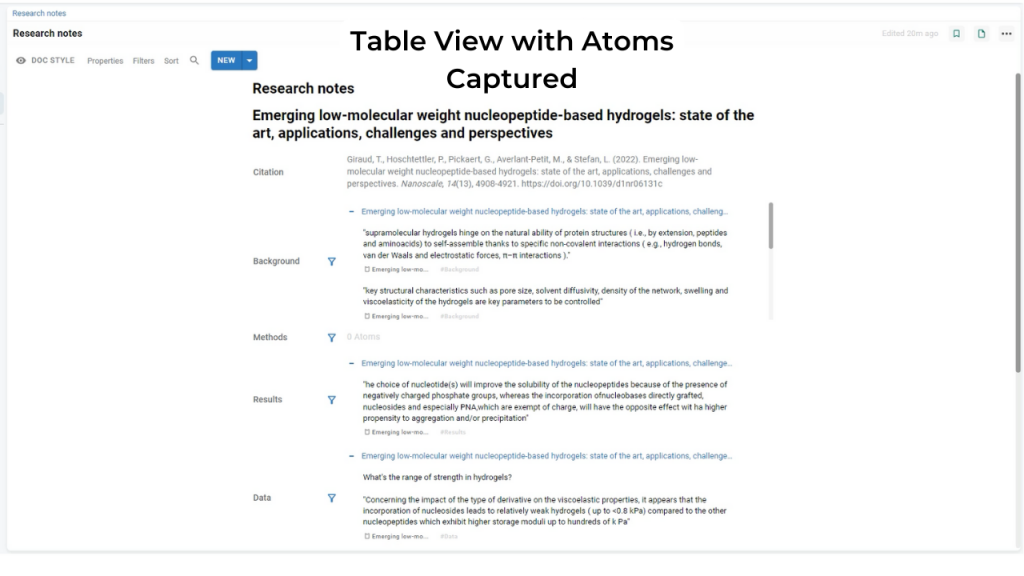
Swap back to Table view, using the Eye icon and selecting ‘Table’ from the list. This will display your page with the information you collected in columns.
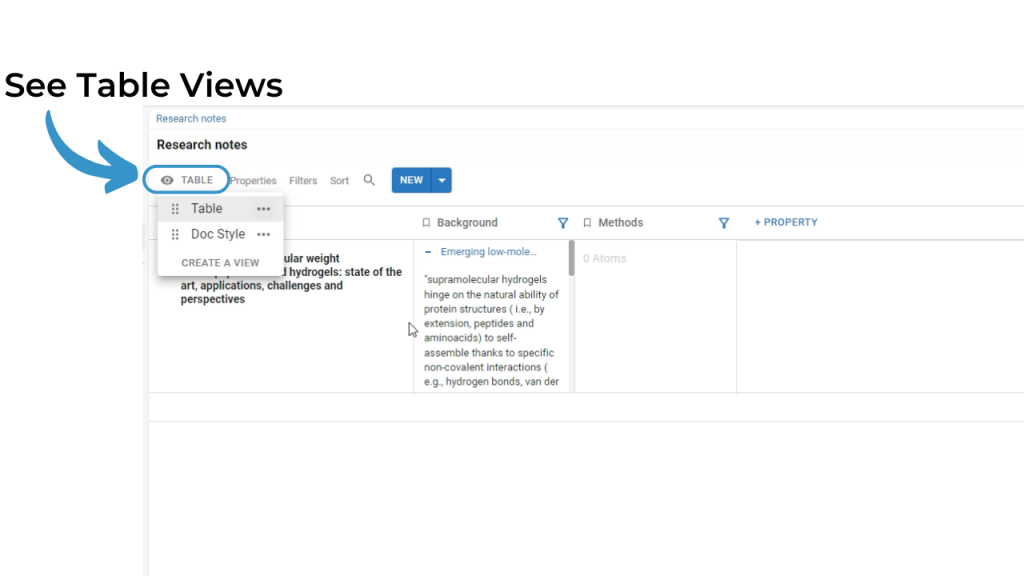
Step 3: Viewing Info from all your Papers #
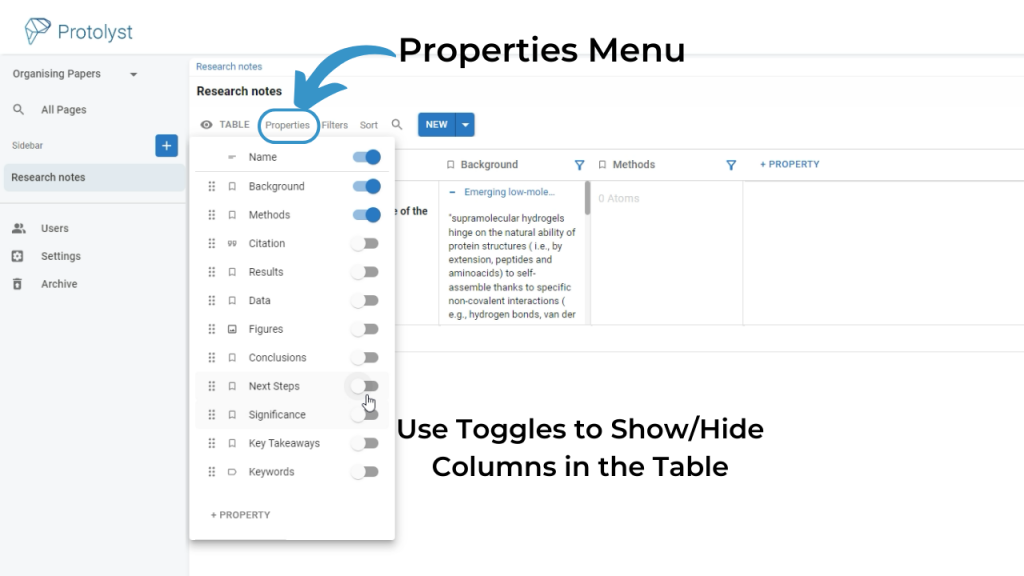
You can change the Properties and information about your Papers on display in a Table View by toggling the Table Properties on/off in the Table Properties Menu
You can also save particular Property combinations as their own View by creating a New View in the Eye Menu.
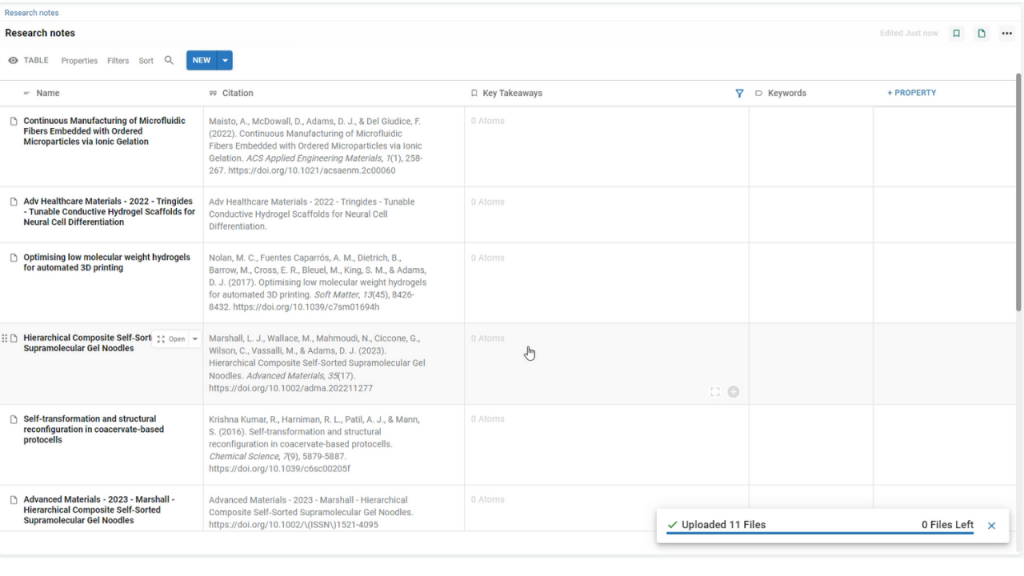
You can batch upload several papers at once by dragging them from your File Explorer onto the Table. They’ll upload one paper per row and the Citation Property will automatically pull the referencing information.
Step 4: Querying your Notes #
You’ve added Tags (Labels) to the Atoms you have collected from your papers. And these labelled details let you create different breakdowns of your information using the different Table Views and selecting the Properties on display. You can also have further control over the information that displays with Filters and Sorts.
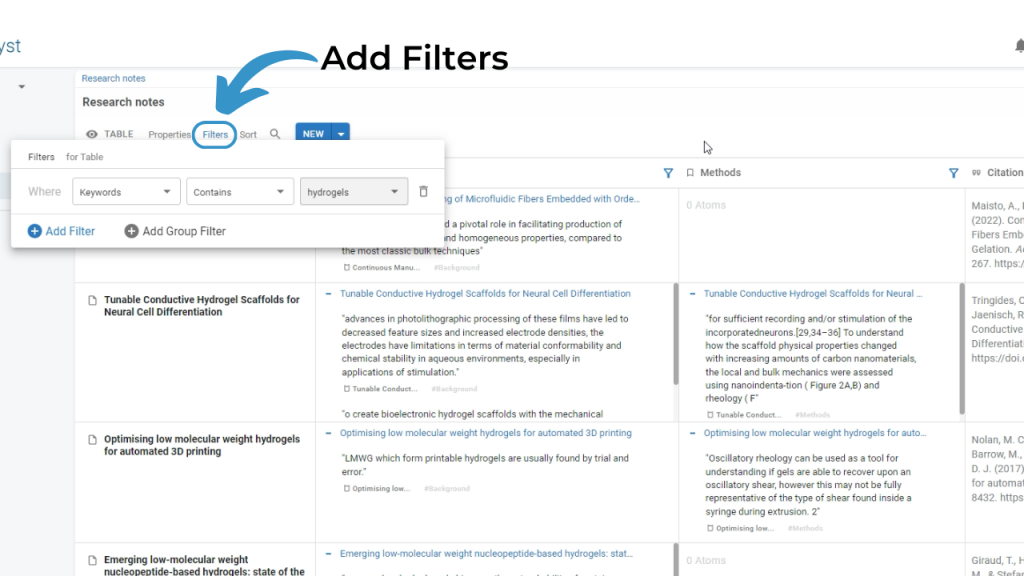
Next to the Table Properties Menu you can also select Filters or Sort
In Filter, you have drop down options to apply criteria that Rows of your Table must meet for them to display. e.g. Adding a Filter to a Multi-Select Property that’s been used to add Topics that the Paper is relevant to, so that all the papers related to 3D printing appear.
Additionally you can Sort how the Rows of your Table display, such as alphabetically by Paper Title or any other options depending on the Properties you have added
Just like you can save Property combinations as Views, you can also save the Filters and Sorts you apply as Views of your Table, so you can move between them quickly, wihtout needing to add and set them up every time.
As you add more Notes in that meet those criteria, they will automatically be updated and display in your Table Views if they meet your chosen criteria. So when you want to see all your papers related to 3D printing, they’ll all be accessible in that view
Step 5: Working from your Notes #
Collecting your information as Atoms, sets you up to be able to quickly reconfigure your notes to display the information you want using the Properties, Filters and Sorts available in Tables.
You can also use the Atoms you have collected to start writing with automatic References and Citations.
Create a New Page (make it a Text Editor) for your written piece e.g. Notes. Then navigate to the View of your Table that gives you the information you need. To open these Pages side by side, use Ctrl+Click to open them up in Splitscreen
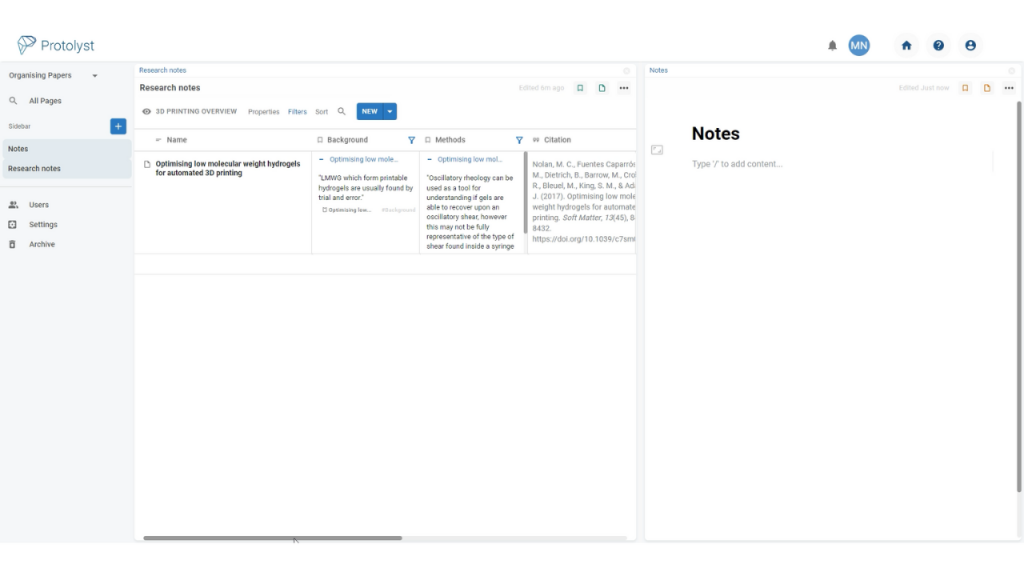
Now you have your New Page on one side and your Table of Atoms and information on the other
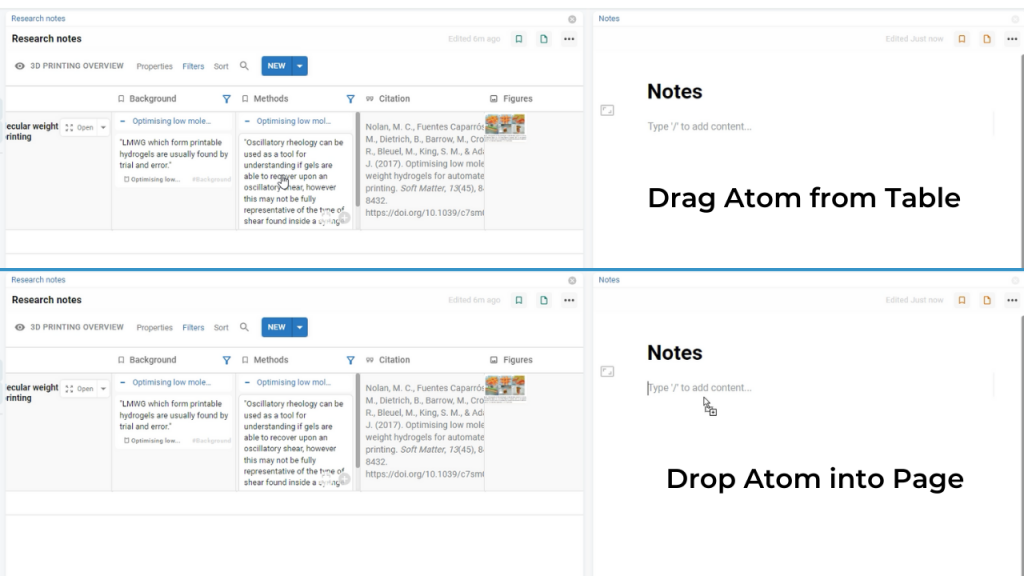
You can now Drag and Drop any Atoms you want to use in your writing from the Table straight into the Notes Page.
Drag and drop will add the Atom text into your Page for you to edit and integrate into your writing, and automatically add an in-text Citation and Reference.
The in-text Citation will take you right back to the location of your Atom in the Paper.
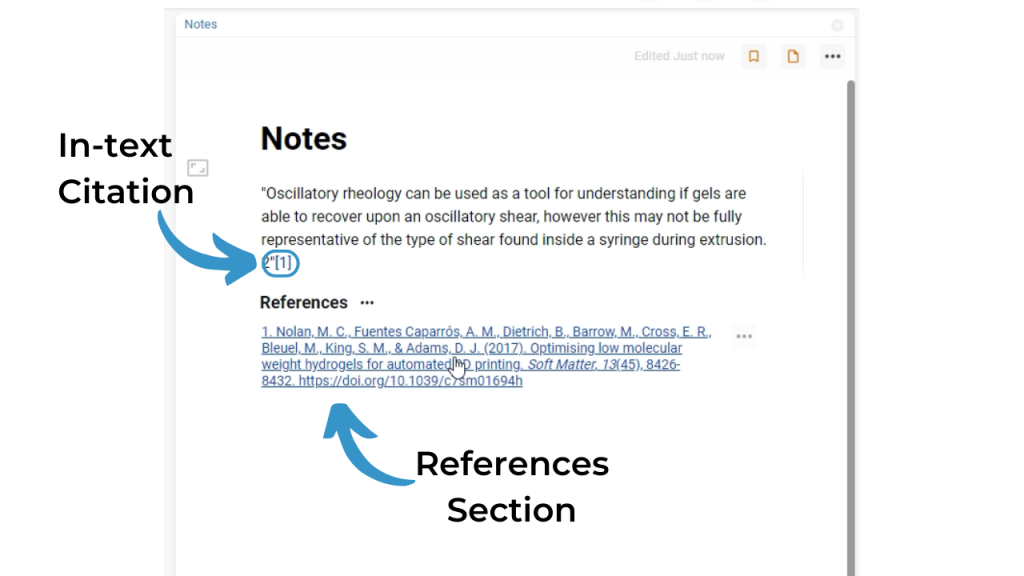
The References will appear in APA Style by default. To change this style, use the Property Options for your Citations Property in your Papers Table. Or open up the Options Menu (three dot button) next to the References Section Title.
When complete you can download using the Page Options (three dots icon in the Top Right of the Page).


