Cornell Notes is a popular note-taking method. Here’s how you can get started using the method on Protolyst and adding connections between related notes to build a powerful and effective system.
Cornell Method Overview #
To use the Cornell Method you divide your Notes page into 3 sections for your Notes, to add Cues and write a Summary. Your page is divided in a particular way to leave enough space for each of these sections:
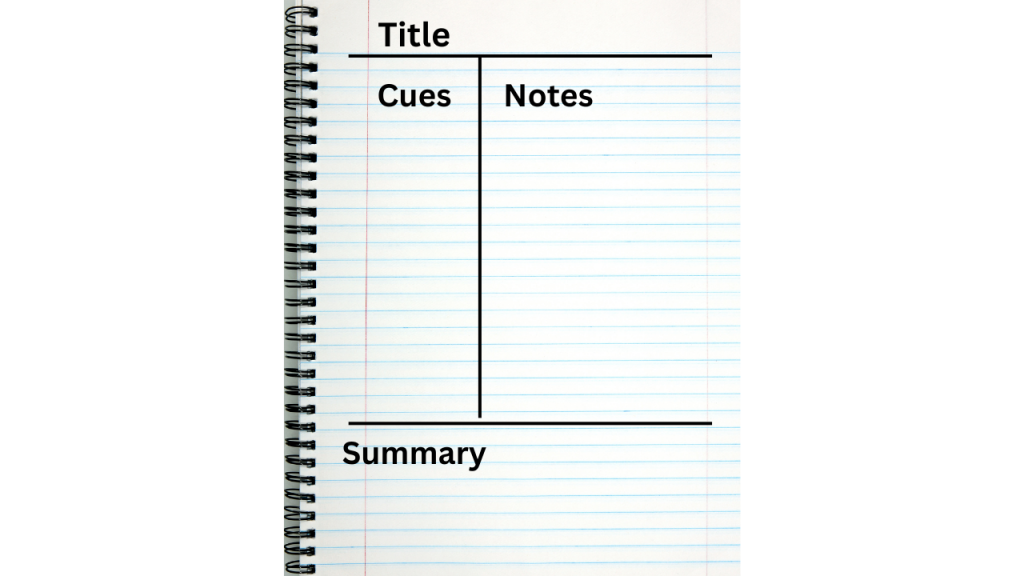
You then take your Notes and when you’re done go back through your notes to identify the most interesting and important information. This is also an opportunity to add any further details to your notes.
In the Cues section, you add keywords and questions related to your important information. Keywords indicate a broader topic that the information is useful for and questions can be prompts for you to investigate further or to test your knowledge in future.
Once you have finished adding cues, you summarise the key details from your notes in the Summary section.
Benefits of the Cornell Method #
The Cornell Notes method encourages you to revisit your Notes to add your Cues, which starts you thinking about where the knowedge in your notes is useful. Distilling keywords to describe the key concepts in your notes encourages you to think critically about your information, while adding any further details you might want in your notes.
Adding questions to your notes indicates the important details to remember and assimilate and then preparing your Summary consolidates the most important information from your notes. Summaries can help you to identify which notes to revisit in future.
Limits of the Cornell Method #
The Cornell Method is an excellent note-taking method, but it still limits a group of ideas to existing within 1 page. As you browse through all your notes, you can’t see what information is inside them, which makes searching very inefficient as you may have to search through many different notes pages to find what you’re looking for. When you want to consolidate your knowledge by topic, you have to jump around between several notes pages and files to grab relevant information and copy it into another notes page. With connected note-taking apps like Protolyst, you can pool knowledge from several notes pages around your Keywords, so that you can see everything related to a particular topic quickly and easily.
Read on to find out how you can take Cornell Notes on Protolyst and add your Keywords and Questions to build an interconnected notes system.
Cornell Notes on Protolyst #
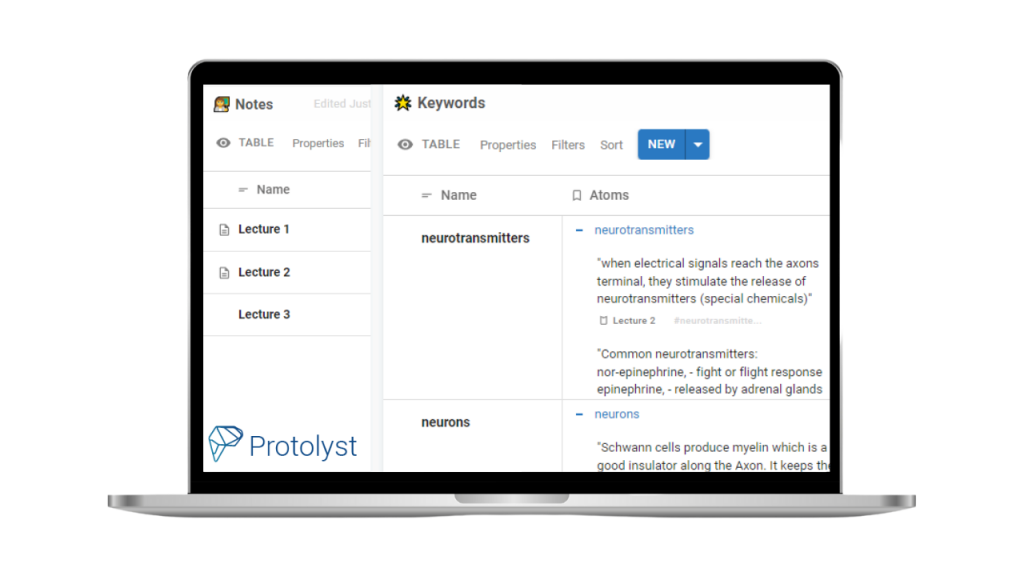
On Protolyst you follow the same concepts to take Cornell Notes – take your Notes, add Cues and write a Summary – but the layout is a little different. Rather than splitting up your page and adding Cues next to your notes, you’ll use Tables so that you can add your notes into an interconnected system and the notes you take can have even more value.
System Preview #
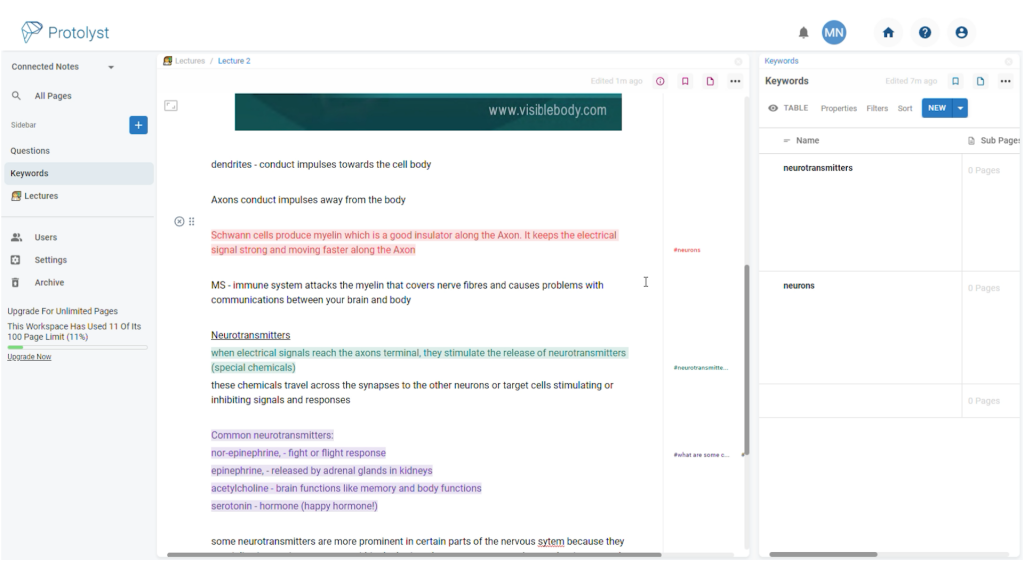
Here’s a Cornell Notes Page on Protolyst. Your Summary is at the Top of the Page, followed by your Notes and then your Cues list in the right hand margin.
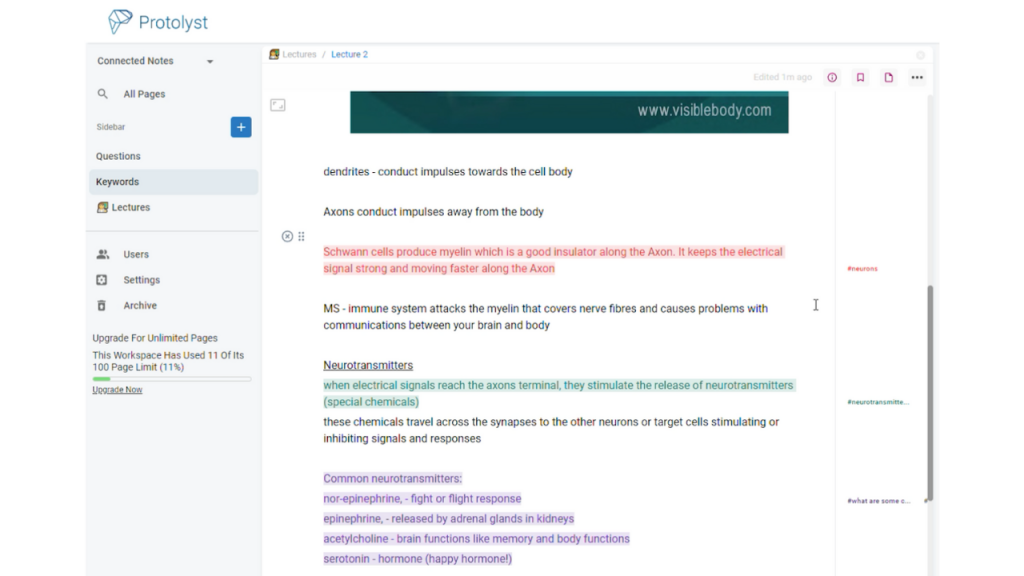
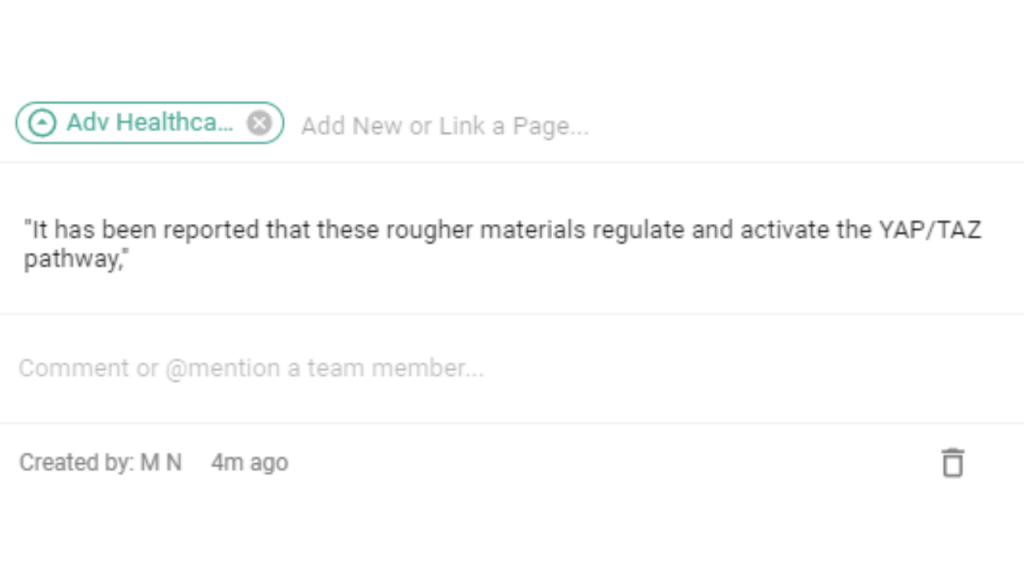
On Protolyst, you create Atoms from snippets of text in your Notes. Your Cues can be added to these Atoms as Tags. On Protolyst you can Tag text snippets to other Pages in your workspace, and this feature allows you to pool knowledge from multiple notes pages related to the same keyword in one place.
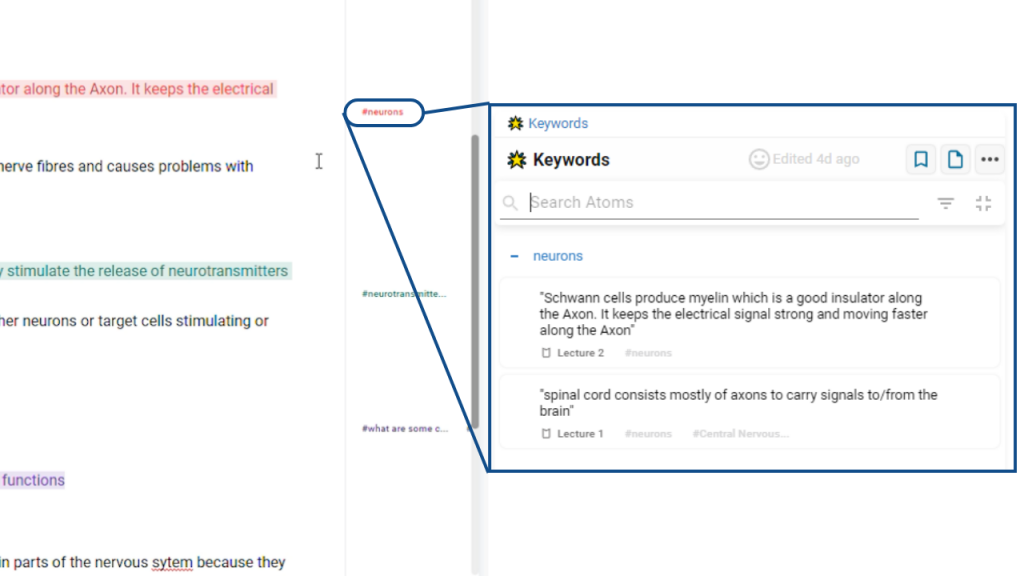
Keyword Cues
By adding your Keywords as Tags, you can open that Keyword Page up to see all the knowledge from across your notes related to that Keyword in one place.
You can also ensure you don’t create overlapping Keywords!
Cornell Notes System Setup: #
1) Create 3 Tables – one each for your Notes, Keywords, Questions.
Use the blue plus button at the top of your left hand sidebar and select Table Type from the Page Type Options to create a Table. Creating separate Tables allows you to connect related knowledge from several different notes pages together.
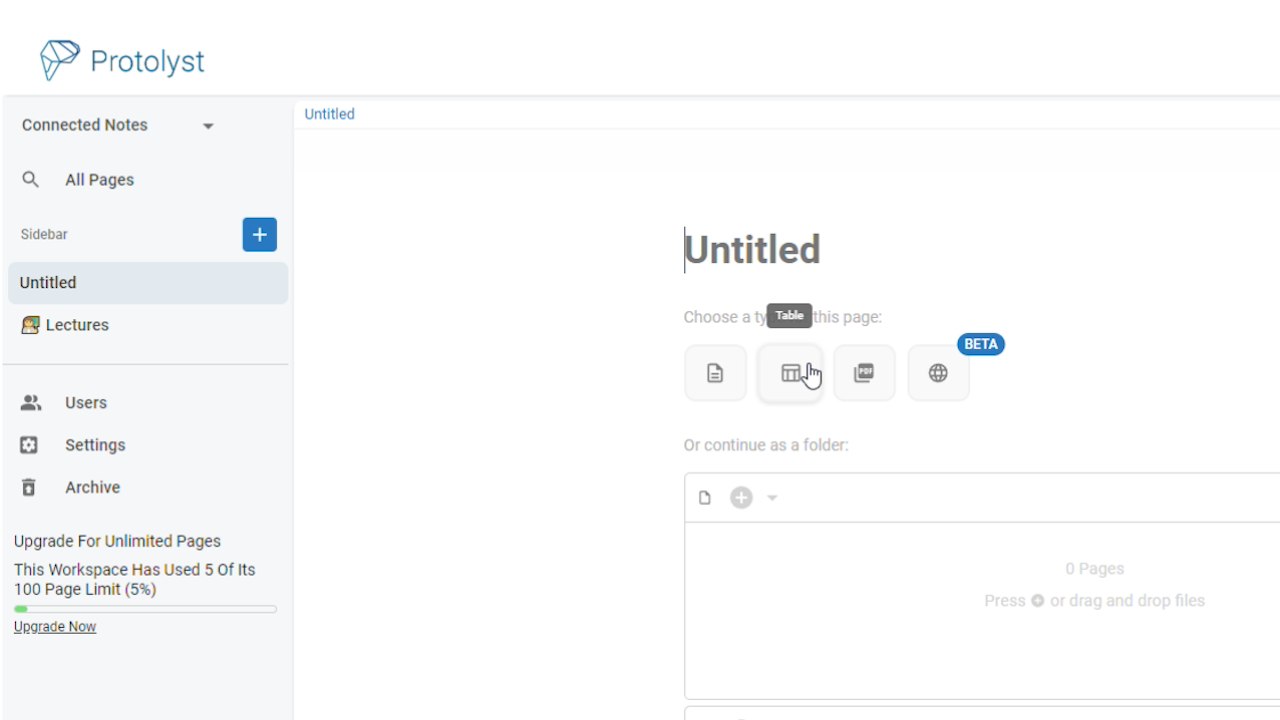
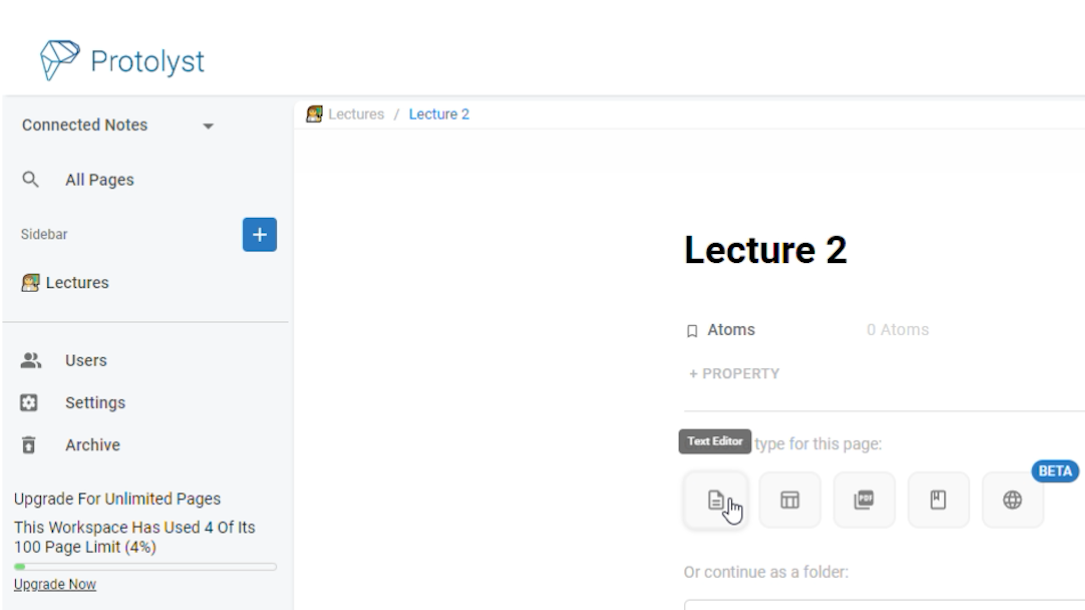
2) In your Notes Table, open up a Row as a ‘Text Editor’ Page and take your Notes
Hover over the Name of your row until the 4 outward pointing arrow ‘Open’ button appears to open up a Row in your Table as a Page. Select Text Editor as the Page Type.
Adding Cues #
3) Review your Notes, highlight text sections to add a Cue to them and select ‘Capture Atom’
After hitting ‘Capture Atom‘ the Atom box will open. The highlighted text has now been saved as an Atom in your workspace. Atoms lift your highlights out of the page so you can view and connect them across your workspace.
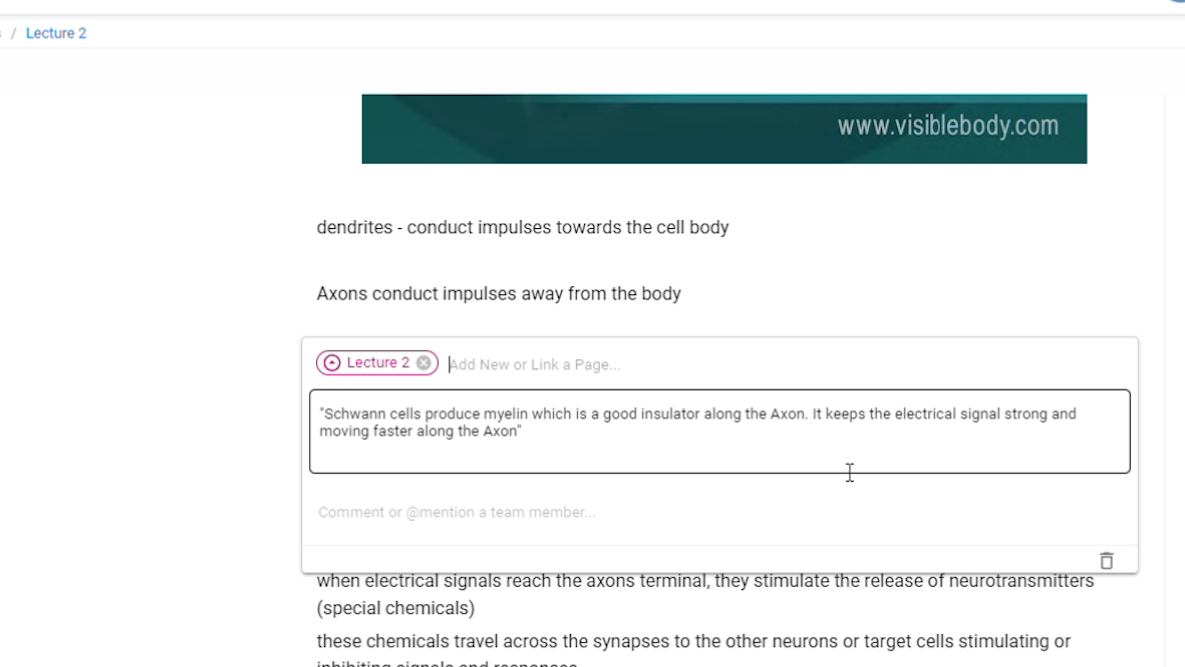
In the Atom Box, there’s a bar above the text and here you should type the Keyword / Question you want to add. Once written, select the ‘Add as New Page’ option to create and add this Keyword / Question into your workspace.
Adding Cues is done by creating new Pages in the corresponding Keyword or Questions Table in your workspace. Once added you can use these Pages as Tags for your Atoms.
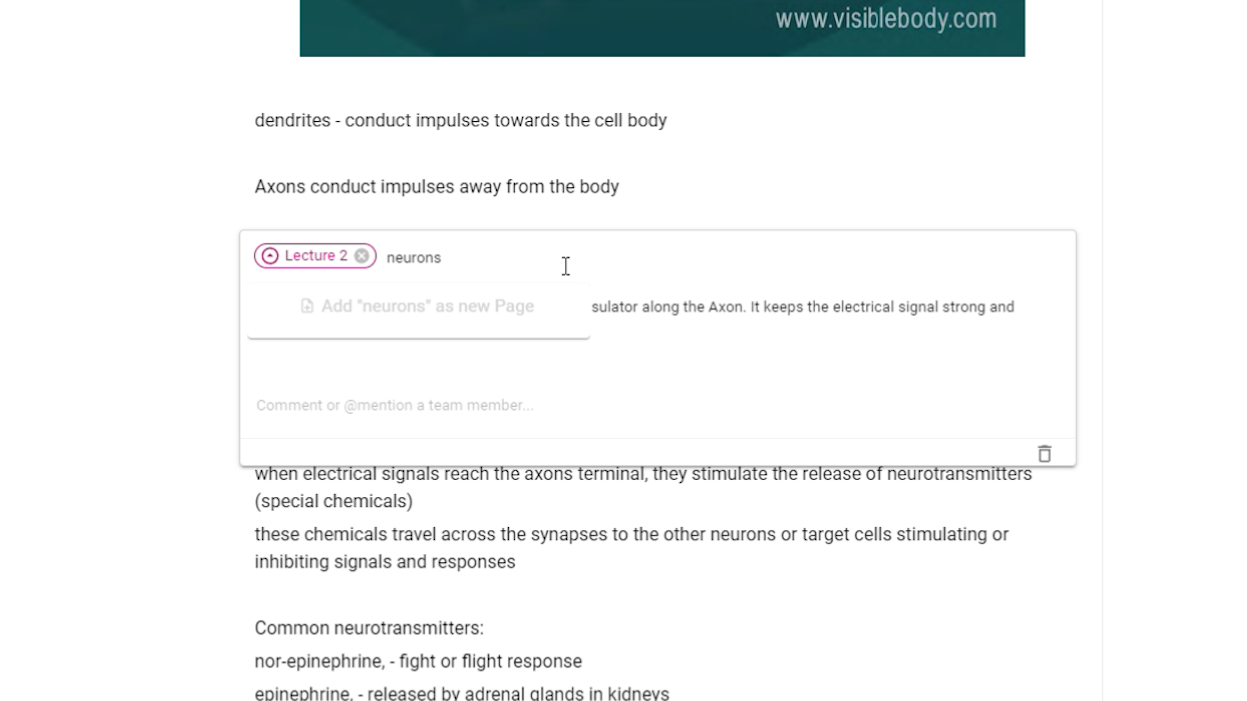
Then choose the Keyword / Question Table created earlier as the location for your New Page
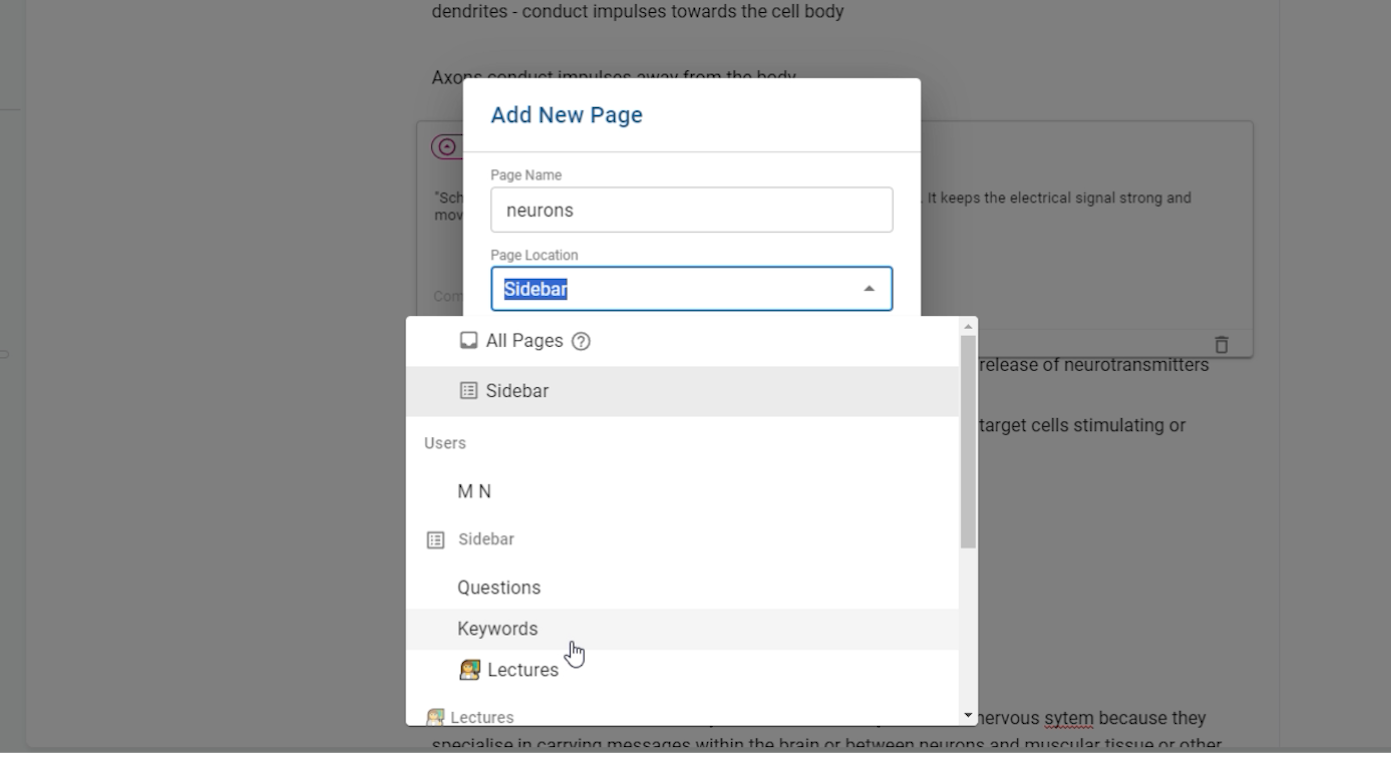
A Tag will be added into the Bar above your Atom text
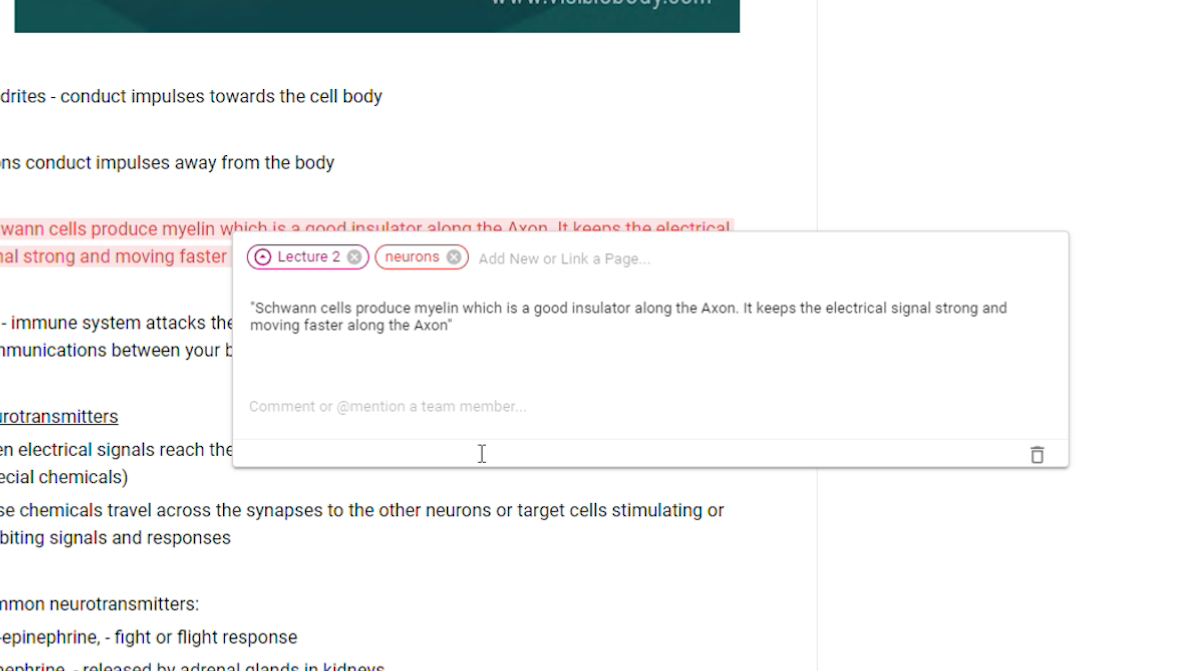
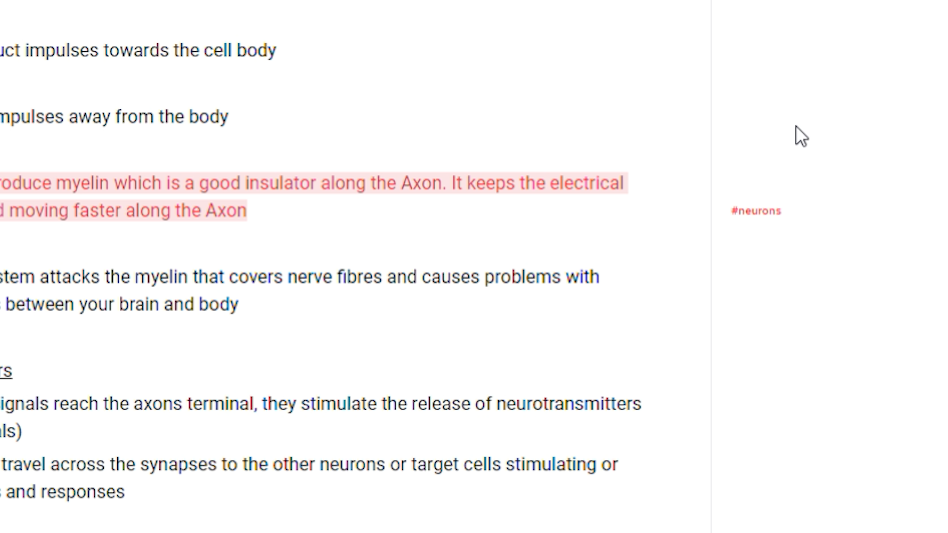
When you close the Atom Box you will see your Cue in the right margin
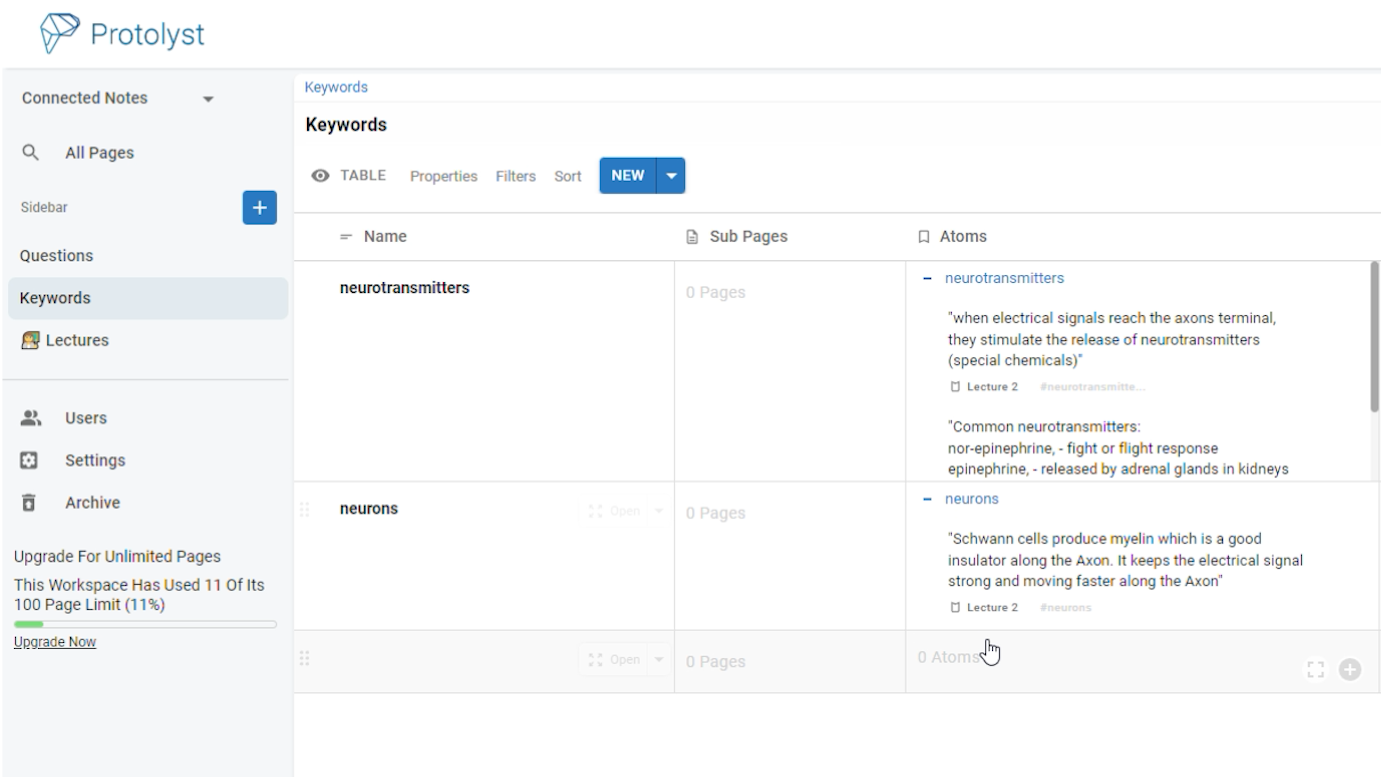
In the Keyword / Question Table, a new Row will have been added. And in the Atoms column you will see the text snippet you captured as an Atom displaying next to the Keyword / Question
Taking your Cornell Notes #
4) Continue reviewing your Notes, adding new Cues as you go
To use an existing Cue, browse through the dropdown list and select an existing one to add it to your Atom.
You could have your Keyword Table open next to your Notes page using splitscreen to have a list of all your Keywords to hand during your note-taking
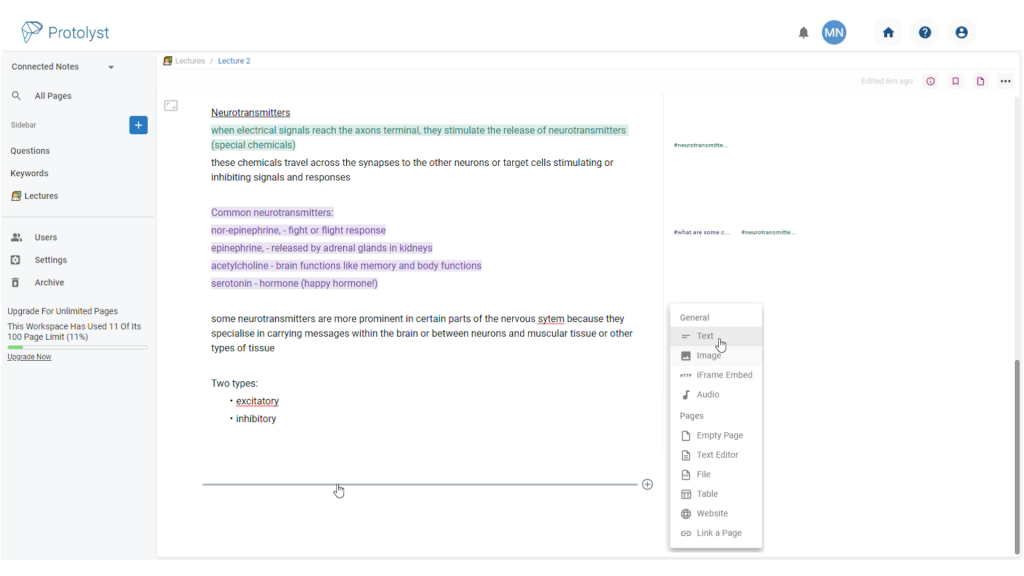
5) Add a new Text Section to the bottom of your Notes page for your Summary
Hover at the bottom of your typed notes and the ‘Add Section Menu‘ will appear, select Text from the options to add a separate text section into your page.
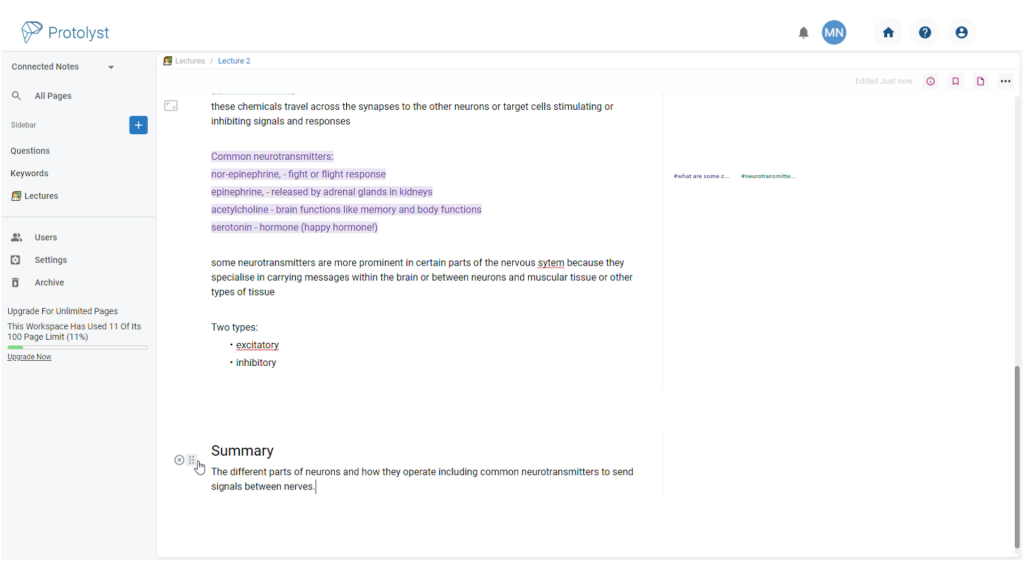
6) Move this Summary section to the Top of your Notes Page
Add your Summary into the new text section and then use the 6 dot button in the left margin of the page to drag and drop the section to move it to the top of your Notes page.
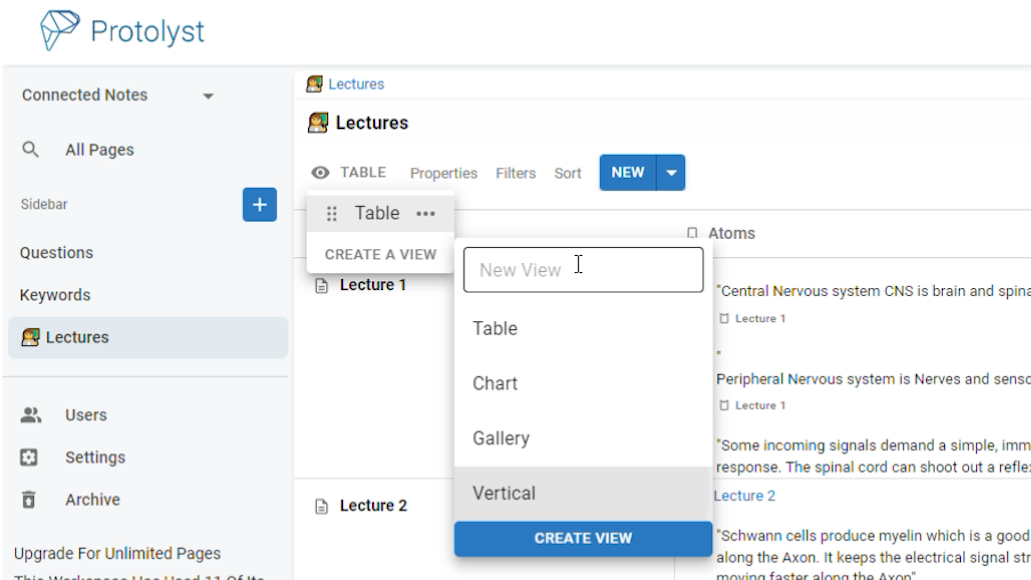
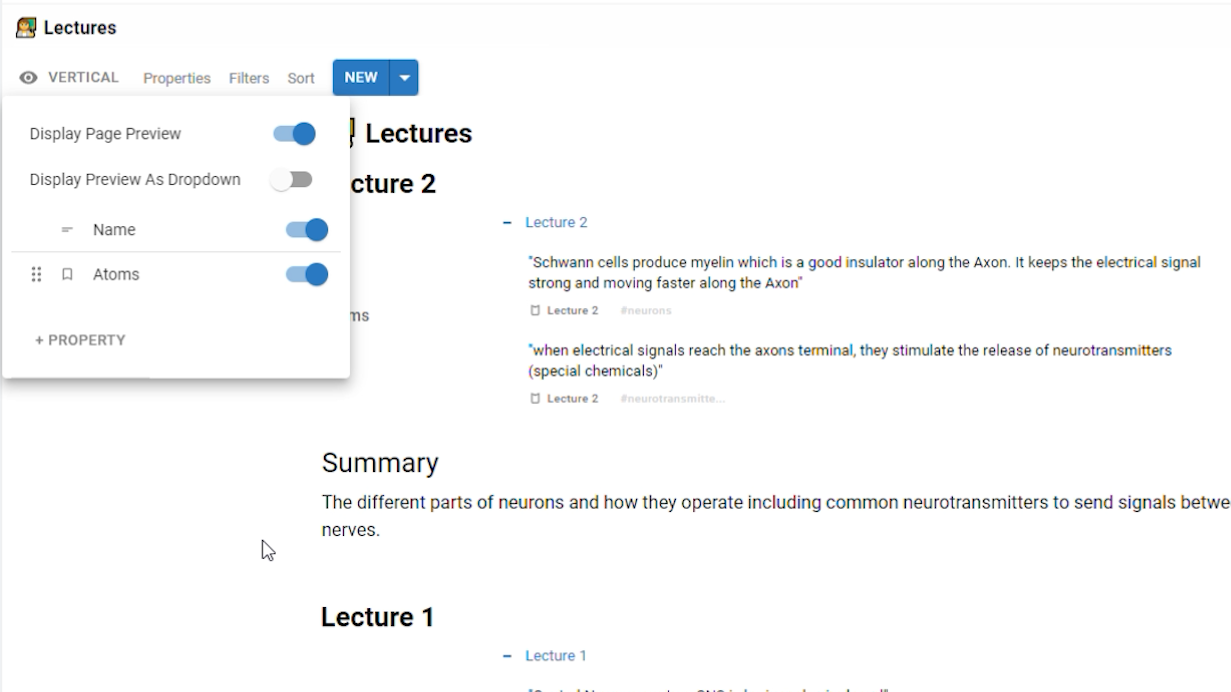
7) Browse your Notes Summaries with the Vertical Table View
Create a New Table View using the eye icon at the top left of your Table. Select type Vertical – this presents all your Notes as a sequential list
Open up the Properties Menu at the top of your table and toggle ‘Display Page Preview’ on for your Summary to display in this Table view.
6) Repeat for all your Notes
Taking Cornell Notes like this on Protolyst gives you several ways to view the information inside your Notes without having to spend time re-organising it. You can view a list of Summaries from each of your Notes, you can view all the Atoms connected to a Keyword or you can browse all the Atoms within your Notes page.
Over time information from all of your notes will collate around your Keywords. So you can ‘use’ your knowledge by going through the Keywords Table, and all related information from across all your Notes will display together here.
Wherever your Atoms display, you can click the Source Tag to jump back to the original Notes page. The Source Tag is the first Tag that displays next to your Atom and is indicated by an arrow symbol.
Cues – Questions #
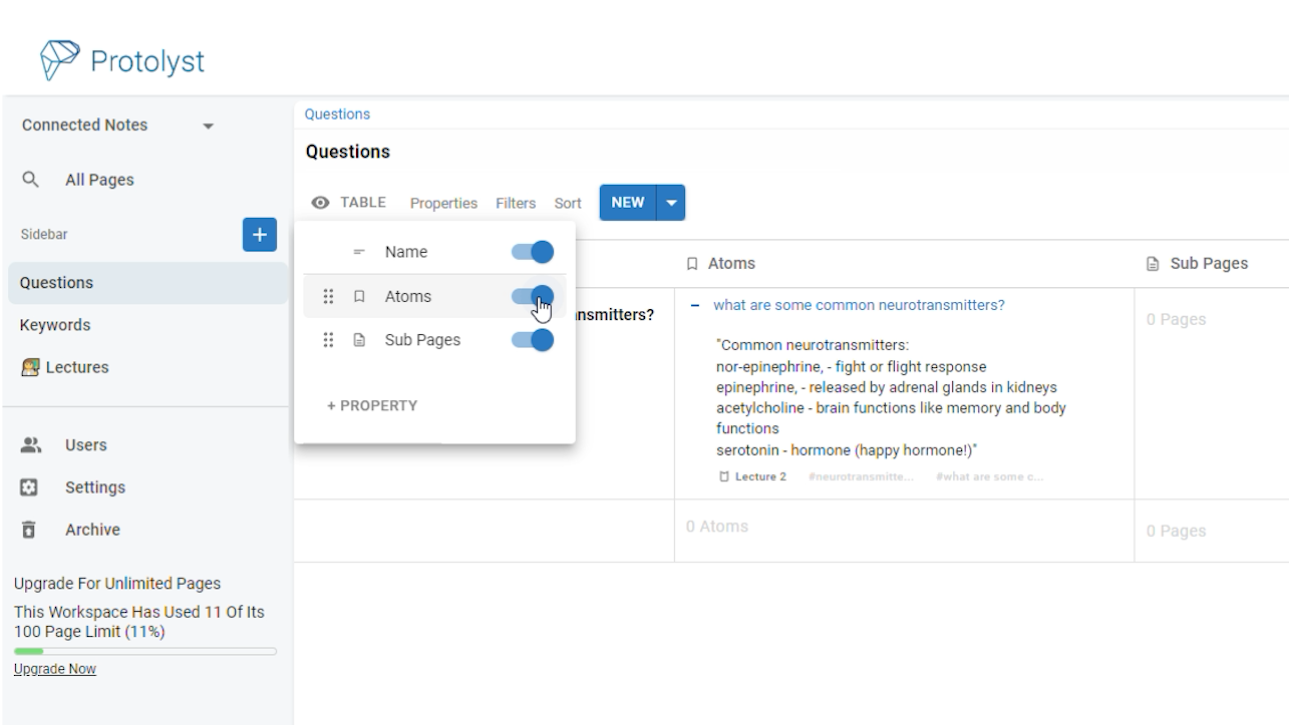
If you’re adding questions into your Notes to test your understanding, then you can show/hide the Atoms containing the answers in your Questions Table.
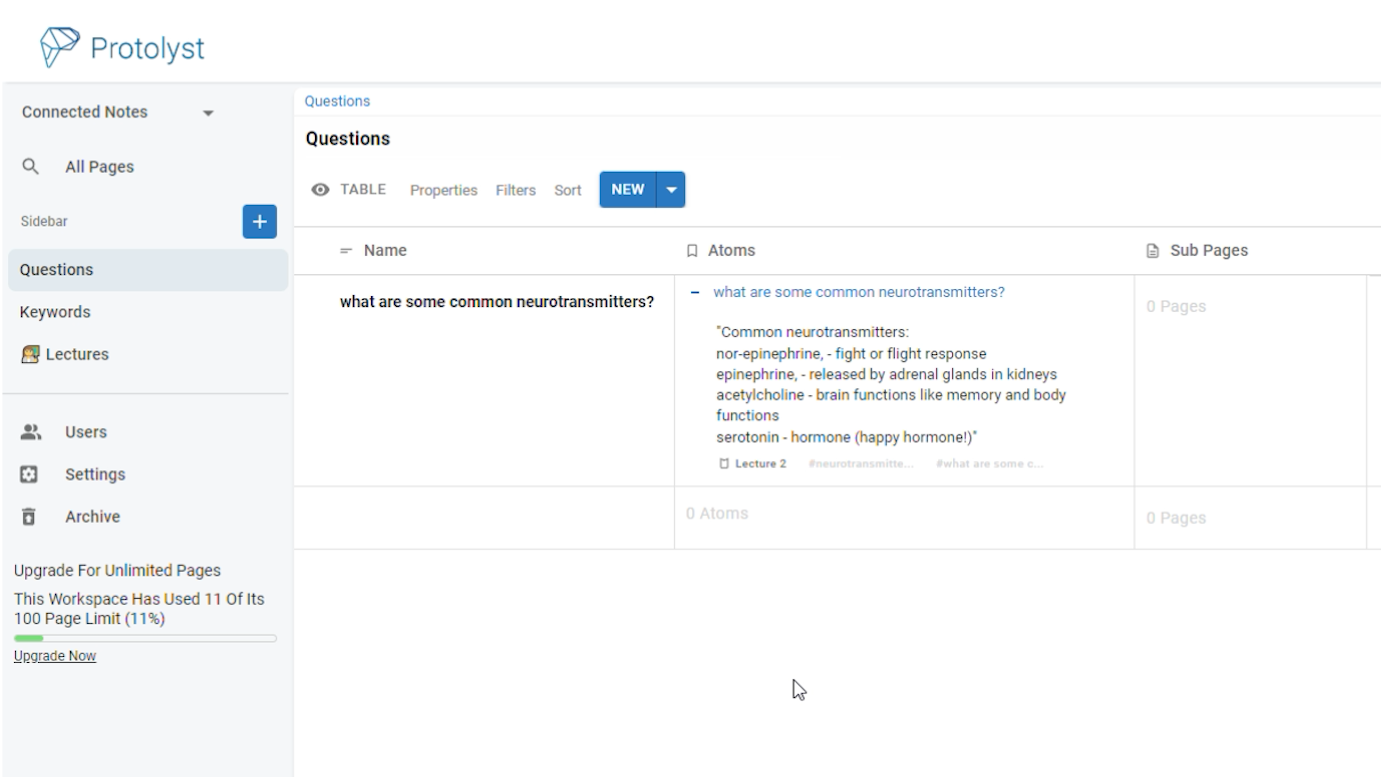
In the Table Properties Menu, you can toggle the Atoms property on/off to show/hide your Atoms and to show/hide the answers to your questions.
Other Cues #
If you’re taking different Cues from your Notes, like ideas or tasks, then adapt this setup to suit you!


