Protolyst is designed to support you in collecting key details, important information and interesting concepts from your academic sources. These details are most useful where they can be applied in your work, rather than organising them alongside the source where you found them. The video and steps below describe how you can set up an academic reading system in a Protolyst workspace.
For tips and techniques on building a system to organise your Academic Reading, head to our blog post.
1 Set up your Academic Reading System #
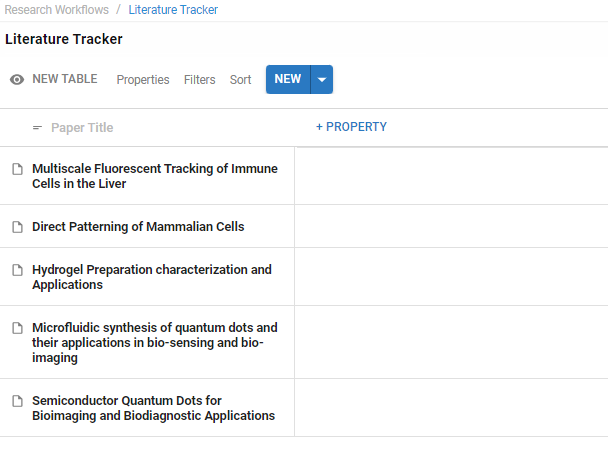
Add a Reading List Table to your Workspace and add your Sources into the Table.
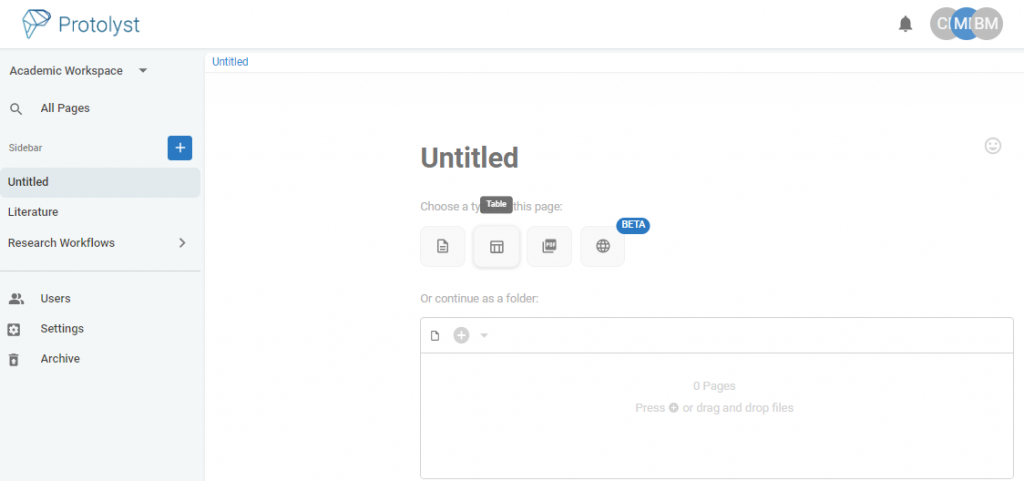
You can drag and drop your files into the Table to upload them into the Table, as well as import web pages from URL links.
2 Organise your Reading List #
Add Properties to your Table to help categorise and organise your papers, such as Journal, Authors and Year. Once more properties are added you can organise all your Papers using Table Filters and Sorts.
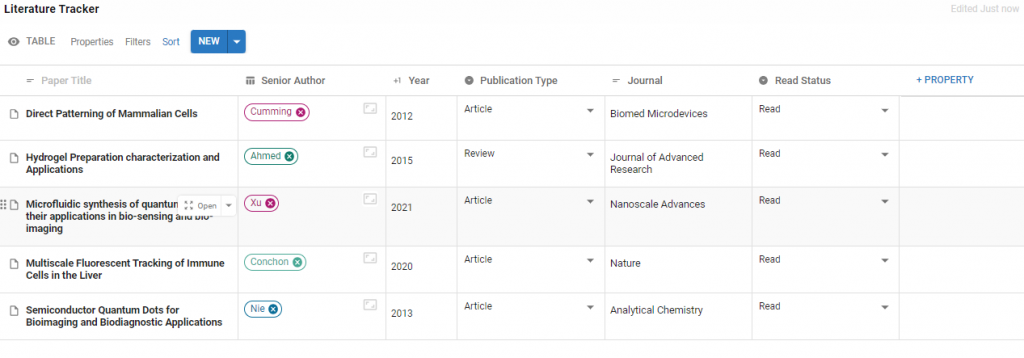
You can also add a Property to organise by stage in a reading workflow such as To Read, Read, To Review, Recommendation.
3 Set your Reading Goals #
Decide what particular information you want to collect as you read through a paper. This could be Method, Key Result or particular topics relevant to your project e.g. neurotransmitters, acoustics or microscopy.
Add each of these as Tags into a Tags Table. You’ll use these to connect your knowledge later.
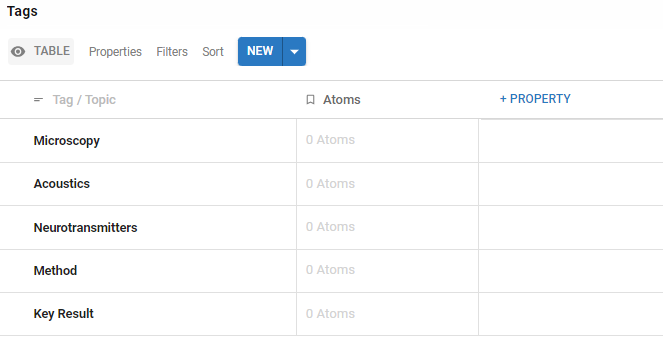
You can add further Tags at any point
4 Read and Create Atomic Notes #
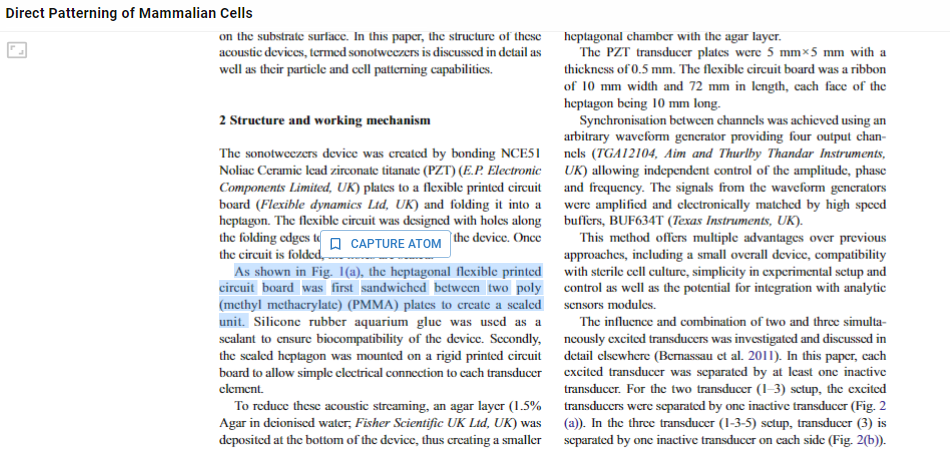
As you read through your papers and sources, highlight just like you would in any other tool, hit Capture Atom and this will save the highlighted text as an Atom in your workspace. You’ll be able to access and use this Atom outside of the Source
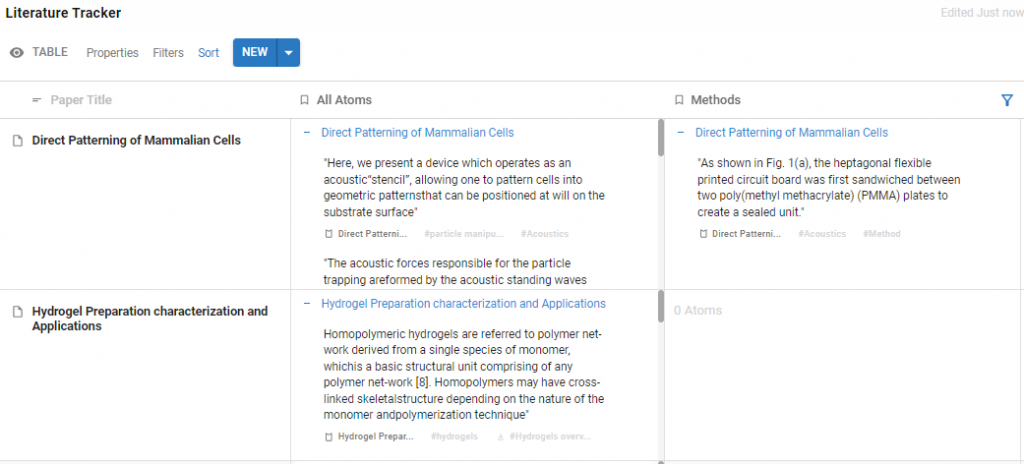
All the Atoms you capture from a Source can be viewed in that Page under the Properties Menu

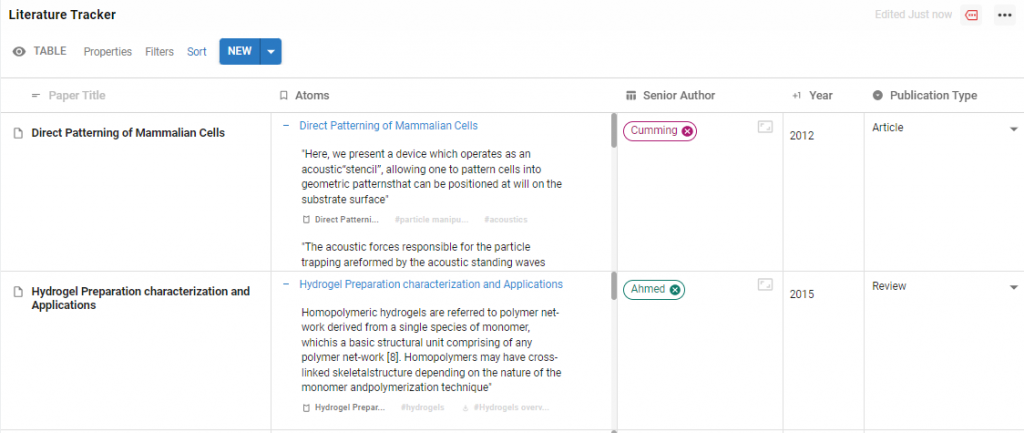
As your Paper is within a Table, you can also use an Atoms Property to view the highlights you saved in the Table view
5 Label your Atoms #
Add Tags to your Atoms from the list you prepared earlier to build your connected Knowledge-base. Add them when you Capture an Atom or come back to add them later. As you add Tags your knowledge will start to pool around different Topics, and you’ll be able to organise it all to get rich information overviews.
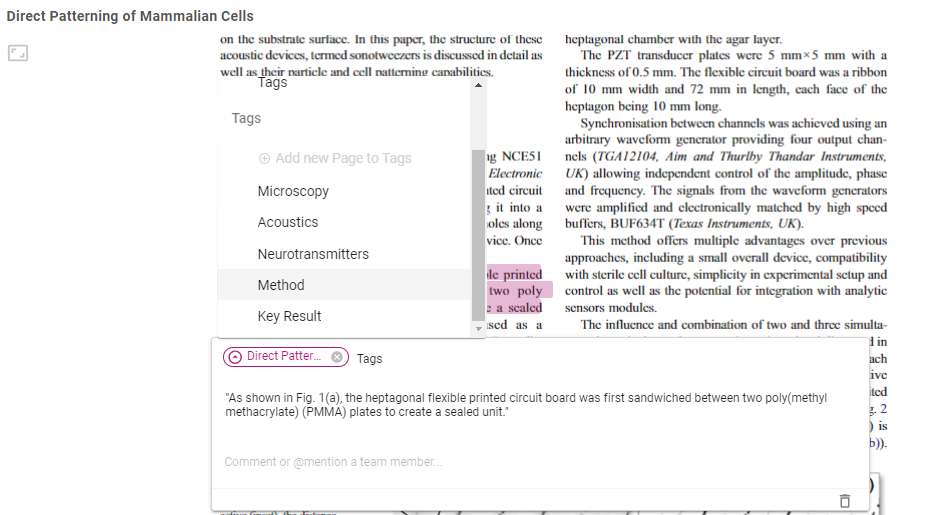
Once a Tag is added, your Atom will display as an Atom of all the Pages it has been tagged to.
Visit Tag Pages to see a collated list of all the knowledge connected to that Topic. Atoms from all your sources that share a particular Tag will be accessible. Over time you’ll build up a knowledge-bank around that Topic.
You can also use Tags to filter Atoms in your Tables to get an overview of your knowledge base and find key information quickly: