As a student or researcher, reading the academic literature is a key part of keeping on top of the new developments in your field and deepening your understanding. As you progress through your studies, the number of papers, articles, books and information to read quickly mounts up. To help manage all the knowledge you acquire from your reading, and so that you can quickly refind it and apply it to your work, you can develop digital organisational systems. In this post, we’ll share some tips and techniques to help you build your own system, as well as show you how to get started organising your academic reading on Protolyst.
Organising your Academic Reading Sources
Here are some tips to develop a reading system to manage all your different sources and develop a reading habit. Systems built in digital tools and software are easier to search through than physical systems, but the choice is yours!
1 Set Up an Academic Reading List
Create a centralised reading list to store all your sources in one place. As you start to manage different streams of work you can evolve this to sort your sources into different Folders and Sub-Folders. If you make use of a digital tool where you can use a Table, you can add properties to categorise your sources and prioritise them to plan out what to read next.
2 Use Reference Management Software
Proper citations of your sources are essential in any academic writing. Make use of reference management software (Zotero, Mendeley, EndNote) to generate citations so you can reference different sources in your written work. Some reference managers, like Protolyst, can combine your notes and reference management together.
3 Adopt an Academic Reading Schedule
Schedule regular times slots to establish your reading habit. Keep in mind your energy levels and other activities around your reading so that you can read actively. Introducing a regular reading habit will help you to continuously build your knowledge and spot ideas for your own projects.
Organising Knowledge from your Academic Reading
Once you have a system in place to organise your sources, it’s time to think about how you organise the key details, concepts and knowledge you are acquiring from each source to start building your knowledge-base.
4 Be Selective
It’s likely that you’ll constantly be adding recommended reading to your reading list and you won’t have time to read everything fully. Identify which papers you will read thoroughly. There are several ways you can approach this by looking at different sections of the paper to determine if you want to read it fully.
5 Set Clear Reading Goals
Determine what information you want to find. This may be collecting the key results, interesting observations or experimental methods as well as adding further papers to your reading list. If you are reading to learn about a new area or to conduct an in-depth analysis, the information you collect will vary. Over time, the information you seek may change depending on the stage of your project.
6 Distill the Important Information
Reading a paper takes time. When you decide to read a paper, the goal should be to read it thoroughly once, collecting the important and interesting information as you go. Time management is a vital skill, and by adding this key information into your system, you can save yourself time by not having to fully re-read that paper again.
As you read the paper highlight and annotate the important sections and ideas presented. On digital tools you can also make use of Labels to categorise each highlight based on the information it contains (see below).
Highlights and annotations draw your attention to key details in a page, which is useful when you are browsing through that particular source. However, as your library grows, browsing through every paper quickly becomes an inefficient way to relocate information. Extracting your highlights, so they exist outside of the source file can help you to relocate and access that information when you need it later.
Saving each key detail as it’s own note is known as the Atomic Notes method, and you can create these on Protolyst very easily.
7 Use Labels
As you acquire knowledge, some of it will be useful to you in several areas of your work. You might notice that it doesn’t fit neatly into just one place or folder in your system. By using Tags or Labels you can connect knowledge to multiple places. Tags remove the restriction of saving a File into just one Folder, by linking it to other Folders. With Tags you can access your file from several locations without needing to duplicate it.
If you start using Atomic Notes, you can make use of Tags to connect each piece of knowledge individually to all the different areas it is useful to you.
8 Save Knowledge from Physical Sources
While a lot of sources can be accessed digitally, you may still read physical books, print-outs or magazines. Once you’ve read them, take the time to add them into your digital system. You can include Source Info and key knowledge acquired as makes sense. Keep hold of the physcial copy (if you can) and store somewhere you’ll know where to find it in future.
9 Have Regular Reviews
As you grow your knowledge-base you should introduce regular reviews. This time can be used to look through the knowledge you have collected, check your understanding and interpretation, and explore connections to spot gaps and opportunities for your projects.
Efficiently managing and mastering your growing body of knowledge in your field of research will set you up to enhance your productivity and spot ideas and opportunities for new directions in your project. Make a start following some of the systems, tips and techniques here as well as from other researchers to find a system that works for you.
Organising your Academic Reading on Protolyst
Here we’ll go through step by step how you can implement the tips and techniques shared above to organise your academic reading and start building your knowledge base in a Protolyst workspace.
Check out our video on setting up a Reading System on Protolyst
1 Set up your Academic Reading List
Add a Reading List Table to your Workspace and add your Sources into the Table.
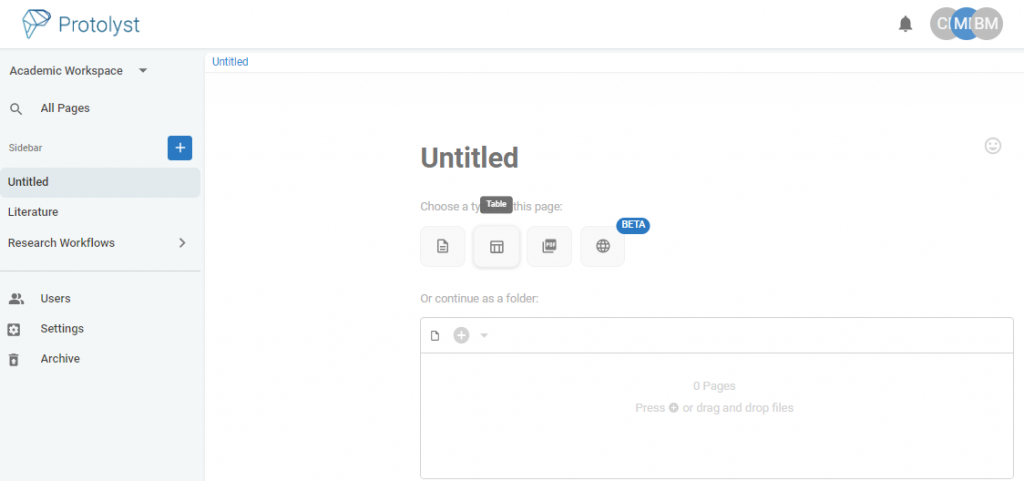
You can drag and drop your files into the Table to upload them into the Table, as well as import web pages from URL links.
2 Organise your Reading List
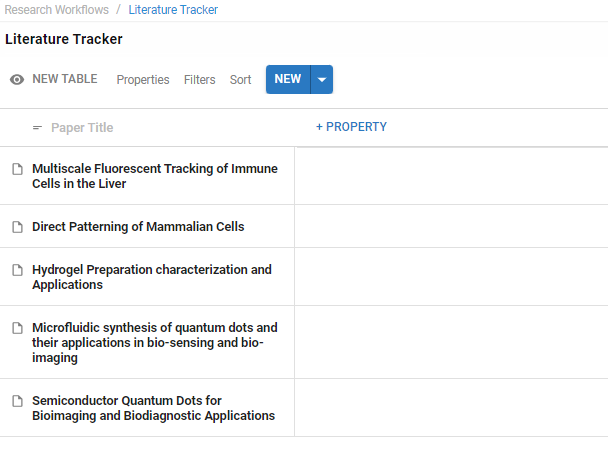
Add Properties to your Table to help categorise and organise your papers, such as Journal, Authors and Year. Once more properties are added you can organise all your Papers using Table Filters and Sorts.
You can also add a Property to organise by stage in a reading workflow such as To Read, Read, To Review, Recommendation.
3 Set your Reading Goals
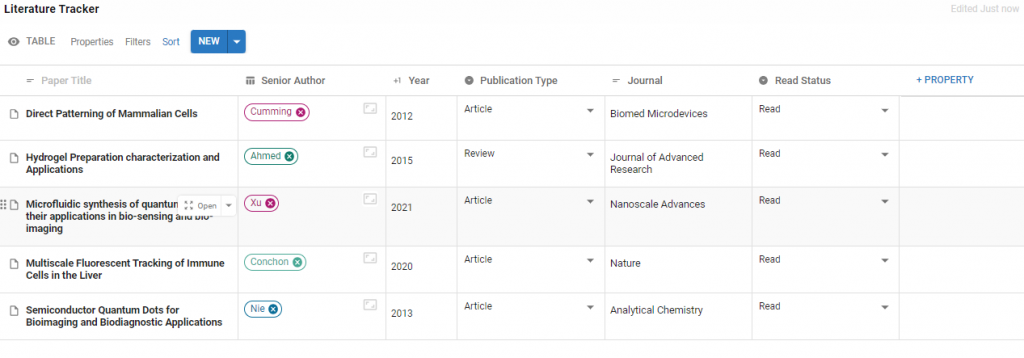
Decide what particular information you want to collect as you read through a paper. This could be Method, Key Result or particular topics relevant to your project e.g. neurotransmitters, acoustics or microscopy.
Add each of these as Tags into a Tags Table. You’ll use these to connect your knowledge later.
You can add further Tags at any point
4 Read and Create Atomic Notes
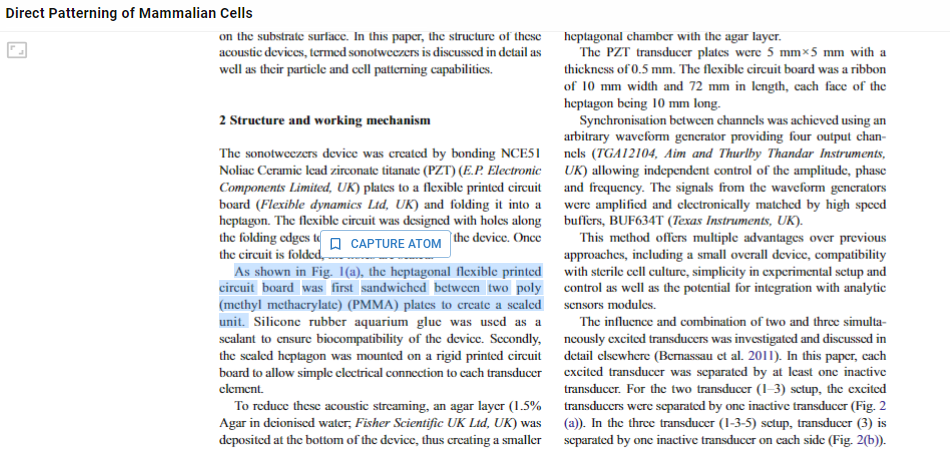
As you read through your papers and sources, highlight just like you would in any other tool, hit Capture Atom and this will save the highlighted text as an Atom in your workspace. You’ll be able to access and use this Atom outside of the Source
All the Atoms you capture from a Source can be viewed in that Page under the Properties Menu

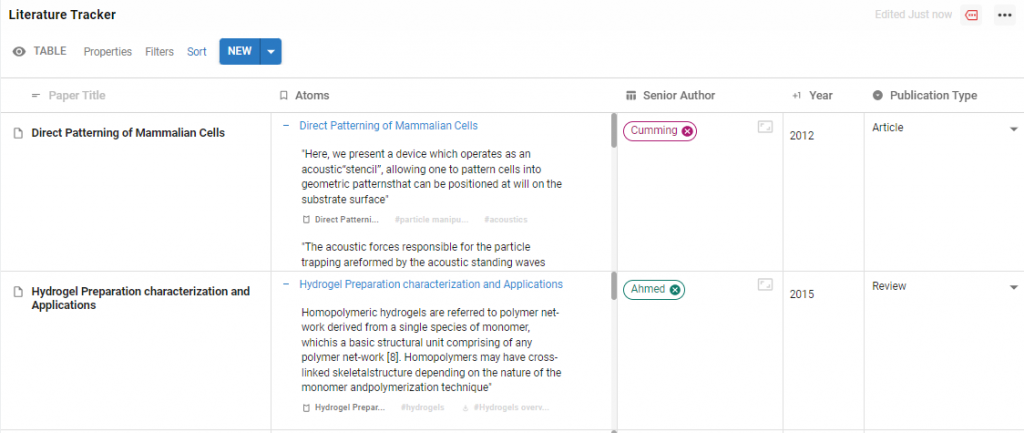
As your Paper is within a Table, you can also use an Atoms Property to view the highlights you saved in the Table view
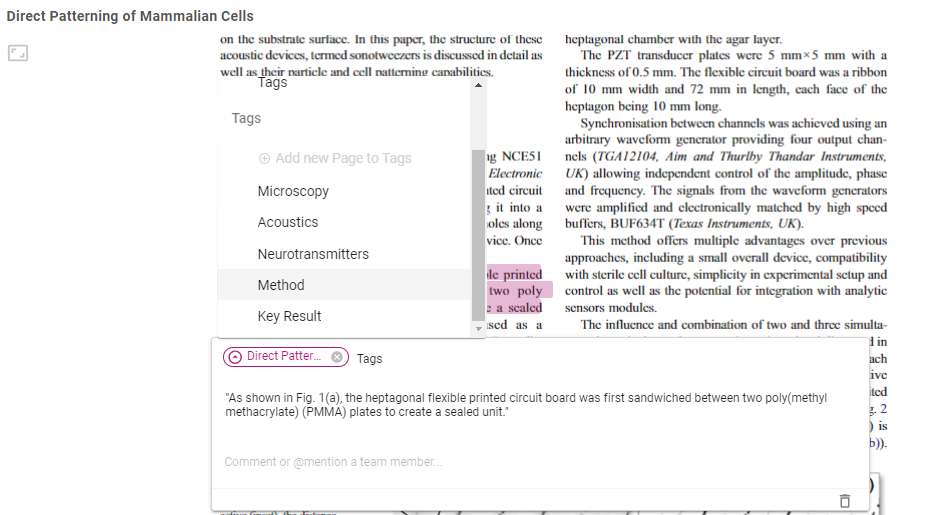
5 Label your Atoms
Add Tags to your Atoms from the list you prepared earlier to build your connected Knowledge-base. Add them when you Capture an Atom or come back to add them later. As you add Tags your knowledge will start to pool around different Topics, and you’ll be able to organise it all to get rich information overviews.
Once a Tag is added, your Atom will display as an Atom of all the Pages it has been tagged to.
Visit Tag Pages to see a collated list of all the knowledge connected to that Topic. Atoms from all your sources that share a particular Tag will be accessible. Over time you’ll build up a knowledge-bank around that Topic.
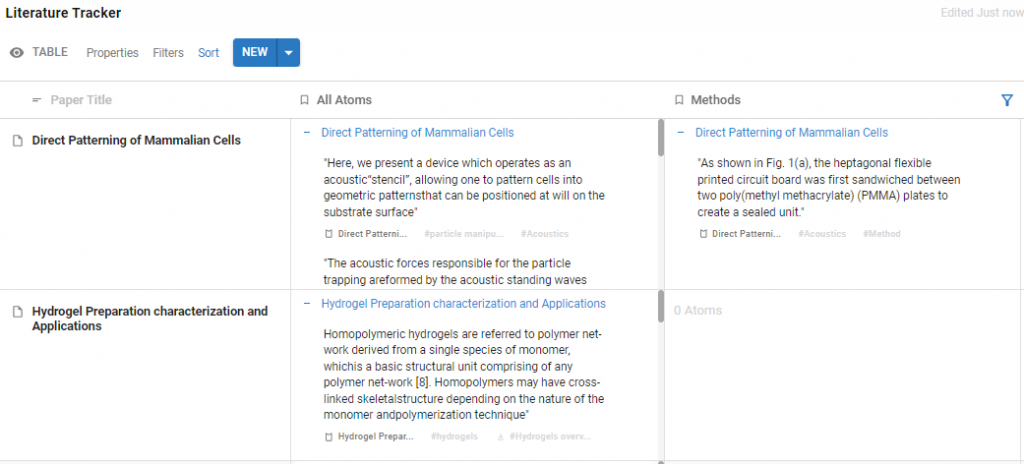
You can also use Tags to filter Atoms in your Tables to get an overview of your knowledge base and find key information quickly:
That’s the starting point for a system to organise your Academic Reading in Protolyst
Digital systems allow you to efficiently search through and organise your knowledge to support deepening your understanding, identifying new ideas for your project and helping when the time comes for your academic writing. We’ve given you some tips and steps to give you a starting point in Protolyst to develop a system that works for you!
You can also use Protolyst to start (referenced) writing with your Atoms. More on this coming soon!