A literature review brings together and critically evaluates existing knowledge on a specific topic, so writing a literature review is an intensive and demanding task. There’s a lot of literature to explore and consolidate often involving revisiting and re-reading papers to ensure a comprehensive understanding. Here we’ll go through step by step how to write a literature review on Protolyst, showing you how using Atoms and Tables can help you organise your information and ideas to cover in your review, and how you can use those Atoms to start writing complete with references.
How Protolyst can Streamline your Literature Review #
There are 3 ways that using Protolyst can streamline your literature review:
- Automatic citations when you upload papers into your workspace
- Use Tables and Tags to reorganise and collate your information together in different ways
- Grab highlights that automatically generate citations and references wherever you use them in your writing
- Organise your information using a Table which you can transform into a Document for download
To watch this workflow head to our YouTube channel:
Who this is for #
Literature reviews can be written at different stages of a project, so there’s a variety of different starting points when you start gathering information to write your literature review. This workflow is for researchers that know their research question and have already developed some knowledge of their project, and so know what topics and questions they will want to answer in their review.
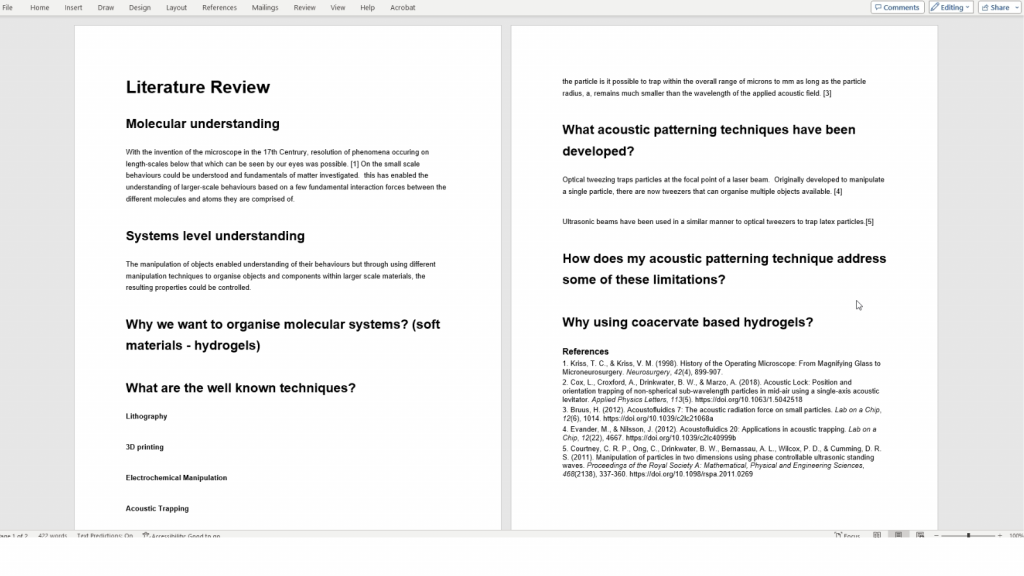
Step 1: Identify your Literature Review Structure #
Map out a structure for your Literature Review. This structure will help you to identify what information you need to share with the reader to introduce your project. You can plan this out however you like. In our workflow example we make use of a series of questions to structure the review. These questions guide the information to collect and bring together for your literature review from the literature.
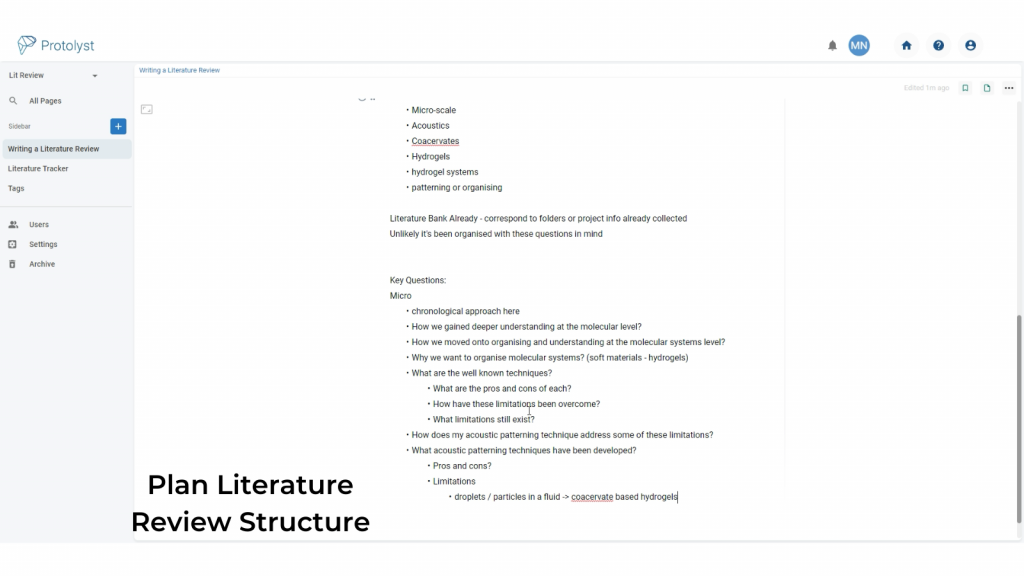
As you work on your literature review these questions might evolve, you might add others in and some of them you might not ultimately use in your final written review – it’s an iterative process!
Step 2: Add your Lit Review Structure into a Table #
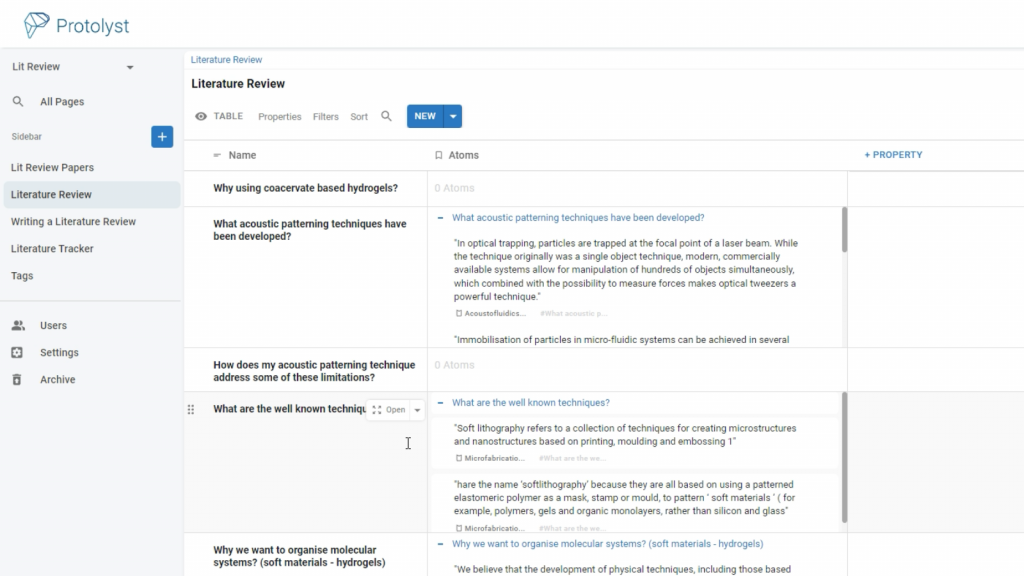
To collect information around these particular questions or your chosen topics, you’re going to add each one as a row of a Table. By using a Table, you can easily reorganise different sections, add in others and reconfigure your work into a cohesive document later.
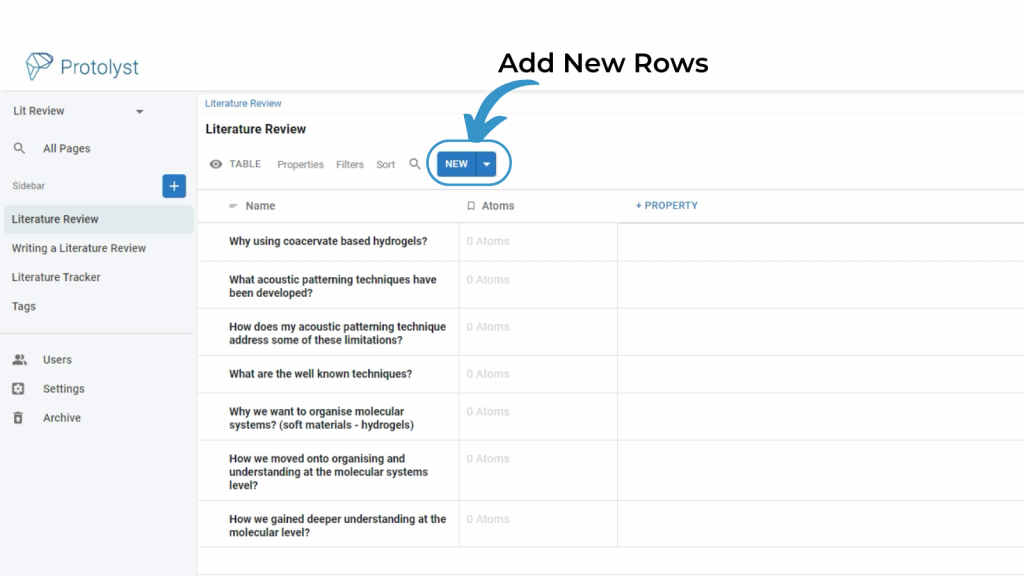
Add a Table to your Workspace, and then add Rows into your Table for each question or topic in your literature review plan.
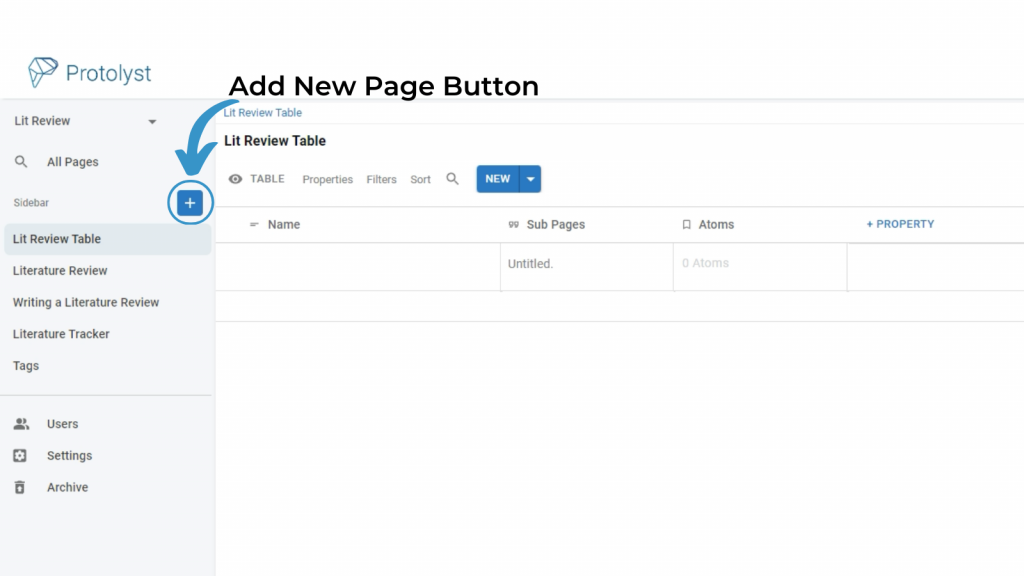
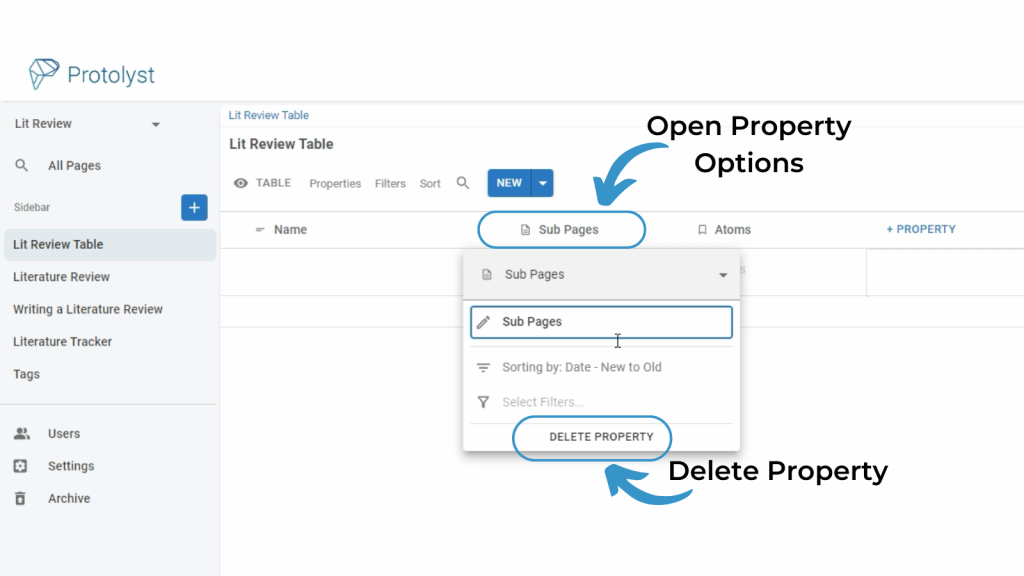
Set up your Table as the Structure for your Literature Review by changing the Properties. Tables have a Sub-page property by default, feel free to delete that Property.
To add Rows to a Table, use the Blue New Button above your Table. Add each question or topic from your structure planning as it’s own Row in your Table
Step 3: Reading the Literature #
This step is iterative and might involve searching the literature for further relevant papers to include in addition to the papers you already have and know about. With the key questions (or other structure) you identified, revisit relevant literature to collect information relevant to answering each question.
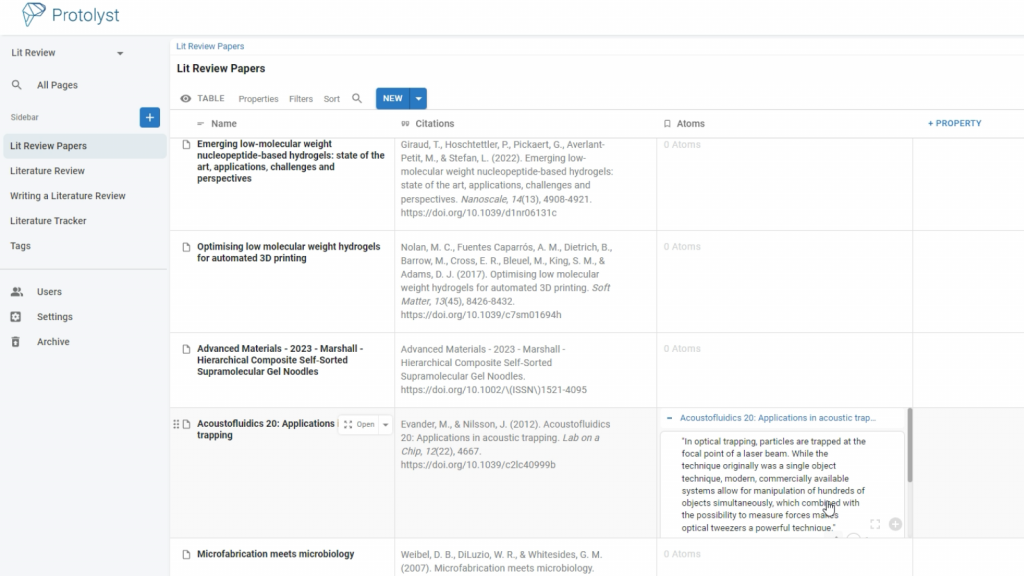
First, add your Papers into Protolyst in their own Table. Add a new Table and then change the Sub-Pages property to a Citation property.
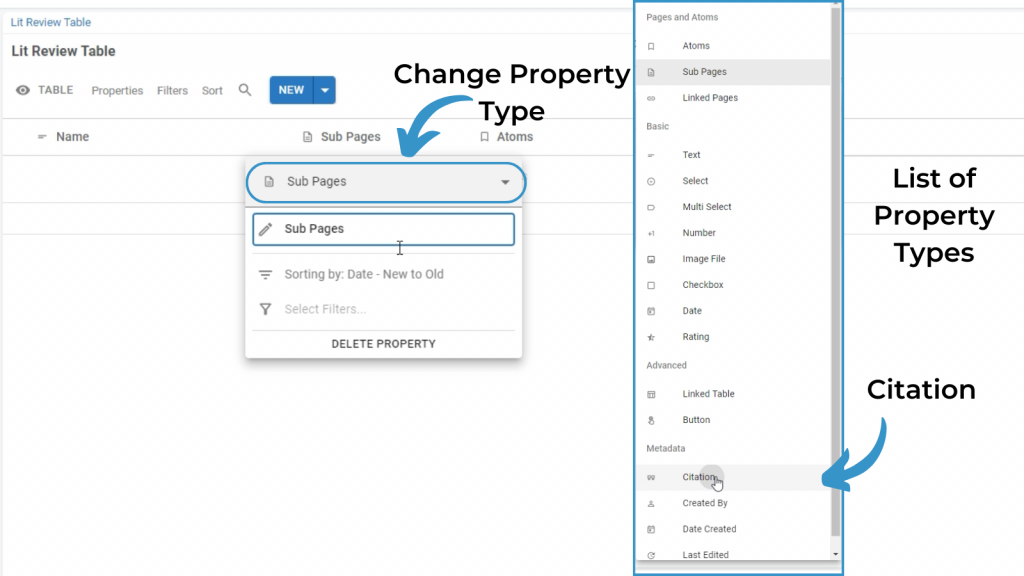
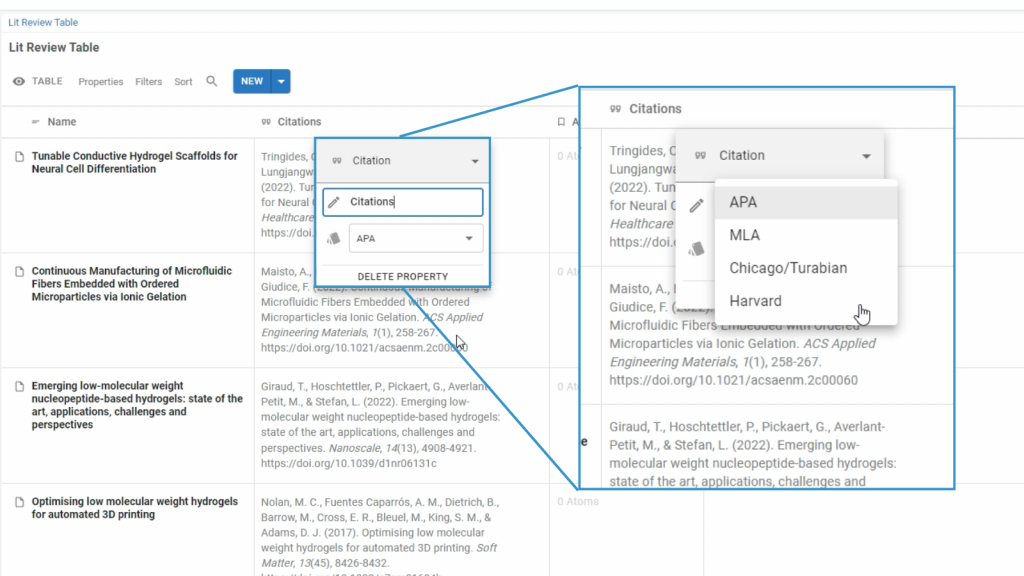
The Citation Property automatically pulls reference information from each PDF uploaded, and there’s a few different styles available in the Property Options.
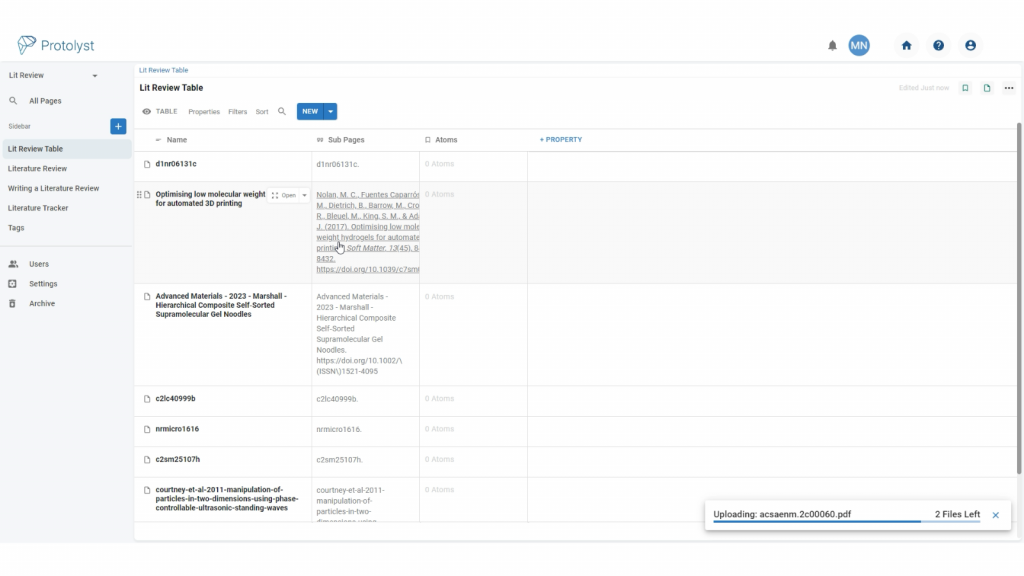
Batch upload a collection of papers with drag and drop. Drop your selected PDF files onto your Table to upload all those papers into your workspace. During this upload the Citation Property will populate with information and the Name Column will update with the Title of your Papers.
Step 4: Capture Atoms #
As you read the papers, grab information from them that’s relevant to your literature review questions. You can have a paper open alongside your questions Table to keep those questions in mind as you’re reading.
To open your Table of Papers alongside the Table with the Literature Review Structure and Sections, use Splitscreen. Ctrl+Click on a Page to open that Page side by side with your Current Page
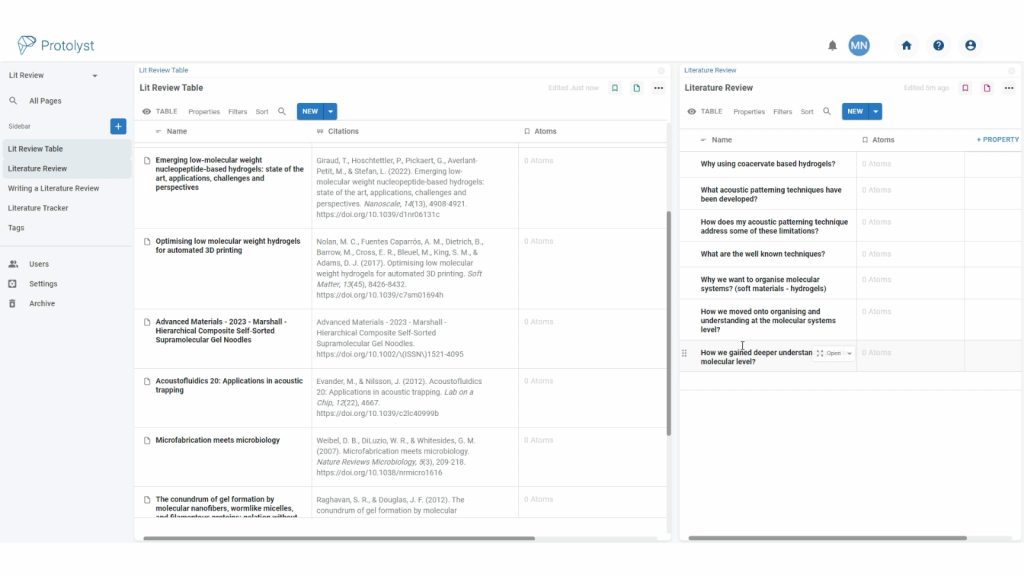
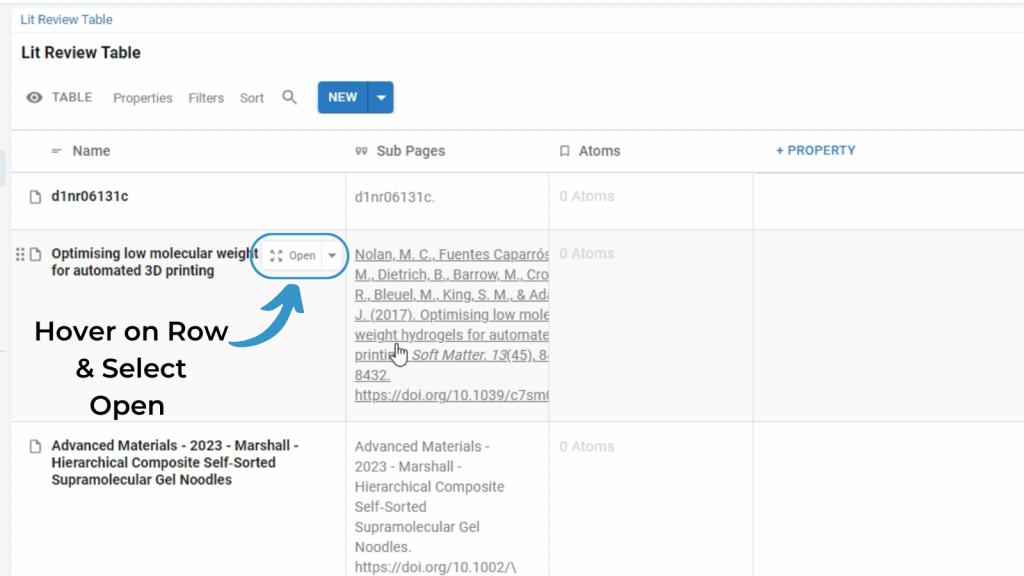
Open up a Paper to read it – this will open up your Paper alongside the other Page in splitscreen.
To capture an Atom, highlight the text and then drag and drop it into the atoms column for the relevant question.
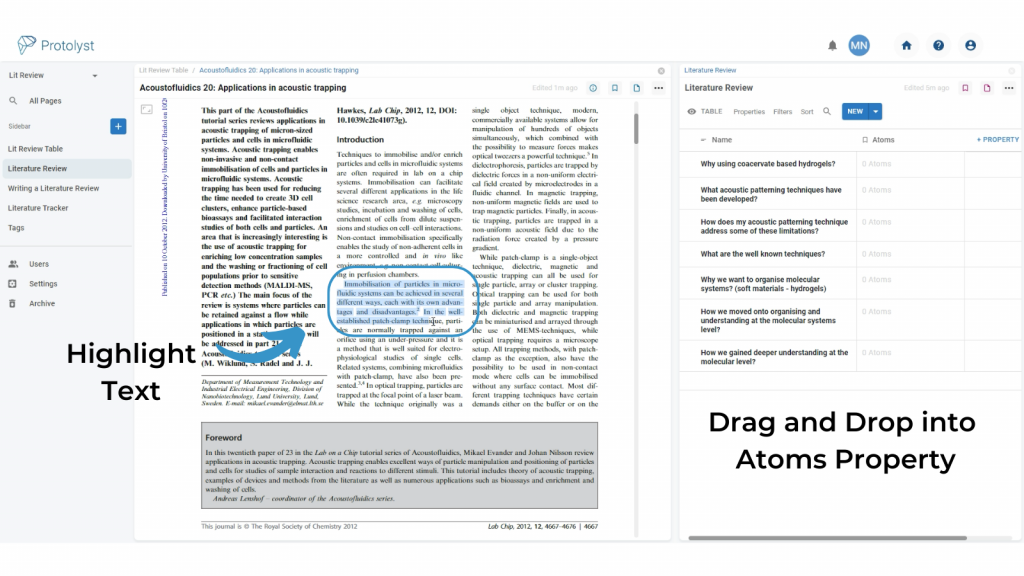
This will save that piece of text as an Atom and add a connection or Tag to the corresponding question. That Atom will now display in your Lit Review Structure Table, so that the piece of information will be to hand when you want to consolidate relevant information together to write that section.
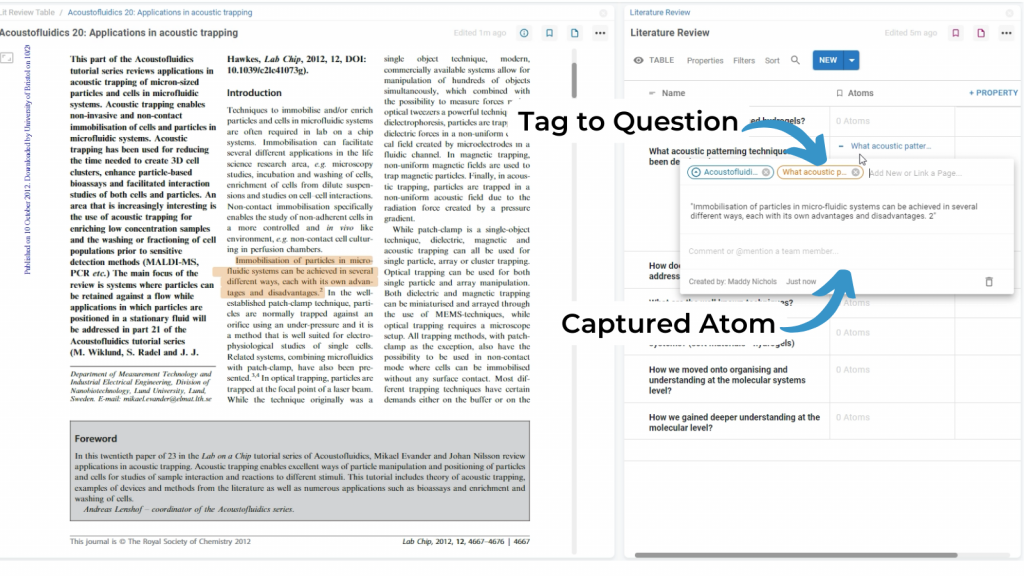
You can also collect Atoms using the ‘Capture Atom’ button that appears when you highlight text. You can then add Tags to connect the piece of information to relevant questions by clicking in the linking bar to select the question(s) from the list of Pages that appears in the list of available Tags.
When you navigate back to your Papers Table, all the Atoms you captured will display in the Atoms column
When you navigate back to your Literature Review Structure Table, all the Atoms you captured will display next to the different Rows, based on which Tags you added when collecting them
Step 5: Start Writing #
Once you have collected Atoms and organised them around your questions, you’ll have built a collection of relevant snippets from all your papers to consolidate together for each question or section of your Literature Review.
You can now start writing out your answer to that question, adding in references by writing with the Atoms you have captured.
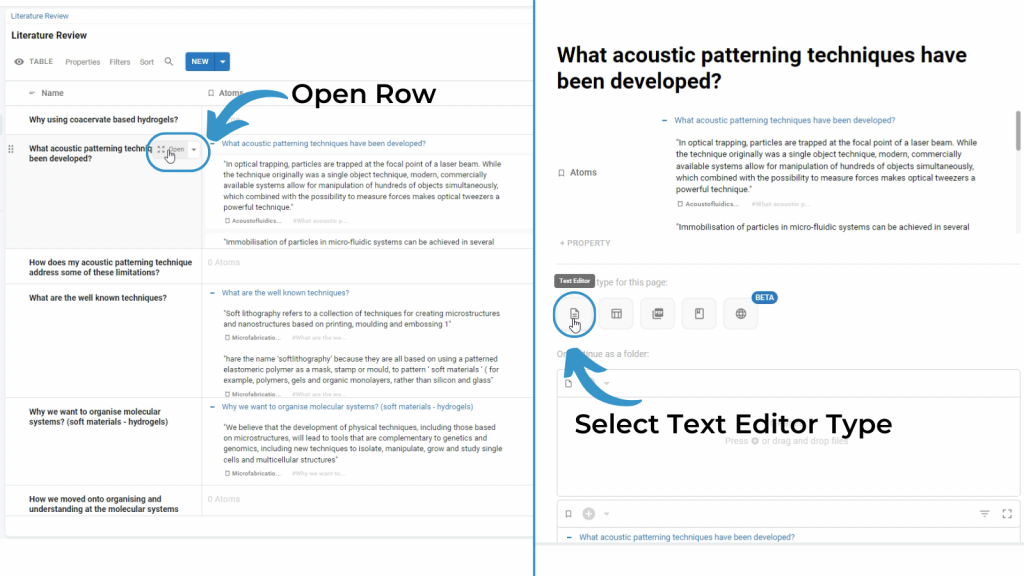
As you have built out your Lit Review into a Table, you can work on each section separately. Open up the Row to work on that section. On opening the Row you can set it up as a Page, choose type Text Editor – this allows you to type into the Page.
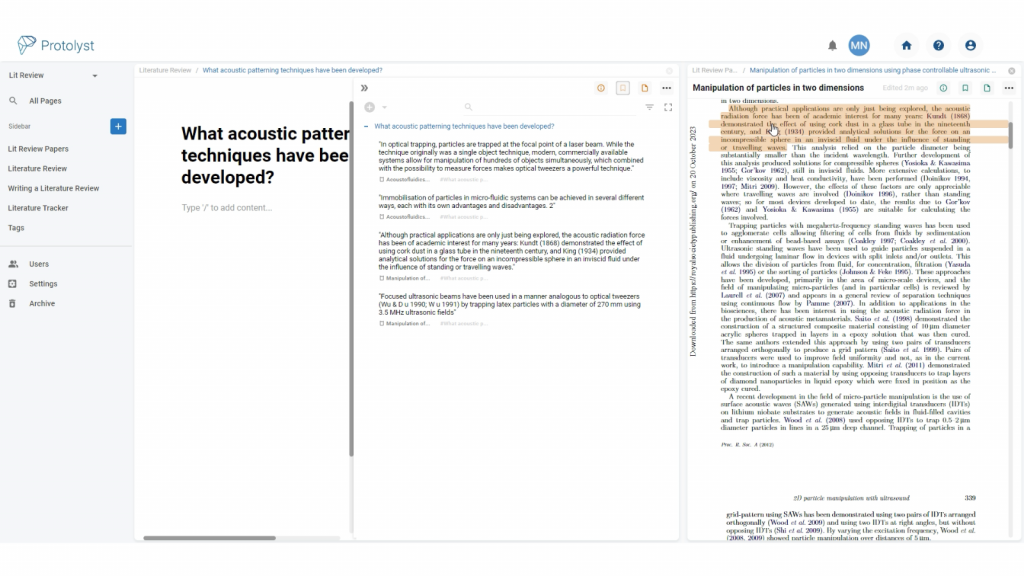
On the Right hand side you can open up a list of all the Atoms you collected around this question by opening the Atoms Menu, which will expand a list of Atoms down the Right Side of your Page.
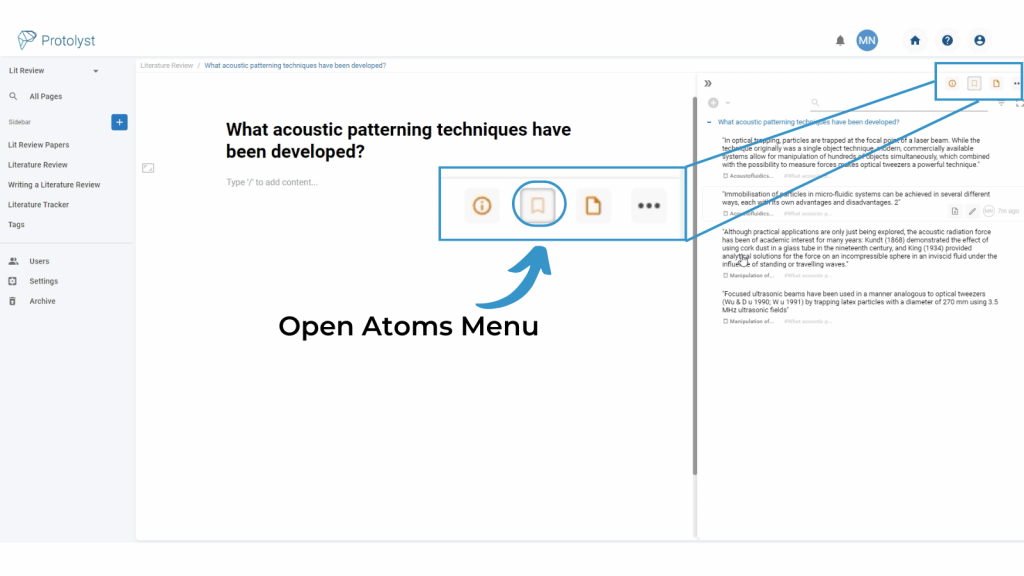
Every Atom in your List will have a Source Tag. This is used to create your Citations and References, and you can click it to open up the Atom in the Source File next to your current page in splitscreen.
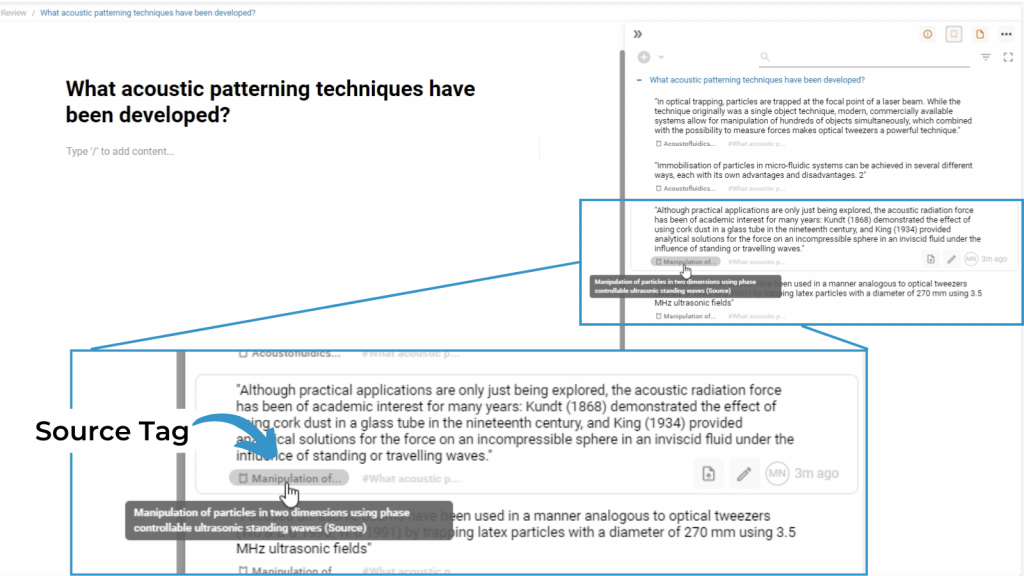
Click the Source Tag and you’ll be navigated back to the Paper and the exact location of that Atom (highlight) inside that Paper, so as you’re writing your Section you can jump back to the original source to gather further context.
To start writing your section, you can drag and drop Atoms into the Page. This adds that text into your page so you can integrate those different ideas and concepts together.

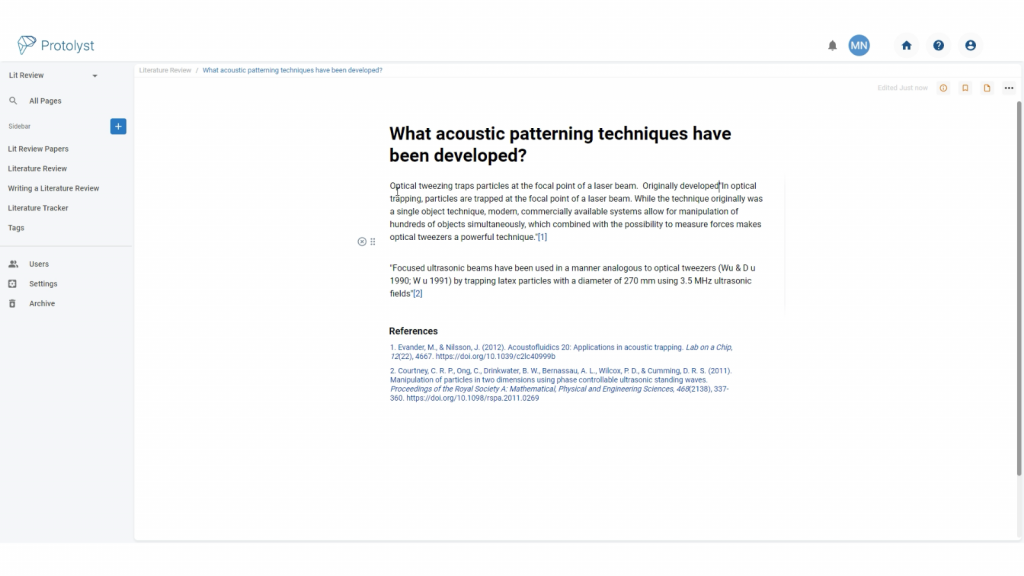
When you drop an Atom, it automatically creates an in-text citation and reference to the source paper. Jump back to the original location of the Atom in your Source by clicking the citation.
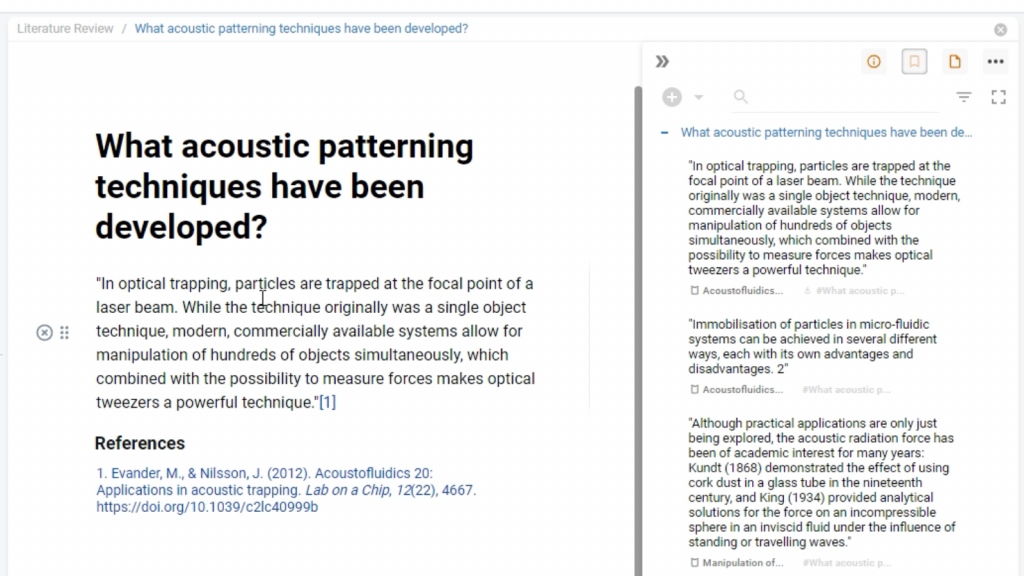
Atoms you drop into your page add the text of the Atom which can be edited and reworked alongside other Atoms into a flowing written section.
Step 6: Set up your Table as a Document #
After you’ve written up answers using your Atoms for each of your Lit Review Sections, you can pull them altogether into a complete document by changing the layout of the information in your Table and using a Vertical Table view.
In your Lit Review Structure Table, add a New Table View and select Vertical type.
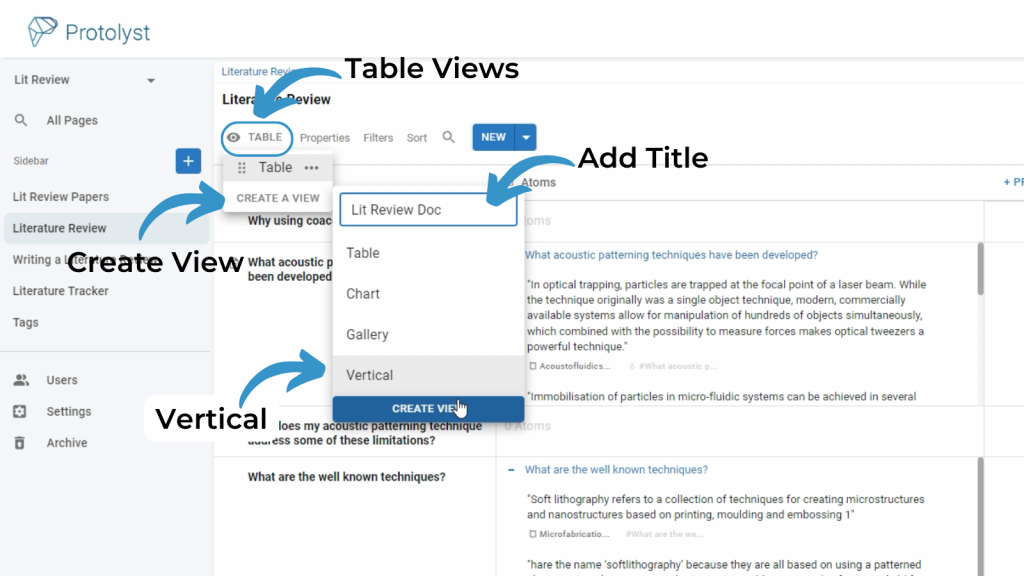
This transposes your Table into a long page or document-style format.
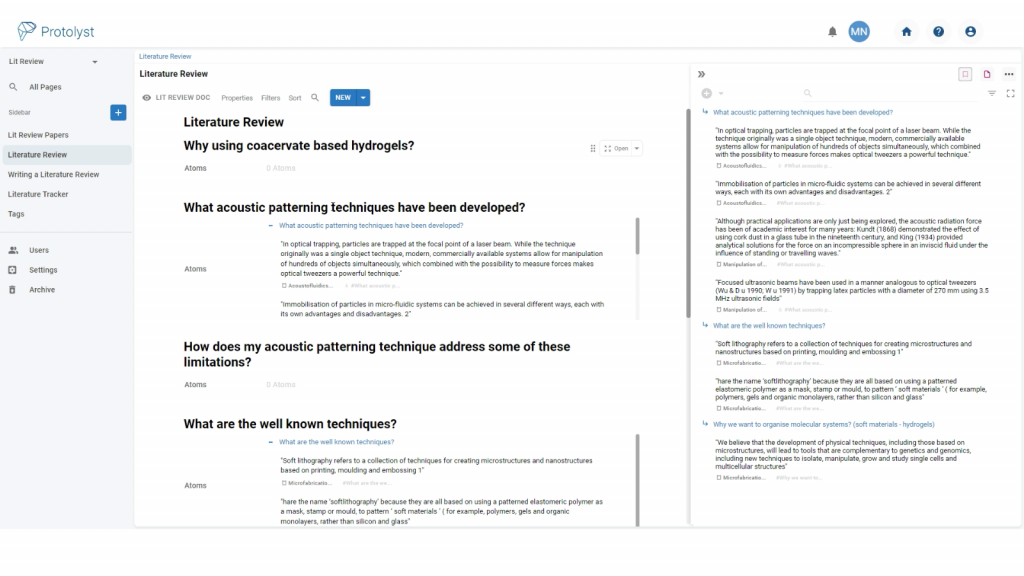
Open the Properties Menu and choose ‘Display Page Preview‘. This will display the text you have added into each Question Page. Here you can also show/hide other properties of the table. Turn them all off to display just the written text sections.
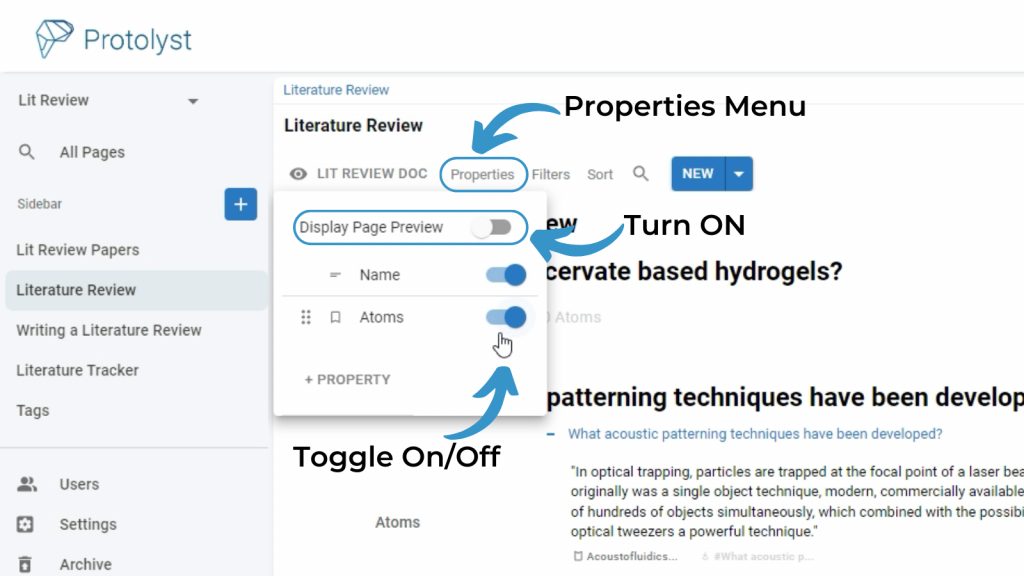
With all Properties but Name turned off and the Display Page Preview turned on the Table looks like this:
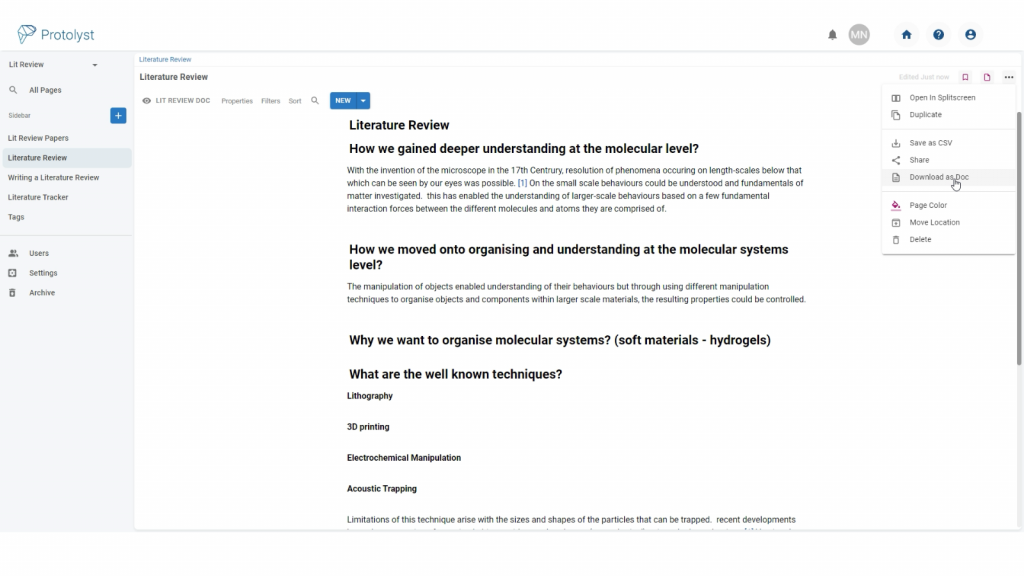
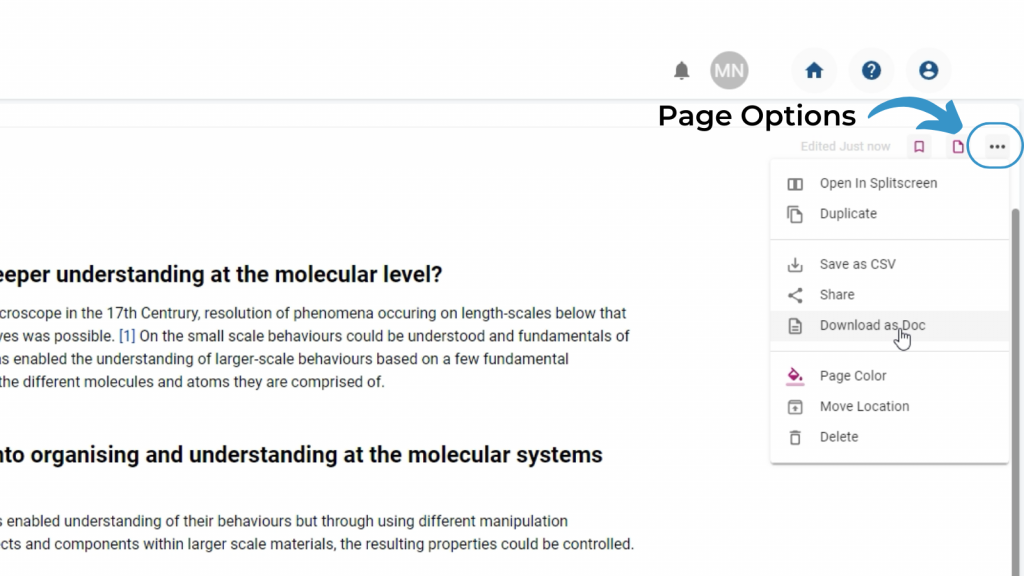
You can export this table as a word document for further edits and formatting. To download use the Page Options Menu in the top right and choose the ‘Download as Doc’ option.
All the text sections are pulled together into a cohesive document with headings including a References Section in the style of your Citations Property.