Here’s a 5 part step by step guide on collecting useful pieces of information as Atoms from several sources to prepare an informed and evidenced Article fast!
This work flow is based on saving particular nuggets of information that you uncover during your research and organising them around the relevant sections of your article. Then when you’re ready to write you’ll have a bank of relevant information at your fingertips ready to collate together into an informed piece. Additionally when you add your saved nuggets into a page, it automatically adds a reference so you don’t need to keep track of where each detail came from and can just focus on writing a strong narrative.
Watch the full work flow on YouTube
Step 1: Decide your Article Content #
Add a Table to your workspace and then add in each Topic (or sub-heading) that you want to cover in your Article as it’s own Row.
To add a Table use the Blue Plus Button at the top or your Left Hand Sidebar and choose Table from the available options.
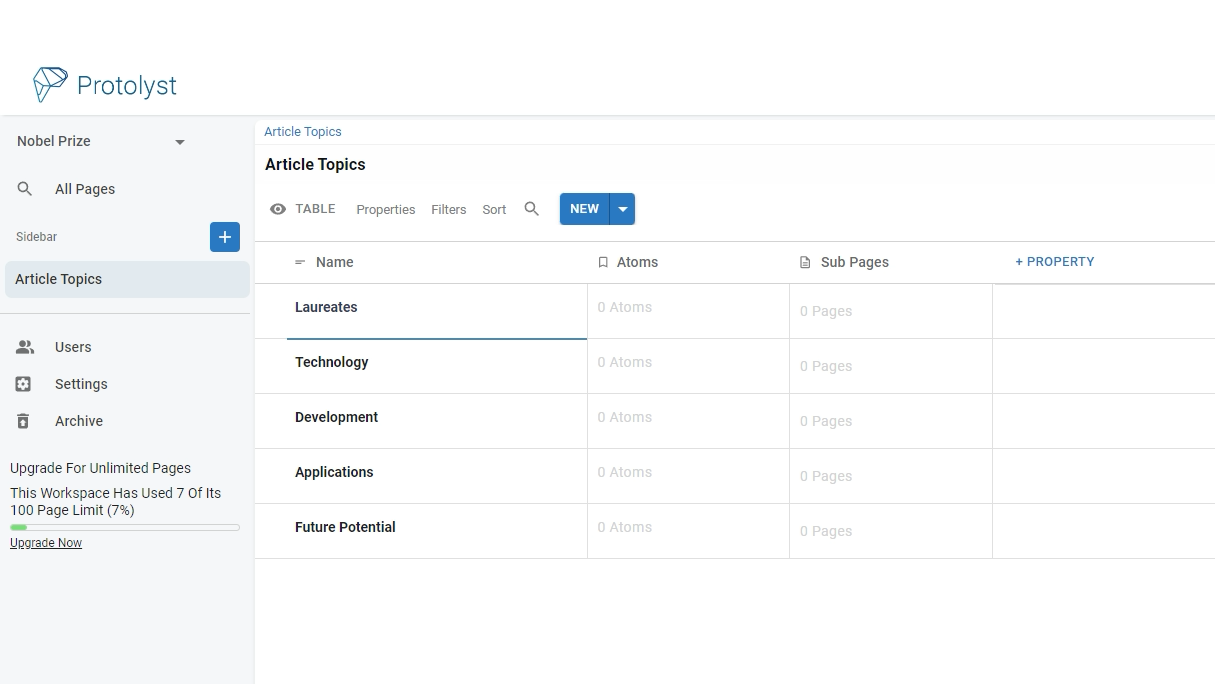
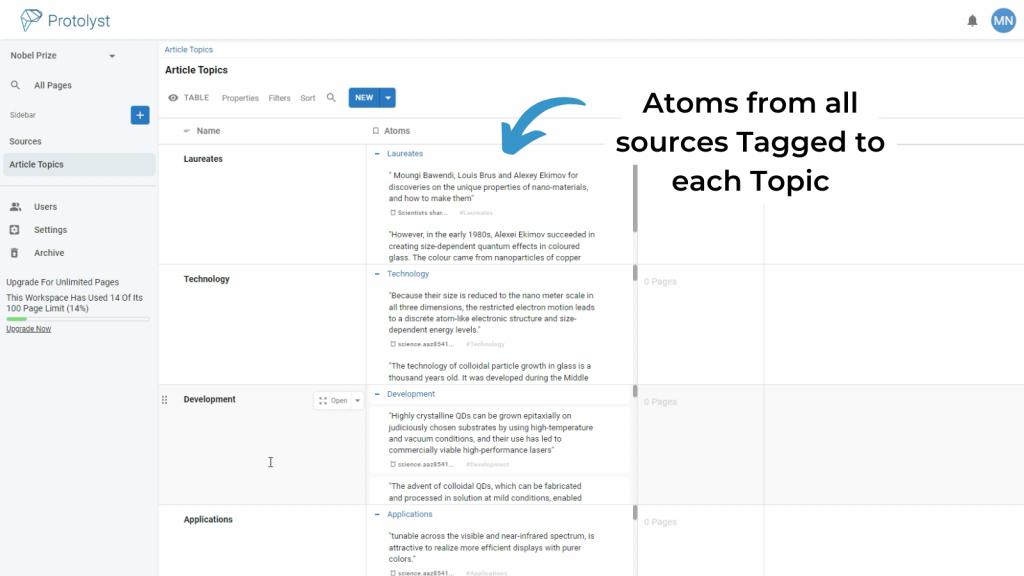
Rows of Tables are Pages in your Workspace, so you’ll now be able to Tag your Atoms to your Article Topics.
Atoms are the nuggets of detail or highlights you make inside your sources. Saving your highlights as Atoms lifts them out the page so you can view and access them across your workspace. You can add Tags to your Atoms so that they display in other Pages of your workspace. Having your Article Topics as Pages means that you can connect Atoms from your sources to those Topics, so you can start to collect info from multiple sources together in preparation to write that section later.
Step 2: Collect and Add your Sources of Information #
As you research your article, you’ll find different sources of information. You can import PDFs, Docs, PPTs and web pages into Protolyst so you can capture and organise the key info inside them as Atoms.
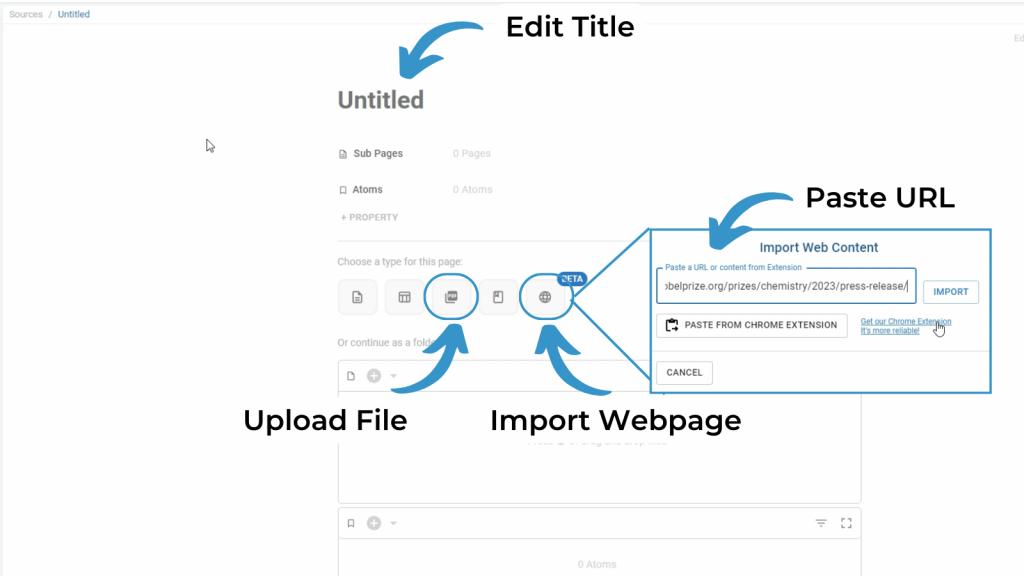
To keep your workspace organised, add all your Sources into one Table. To add a Source you can open up a Row of the Table as a Page using the Open Button
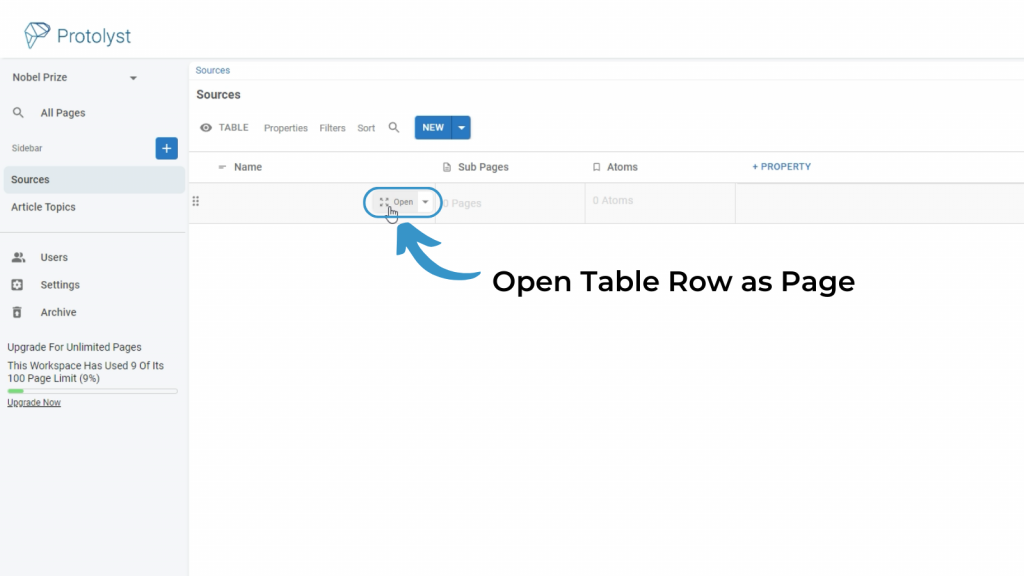
And then choose the relevant Page Type; File Upload to upload any files you’ve found in your research or Web Page to extract text from any web pages you want to use.
Step 3: Organise the Key Information in your Sources #
Highlight the important information in your sources to save it as an Atom. Atoms lift snippets of text in a source out of the page.
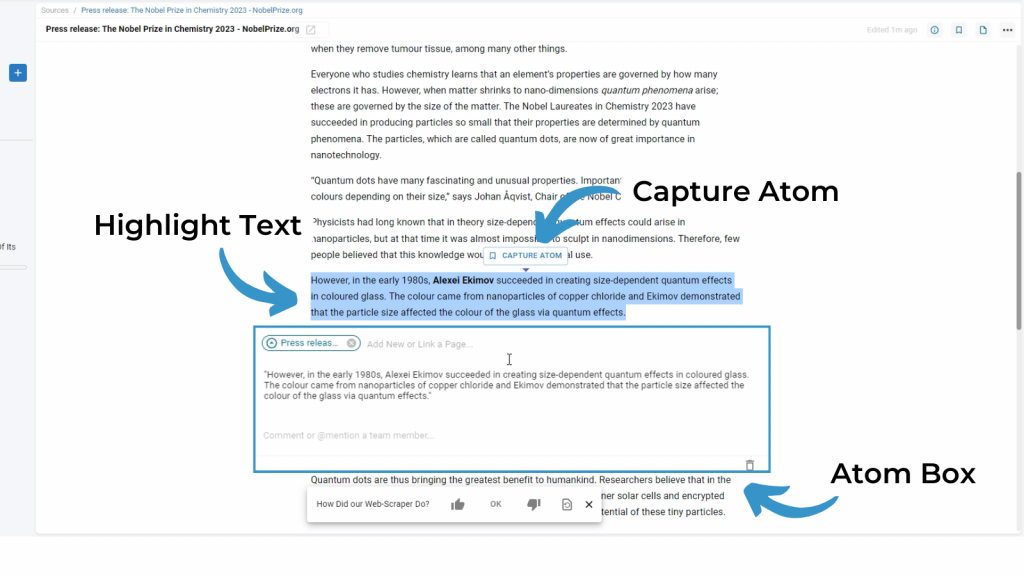
By adding Tags to each Atom your information will display in other Pages so you can use it.
Atom saved from a source and Tagged to ‘Topic’ will display next to that Topic. To add Tags use the bar above the Atom text, and select a Page from the dropdown list that appears. You can also start typing the name of a Tag you want to add.
Once a Tag has been added they will all list here. Add as many Tags as you want
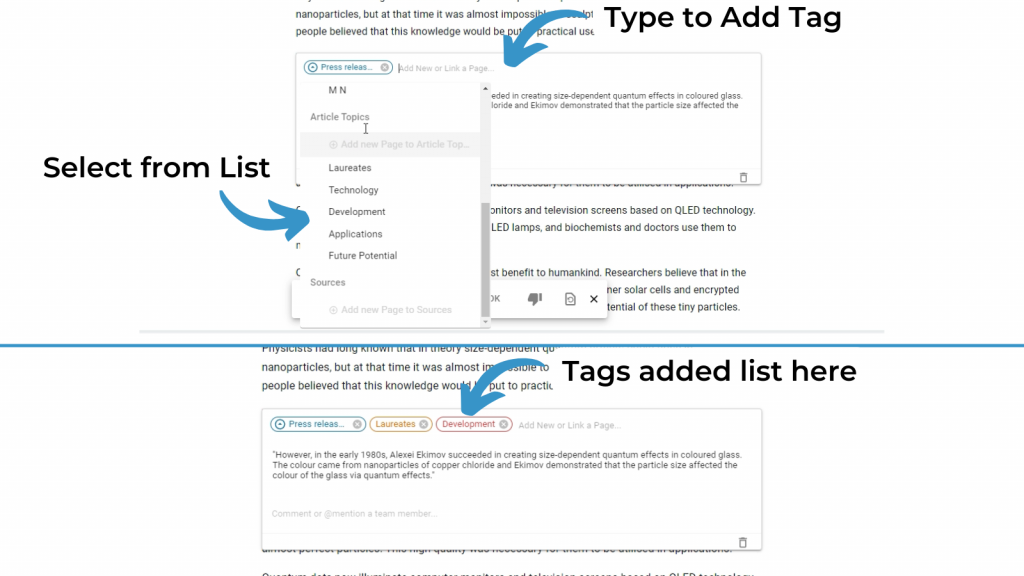
When you add Tags, your Atom will display for all those Pages
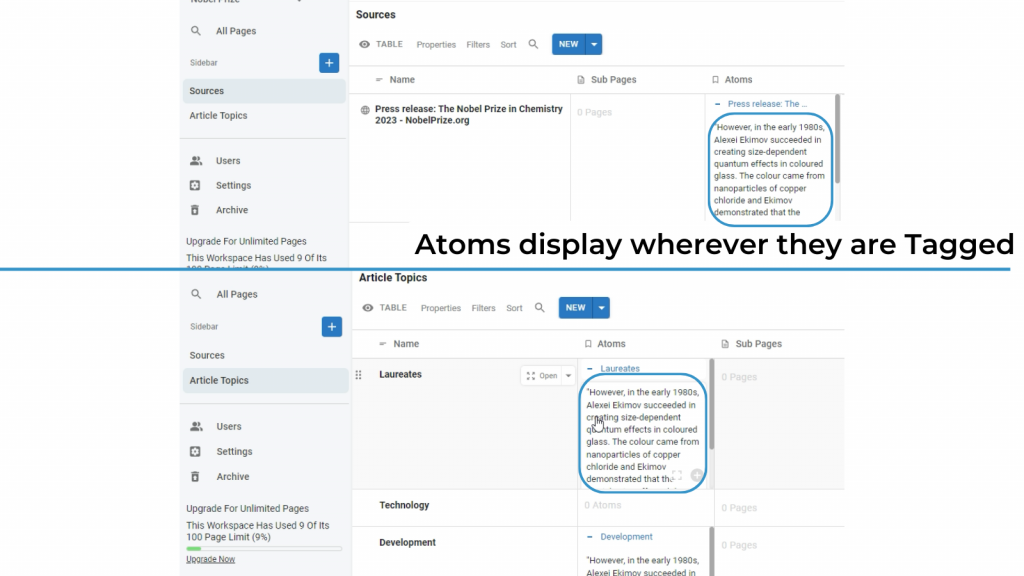
Top: Atom displaying in Atoms property of the Source it was Captured from in the Sources Table. Bottom: Atom displaying in Atoms property for ‘Laureates’ in the Topics Table.
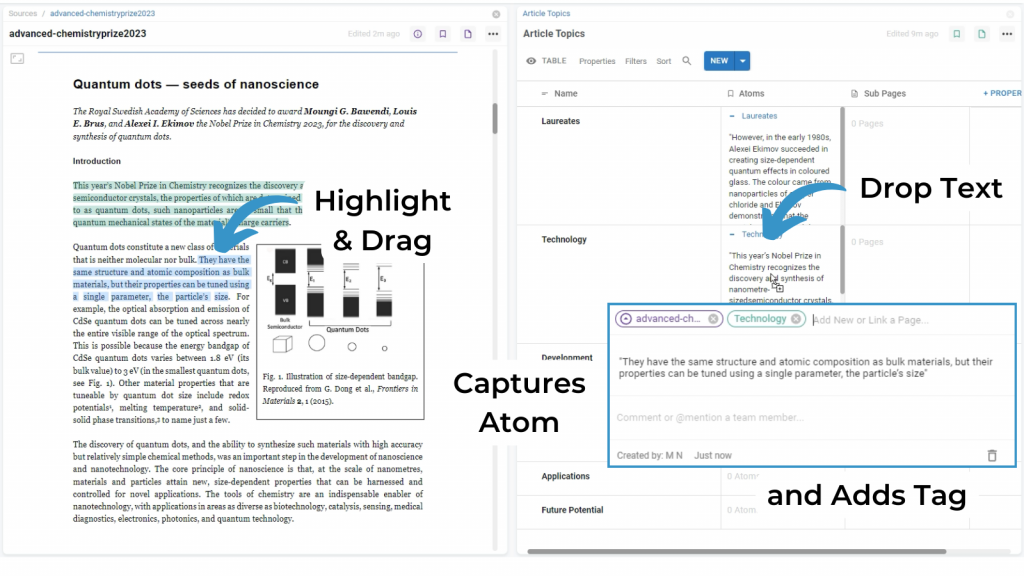
To add Tags to your Atoms faster, you can make use of Drag and Drop. Open your Source and your Article Topics Table side by side in splitscreen (open one page next to another by Ctrl+Clicking it)

With both pages open you can drag and drop text into the relevant Atoms property to both Capture your Atom and add a Tag. Drop your highlighted Text into whichever row you want it to display for.
As you continue capturing Atoms and adding relevant Tags between each Atom and the relevant Topics in your Topics Table, you start to collate all the information from across your different sources together ready to use in your writing.
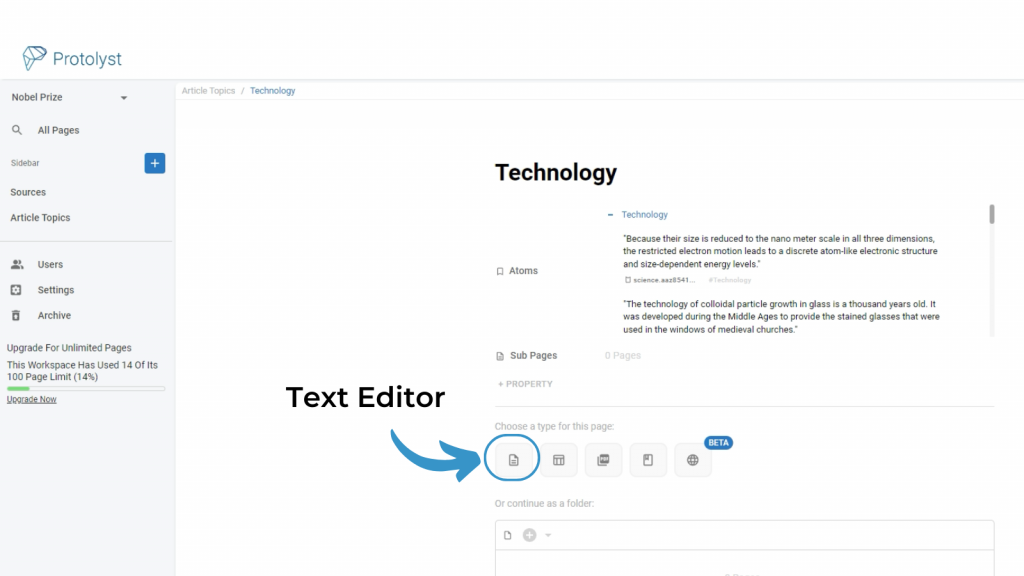
Step 4: Write your Sections #
When you have collected information from your sources, you can open up a Topic in your Topics Table as a Page. Select Text Editor as the Page Type to use your collected Atoms to prepare that Section of your Article.
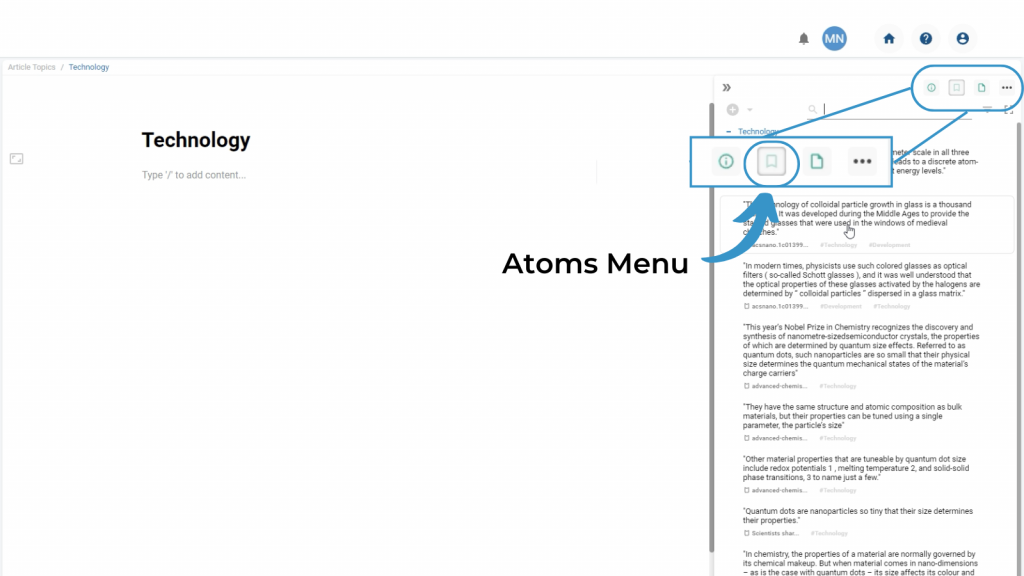
All the Atoms tagged to that Page can be viewed by opening up the Atoms Menu using the buttons in the top right of your Page.
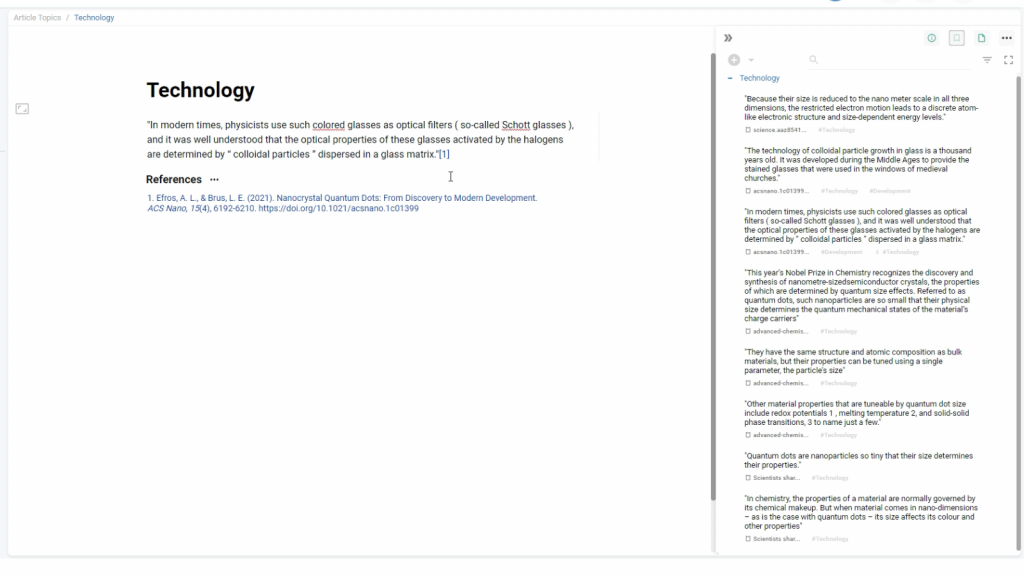
Drag and Drop your Atoms into the Page to use the information you have collected. This will add the Atom text as lifted out of the source page and automatically adds in a citation and reference. You can use your Atoms to help with writing your section into a flowing piece.
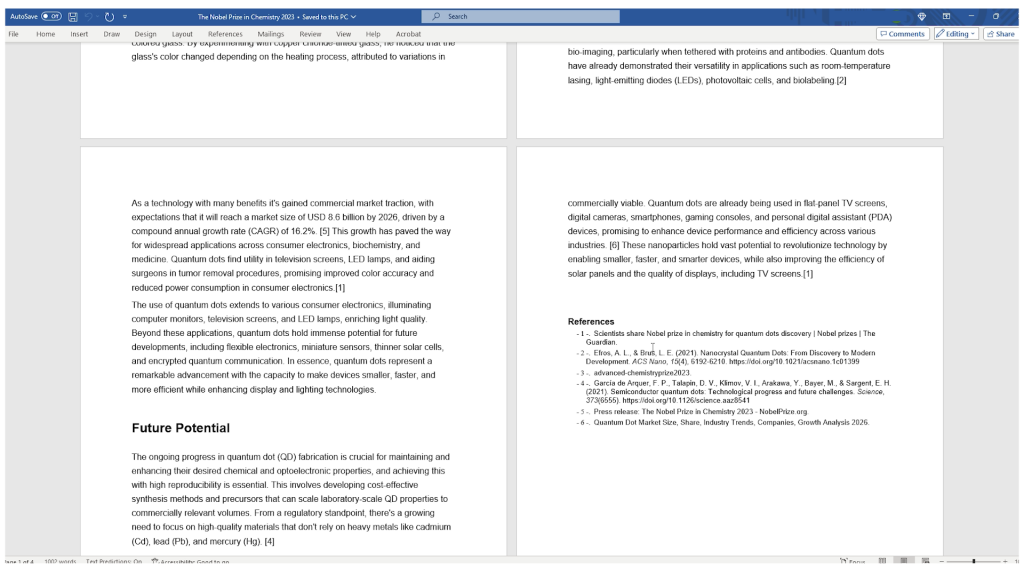
Step 5: Prepare the full Article #
Once you have written out each section of your Article, you can use a Vertical Table view to pull together all your sections into one Document and download your full article.
Create a new Table view in your Article Topics table and select Vertical Type.
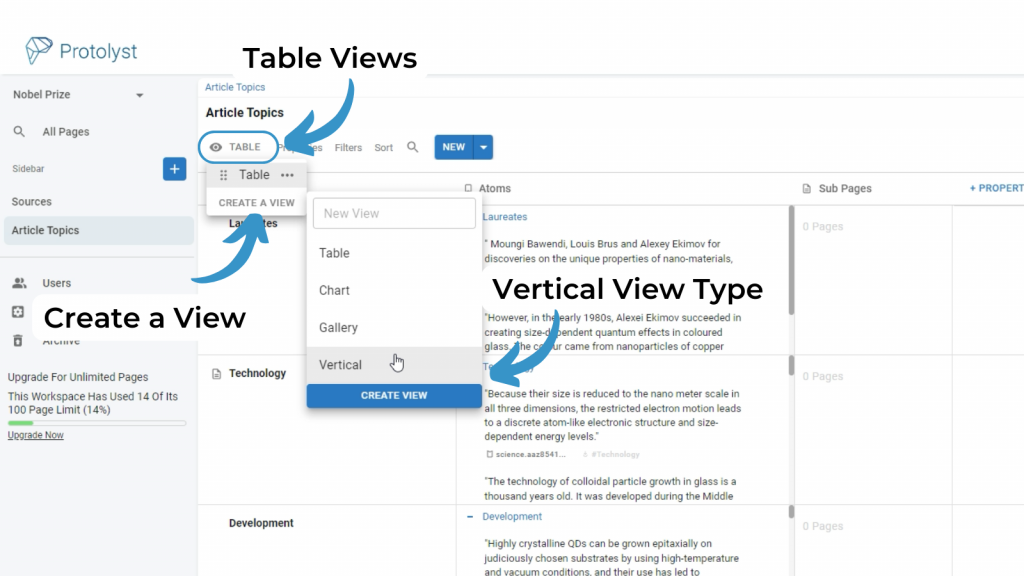
Vertical View displays each row on top of each other, with the Properties displaying as ‘Rows’
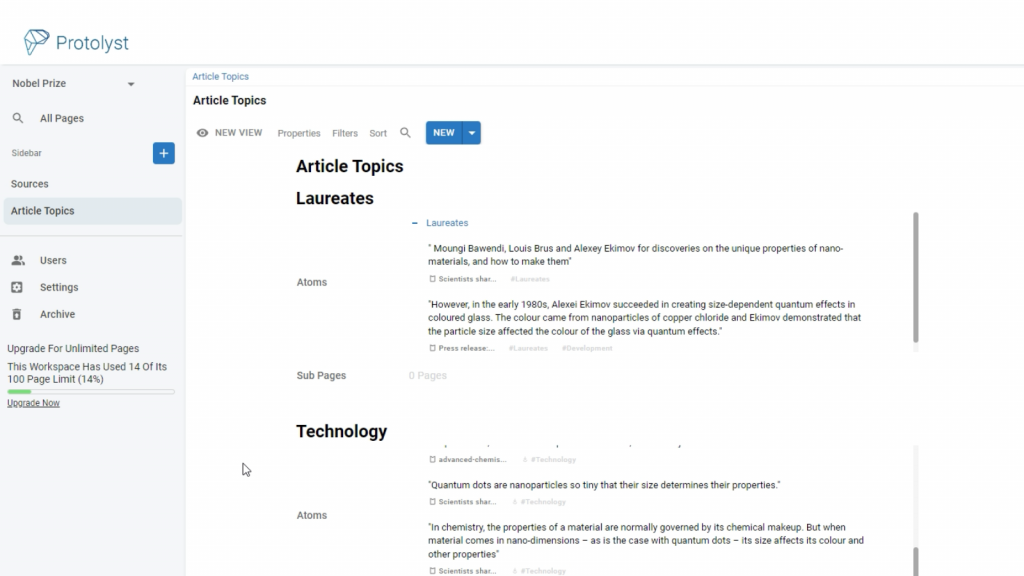
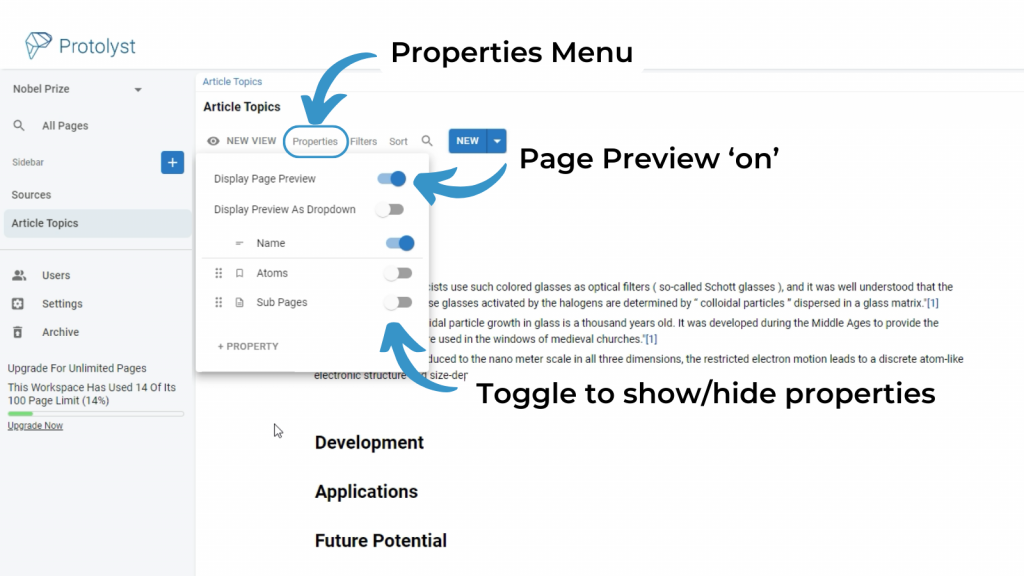
In the Properties options switch on ‘display page Preview’ and this will show the text inside each Page in the current Table. Toggle the other Properties off to display just the text you’ve written as a cohesive document. (You can rearrange the rows in your table to change the order of your article.)
Download this as a doc using the Page Options Menu (3 dots button) in the top right.
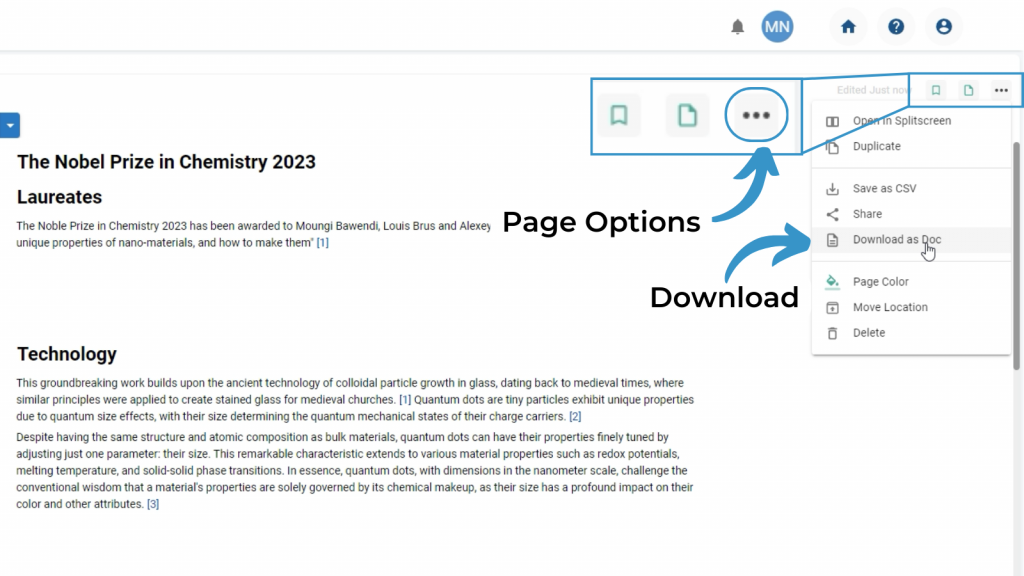
The doc will have an integrated references section included and you can make further edits and add formatting to your document to finish up your article.