Once an Atom is captured, connections can be made to anything else in a workspace, for that knowledge or important detail to be used in other areas of your workspace.
Connections are added across your workspace by creating links between the Atom and other Pages in your workspace. These may be referred to as Tags or Links, and every Tag you add will correspond to a Page within your workspace.
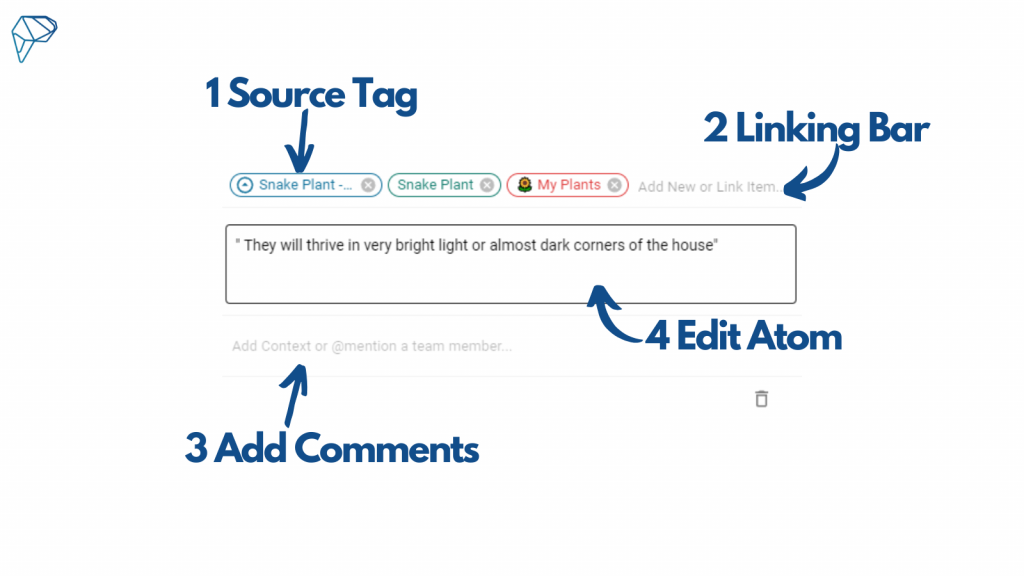
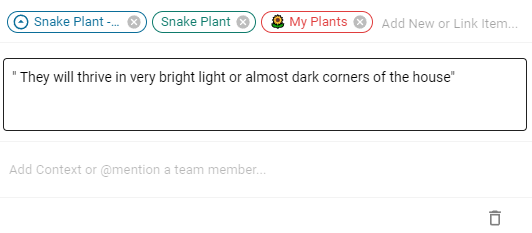
Source Tag #
After hitting Capture to add the atom into your workspace, above the atom text you will see some coloured ringed text. This is a Link between the Atom just captured and the current Page.

This first Link/Tag is always created whenever you capture an Atom and acts as the Source of your Atom. No matter how many other Links are added, this Source link can be distinguished by the source icon – a circled up arrow – at the beginning of the link.
Wherever you view and Atom in your workspace, clicking the Source Tag will navigate you back to the source of your Atom.
Adding Tags to your Atoms #
Next to the SourceTag, you will see ‘Add New or Link Item‘. Here is where you can start typing the Title of another Page in your workspace to add a Tag and Link this atom to it, or browse through the list of Pages in your Workspace to select the Pages you want to link this atom to.
Link the Atom to several other pages in your workspace to make it easier to find when you want it.
Whenever you view the Atom, you will always be able to see the Tags/Links added as they display above the atom itself. Sometimes these Links may also be referred to as Tags.
Links can be added to an Atom at any time. Click on an Atom to open the Atom bar. Then add links in the same way as shown above in the Linking Bar.
Linked Atom Behaviour #
Once an Atom is linked to another page, it will also display as an Atom of that Linked page.
You can see all the Pages from the list of Tags/Links above the text of your Atom.
Navigating with Atoms #
Clicking on any Links in the Linking Bar of an Atom will take you to the corresponding page.


