Here’s the basics for you to start collecting together your important information and using those details for your project. First we’ll give you the basics of adding info into your workspace, capturing the important details as Atoms and then there’s a simple work flow on how you can use those Atoms in your writing with automatic referencing. Let’s get going so you can learn the basics of Protolyst!
Getting Started #
There’s 2 basic steps; Adding Pages and Capturing Atoms and then we’ll add in a couple of other steps to show you how you can use those Atoms.
1. Adding Pages #
To start using Protolyst, you’ll want to add in some of your information and sources. Use the Blue Plus Button at the top of the Left Hand Sidebar to add a new Page into your Workspace.
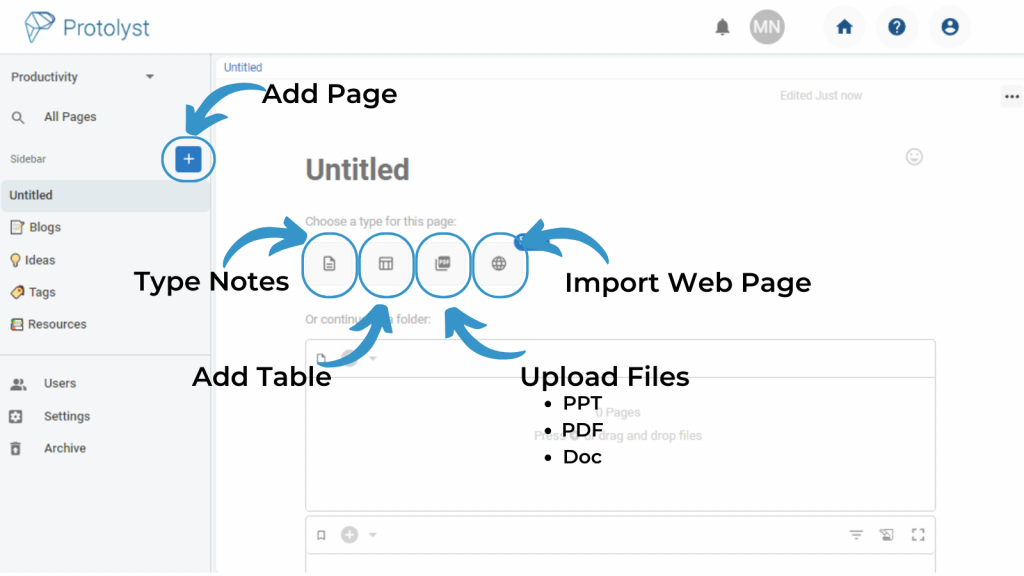
Everything you add into your Workspace like this is known as a Page
There’s different types of Pages to choose from. Select the Page Type you want from the buttons when you add a New Page.
- Text Editor – for your own typed notes
- Table – organise your Pages in a Table with Properties
- File Upload – add your files into your workspace
- Web Page – import text content from webpage by URL
Once you’ve got some content in your workspace you’re ready for step 2!
You can also upload multiple Files at once – see more here
2. Capturing Atoms #
Atoms are the golden nuggets, key details, takeaways, highlights, important ideas and concepts in your information that you want to remember, use and access. Any text you save as an Atom is lifted out of the source Page so that you can use, find and access it across your workspace.
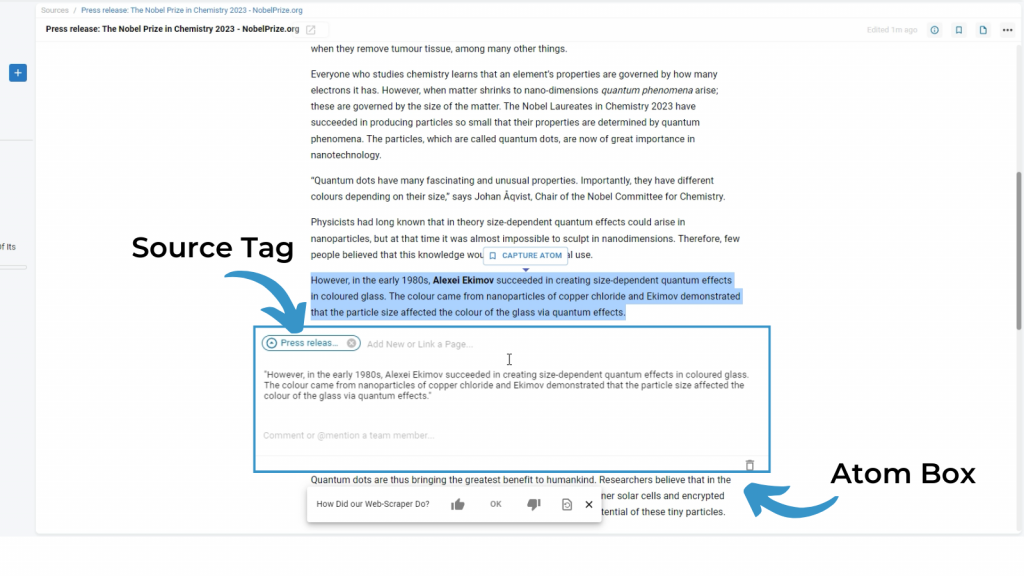
Highlight the important piece of text and then use ‘Capture Atom‘ to save it as an Atom.
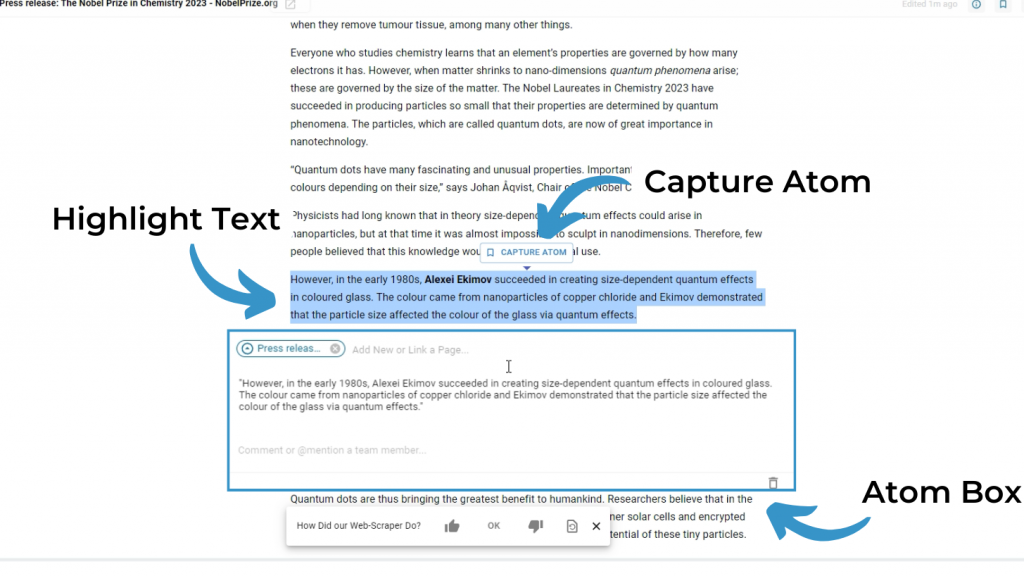
The Atom Box will appear showing you the text you have saved as an Atom. Click outside the box to carry on capturing more Atoms.
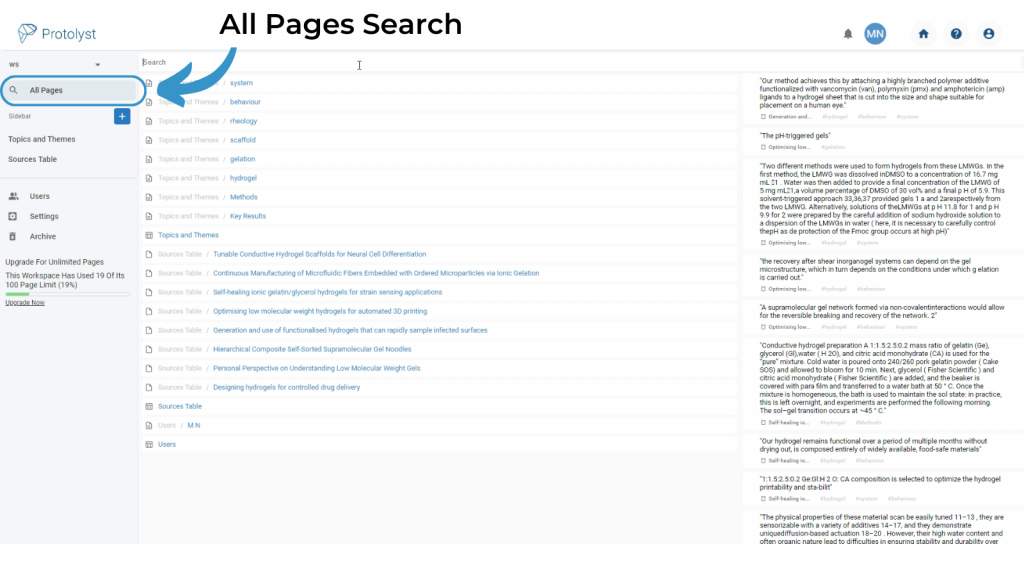
Search and browse through all your Atoms in All Pages Search. Type a Keyword at the top of the page to search through them all
A Simple Work Flow to use your Atoms #
This is a simple work flow for you to get familiar with how Protolyst works. Use Protolyst to organise your notes, distill the most important information in those notes as Atoms and then use your Atoms in your writing.
1. Add your Sources into your Workspace (See above)
2. Capture your Atoms from those Sources (See above)
3. Use those Atoms to write
You can drop your Atoms into a Text Editor Page to add those ideas into your page and use them in your writing! Whenever you add an Atom into a Page, it will automatically add in a Citation and Reference to the Source Page.
To start writing with your Atoms, add a New Page and set it up as a Text Editor Page.
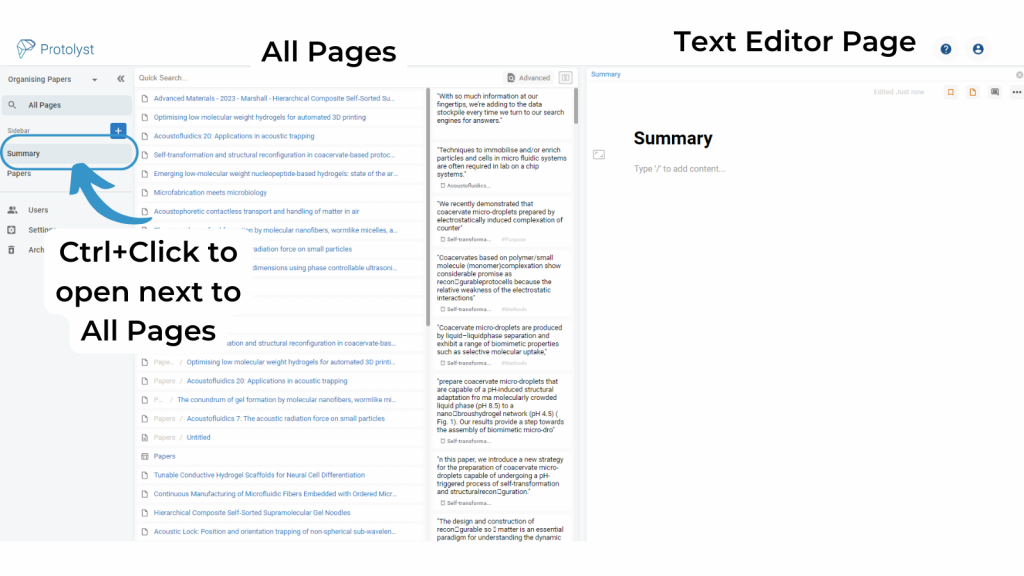
To have your Atoms list open alongside a New Notes Page so you can drop them in, you’ll need to use Splitscreen view to have All Pages with all your Atoms, and your new Page where you’ll be writing open side by side. To open a Page in Splitscreen use CTRL+Click.
Drag and drop the Atom into your Page. This will add the Atom text into your Page, create an in-text Citation, and a References Section will appear at the bottom of your Page.
Repeat for as many Atoms as you want. Once added in you can edit the Atom text to integrate it into your writing.
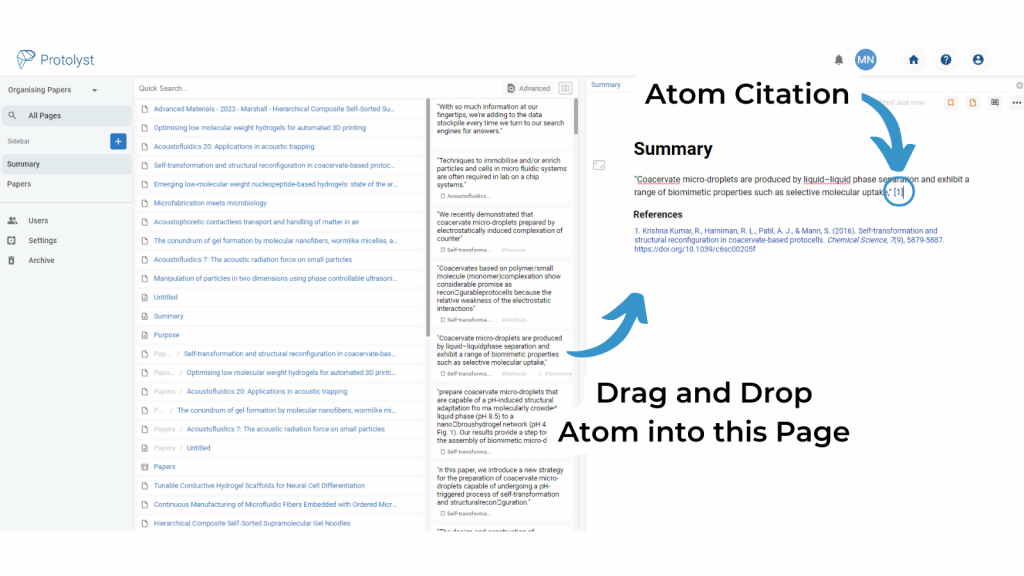
When you captured your Atom, the Atom box appeared, and above the Atom you might have noticed an encircled Page Title. This is the Source Tag, automatically added to link your Atom to it’s Source Page in your Workspace. This is used to create the Citation when you add your Atom into a Page. Clicking that Link will take you back to the Source of your Atom – and it’s exact location in the Source Page!
If you’re looking to do more with your Atoms and workspace then you should check out some of our other Docs, guides and information where you can learn more about organising and categorising your Atoms to have curated collections of information at your fingertips.


