Protolyst is built for the capturing and collation of insights, which lends itself well to keeping track of the key insights that help with making a decision about next steps for a candidate as part of your recruitment process. This setup described gives you a base workflow to get started, designed for you to adapt and evolve it to better suit your needs!
In this workflow you will build a knowledge base by capturing atoms from the application documents submitted by your candidates. You will also need some evaluation metrics or criteria.
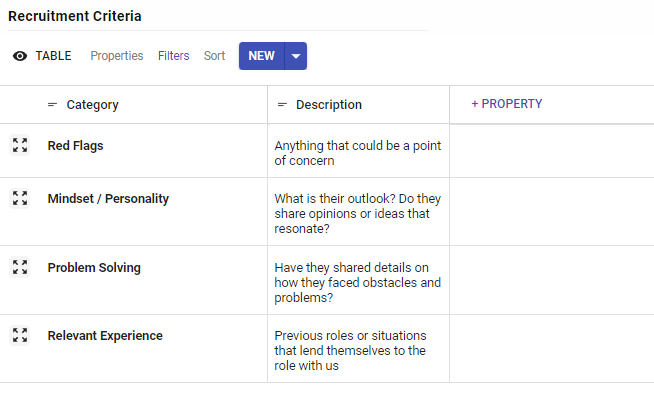
1. Create a Recruitment Criteria table #
The recruitment criteria table contains the metrics around which you will be gathering insights and evidence for each candidate. There’s the option to add properties to this table such as a description or any further properties useful in your workflow.
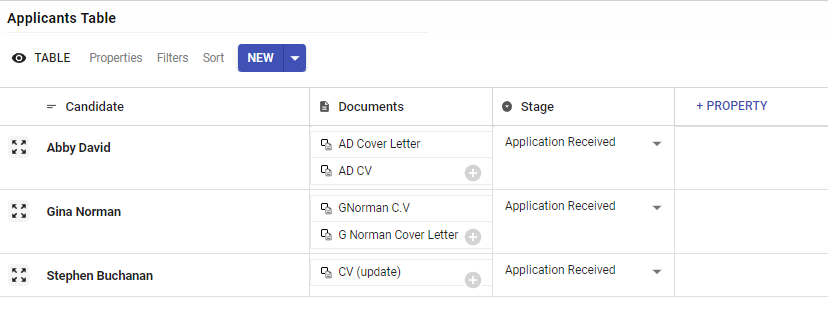
2. Create an Applicants Table #
This table will contain all of the information about candidates applying to the role. Drag and drop relevant files into the table to upload them.
A sub-pages property is used to keep all the documents or files shared by a particular candidate, as well as a single select property to indicate what stage of the recruitment process they are at. There’s the option to add further properties to this table to support your workflow.
3. Gather Candidate Evidence #
Atoms can be captured from documents uploaded and tagged against relevant criteria in the Recruitment Criteria table.
Tip: Use Splitscreen to have a document open alongside the recruitment metrics table to remember all criteria you are collecting insights against.
4. Set Up an Applicant Review Table #
The Applicant Review Table makes use of an alternative table view for the Applicants Table. Different Table views can be created to display different properties as well as introduce filters and sorts on the information in your Table.
In this Applicant Review view, you want to organise the atoms you have collected by the recruitment criteria, and so we need to set up a Filter on an Atoms property in the table.
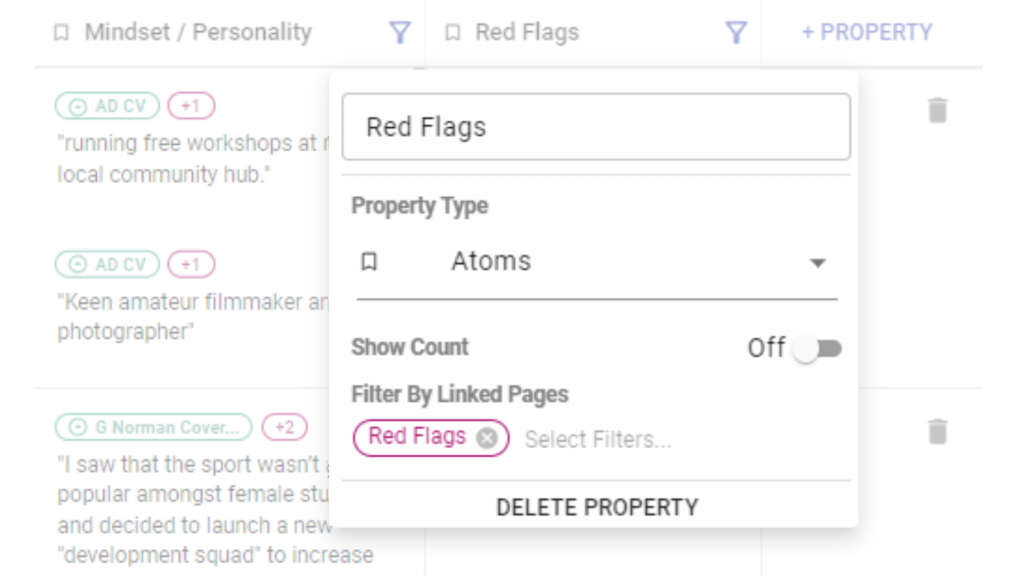
Create a new Table View from the Table Menu and add a new property, change it to Atoms type, and then select one of the Recruitment Criteria from the workspace list. Add more properties so that you have a column and Atoms filter for each of the Recruitment Criteria. This will automatically display all the Atoms for a particular candidate that are tagged against the chosen Recruitment Criteria.
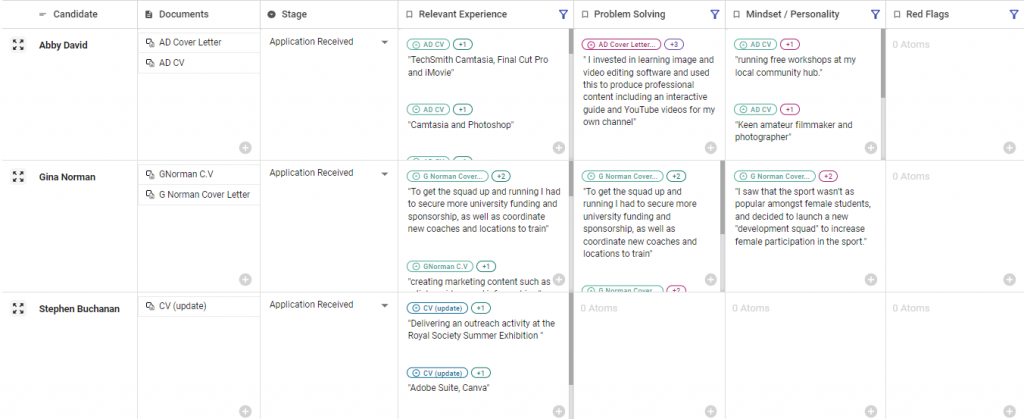
5. Get Reviewing #
The Review table has gathered the insights you collected for each candidate across your chosen Recruitment Criteria. You can now use those insights to support you in making a decision on the next steps for each candidate.
Once you have decided, you can update their recruitment stage, and extend your workflow to capture and collect evidence as candidates progress through different stages of your recruitment process.


