You can view the information in your Tables in different ways and you can save different configurations as a ‘View’ so that you can quickly swap between them.
Organising Information on Display in your Table #
Within the Table view, next to the New Button, there are 3 menus providing different options for organising the information inside your Table; Properties, Filters and Sorts
Table Properties #
Open this Menu to see a list of all the Properties added to your Table. You can use the toggles to show/hide each Property from the current view
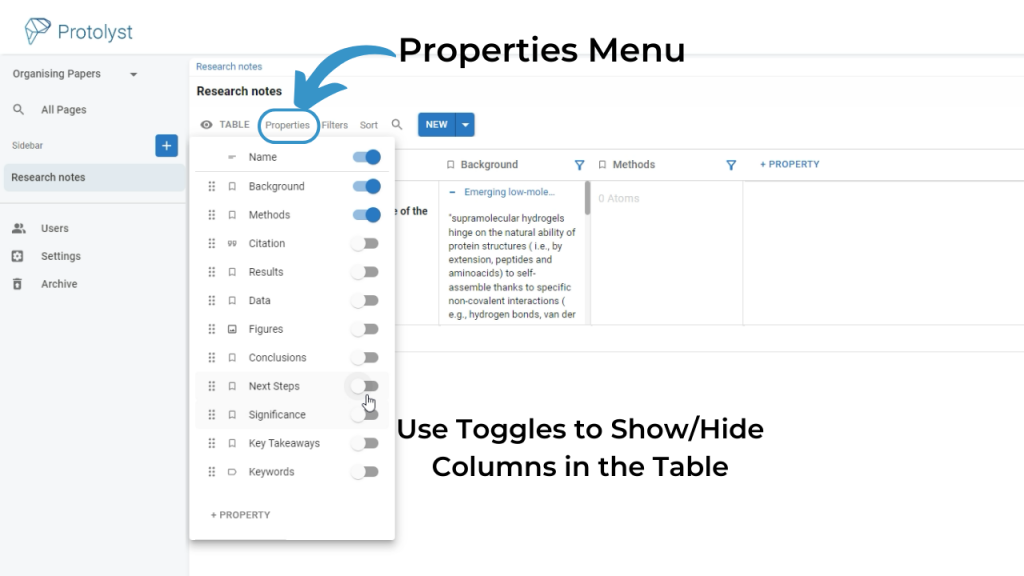
From here you can also add Properties into your Table using the + Property option at the bottom of the list of Properties. You can also delete Properties from here too, right click on a Property and choose Delete.
Table Filters #
Adding Filters will show information in your Table that satisfies particular criteria. Use the dropdowns in the Filter Options to setup a Filter, based on the Properties you have added to your Table, and apply it to your Table.
The dropdown menus allow you to use different Property Types and set the conditions to exclude rows from displaying if they don’t meet the criteria you set.
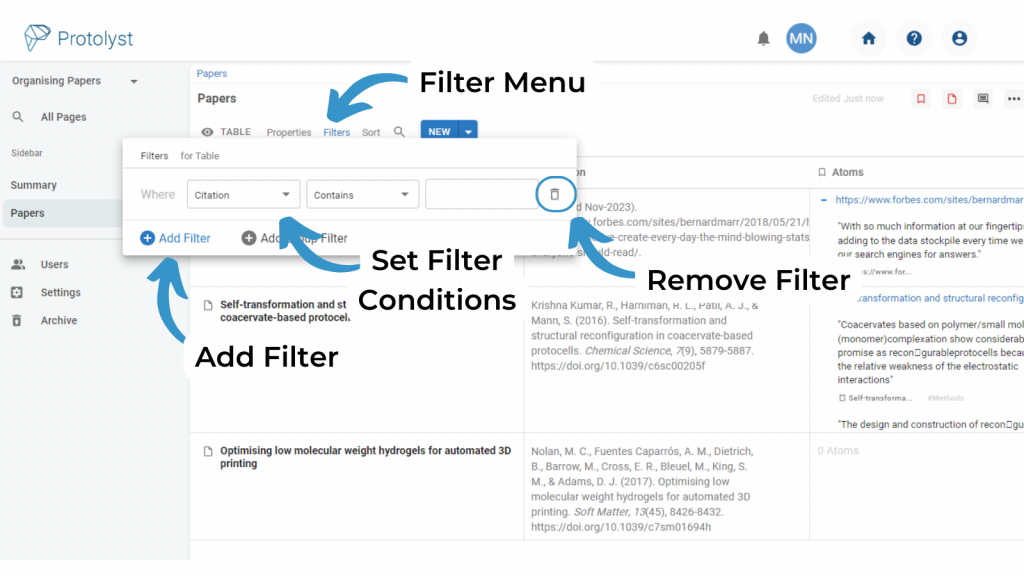
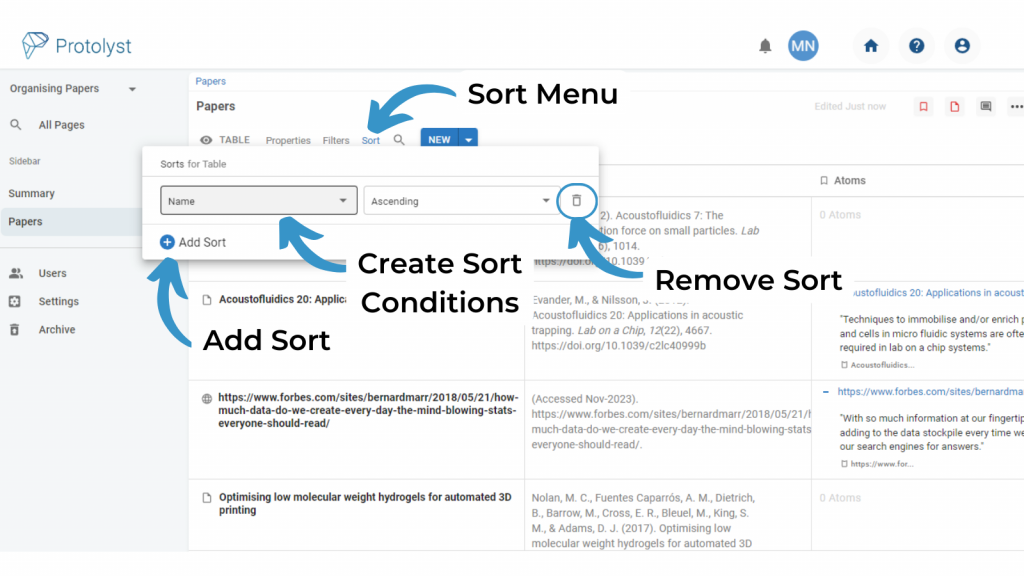
Table Sorts #
Apply Sorts to your Table to organise the rows of your Table into a particular order. Sorts are available for some Property Types as well as for organising into alphabetical order
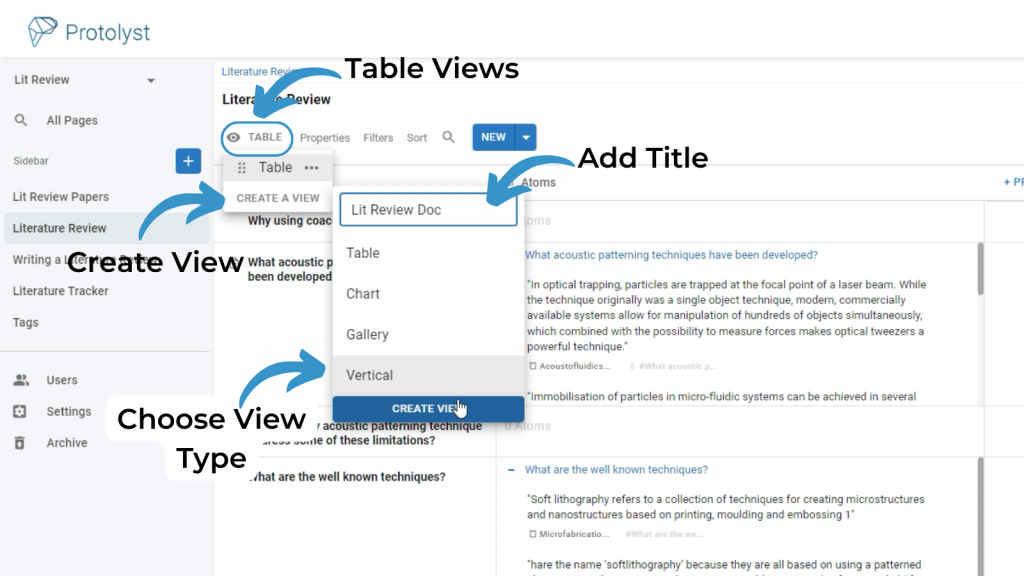
Creating a Table View #
Once you have a combination of Filters, Properties and Sorts that you like, you can save it as it’s own View to quickly get to it and see other views of your Table. Use the Eye Icon to see a list of all the Views of your Table, choose Create a New View – then select the View Type (see below) to add another View into your List.
Open up the menu again to update the title of your current View using the 3 dot button. Assigning Names can help you to move quickly between different Table Views.
Swap to the New View you created, by selecting it from the list. Change the Properties, Filters and Sorts to display the information you want.
You can also select different View Types, in addition to ‘Table’ there is Chart, Gallery and Vertical. Let’s take a closer look at each
Table View Types #
Traditional Tables or Rows and Columns give you many different options and combinations to display your information but sometimes there are other views you want to use to browse information in a table.
Table #
Organise your information into Rows and a series of Columns (Properties) displaying the information for each row.
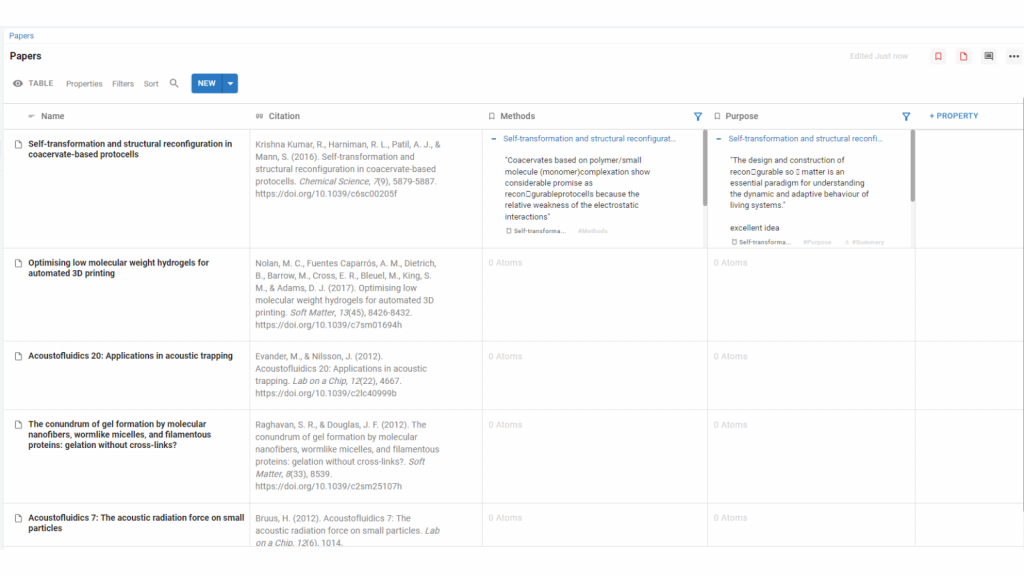
Freeze the Name Column in the Property Options to help with Tables that have a lot of Properties on display. Click on Name and then toggle Freeze Column on.
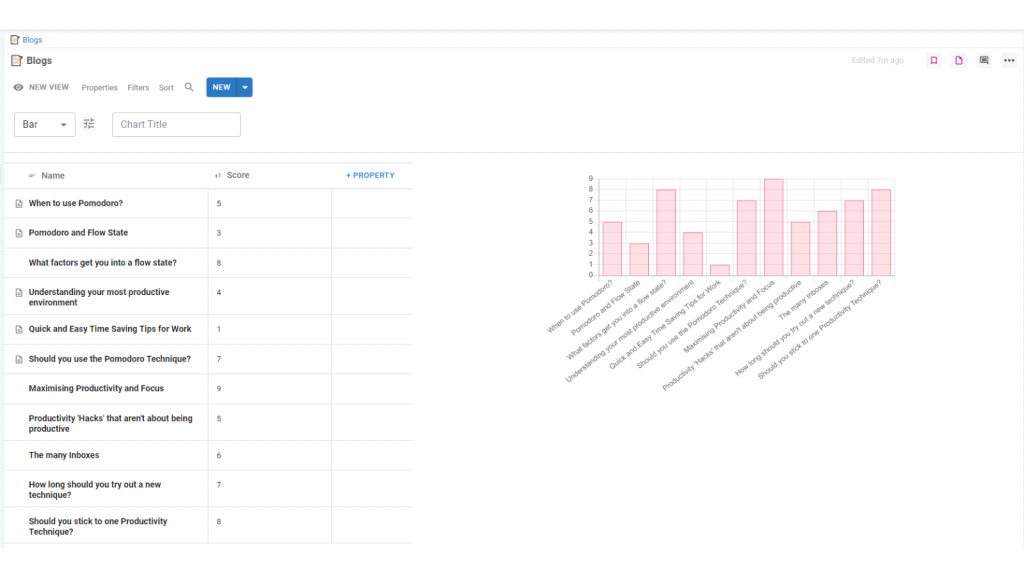
Chart #
Charts are available for you to plot properties against each other for a visual summary, particuarly if you’re using Numbers!
Use the Properties Menu to display the properties you want to plot. Change the options at the top to update and customise your chart.
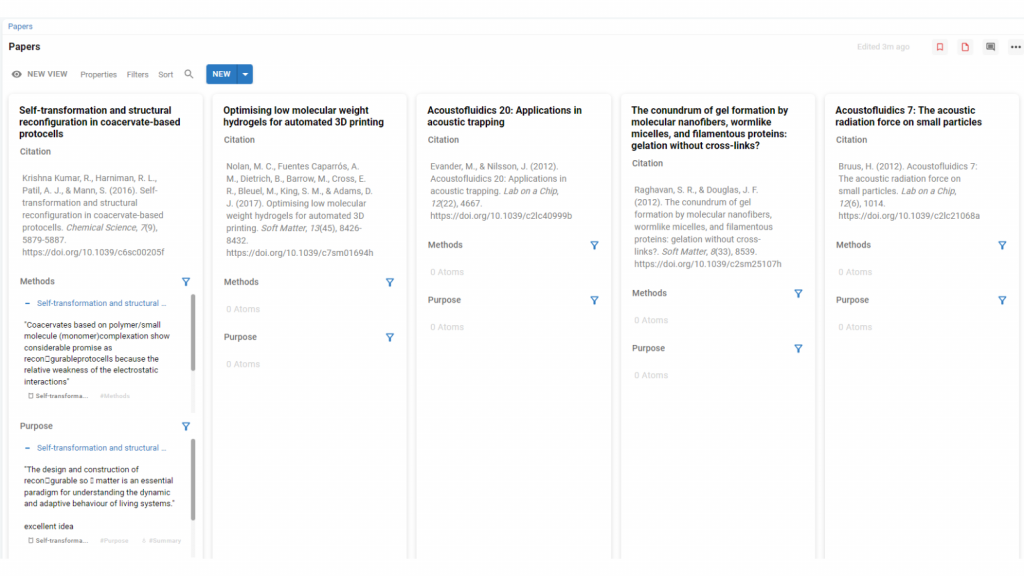
Gallery #
If you have any Image Properties in your Table, you can use them to browse the rows of your table as a selection of Cards.
You can use the Properties, Filters and Sorts to organise your Cards and change the information that displays for each one.
The Properties Menu has an additional option that allows you to select an Image Property as the ‘header’ i.e. an image that will display in your Card.
Vertical #
Vertical view transposes your Table so you can browse it like a document. Each Row of your Table displays sequentially after each other, with the Properties displaying vertically in the page rather than horizontally.
You can use the Properties, Filters and Sorts to change the information that displays.
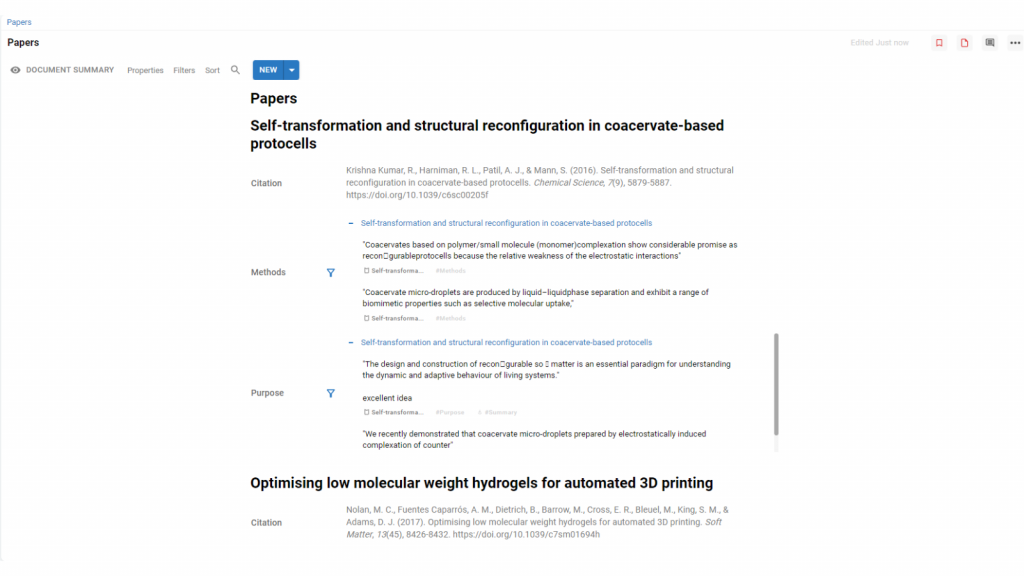
The Properties Menu has an additional option that allows you to ‘Show a Page Preview’. When turned on this will display the contents of your Rows in this view. This allows a Table to be used to craft documents with different sections and pull them altogether into one cohesive document comprised of different sections. See more on this work flow in the Literature Review walkthrough on YouTube
Table Embed #
Table views are useful to view particular information in different parts of your workspace through Table Embed
Tables can be added as a Section of a Text Editor Page. They can be created New or an existing Table can be Linked to pull information into different pages across your workspace.
When adding a new Section to a page (hover over an existing section and click (+)) , navigate to Link a Page option in the Section Menu
This opens up the Search Bar to locate the Page of interest, start typing the name of the Table you want to Embed and select it from the list.
The Table will be added into your page. To expand and view the Table, select the ‘View Table as Embed’ option on the right hand side.

Once the Linked Table is expanded to view the contents of the Table, a Table View can be added or selected to show the information of interest on that Page alongside the other content.


