Notes can be used to capture any typed information. You can use them for journal entries, to-dos, to log ideas sparked throughout the day or to capture important info that you’re reading or listening to. Distilling key points from your notes is a habit to introduce to get started with connected note taking.
Capturing Atoms from your notes, allows you to connect each individual detail wherever it’s relevant in the rest of your workspace. Take a closer look at the video on different ways to take Notes on Protolyst
Create a Notes Page #
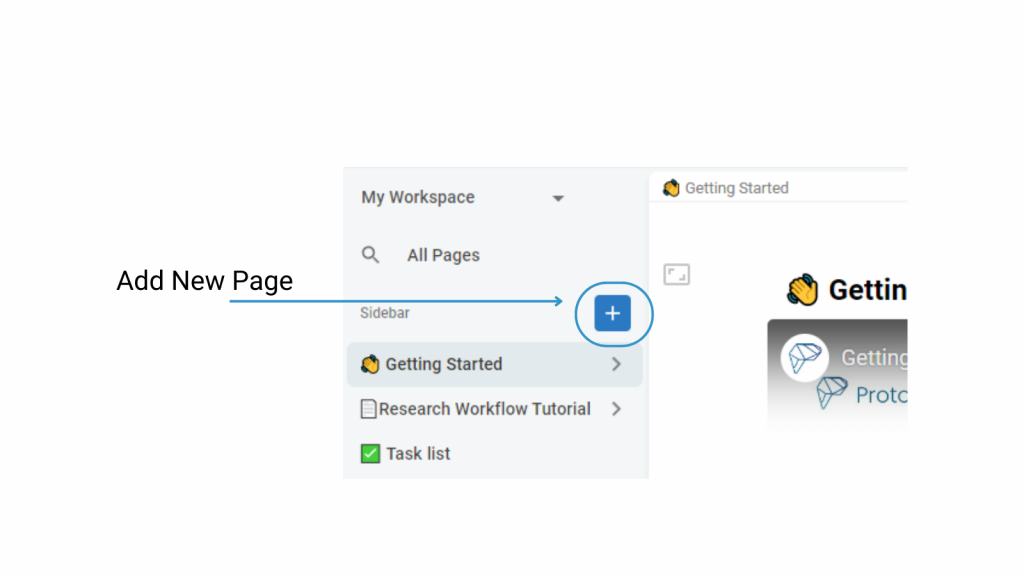
You can add a New Page to your workspace using the + New Page button at the top of your Sidebar, select Text Editor Page Type and then add everything that you want into the Page.


Text Editor Pages can have several different Sections, giving you the option to add Images and Videos alongside your text, as well as adding and linking to other Pages in your Workspace.
To download any Pages in your workspace, use the Page Options Menu (3 dots in the top right) and select ‘Download as …’
Once you have made your Notes, distill the key points as Atoms to make them accessible and useable across your workspace.
At any point, you can view and search through all the Pages and Atoms in your workspace through the All Pages option at the top of your Sidebar.
Importing Sources to take Notes #
Choose the Webpage Import option from the differnet Page Types to import a Source from URL into the workspace.

You can capture Atoms directly from these pages.
When you capture an Atom, the Atom box will open and display the captured text. You can edit this text and add further text in this box.
Adding your Sources as Sub-Pages #
Sub-pages are pages that sit (or nest) underneath another Page. Atoms captured in sub-pages display for the parent page.

If you add all your sources as Sub-Pages or a Notes Page you can easily view all the Atoms captured from several sources in the Atoms list of the Notes Page.

Add your Atoms into a Notes Page with the Cite in Page button or with drag and drop
Importing Atoms from other Pages #
Atoms you have collected elsewhere in your workspace, can be imported into a New Page for you to use.
In the Atoms Section, use the ‘Add Atom’ Plus Icon at the top left and select ‘Import Atoms’. You’ll then be prompted to select the Page with the Atoms you want to use.

Once selected, a Link will be created between the Pages, and the atoms will display for your current Page. Linked Pages are indicated by an upward left pointing arrow next to the page title

Drag and Drop Note-Taking #
You can drag and drop highlighted text from an imported Web Page directly into a Notes Page. This creates an Atom and adds it into your Notes in one. See this in action in the video below
To open 2 pages side by side in splitscreen, use SHIFT+CLICK to open a Page next to the Current Page.
Organising your Notes #
You can add and organise your Notes in a Folder or Table to stop your Sidebar becoming cluttered.
Creating a Folder for your Notes
Add a New Page to your workspace and give it a Title. To use this Page as a Folder, you can leave the Page Type unselected and add Pages in the Add Page Section underneath.

Add your Pages here and they will list in this box.
Using a Table for your Notes
Using a Table for your Daily Notes will keep them all in one place in your workspace and you can make use of Templates & Properties if you want your notes to have the same structure
Add a New Page to your workspace and select Table type.
Each Row of your Table can be a Notes Page. Add New Rows and open up the Page to add in your Notes.
Tables also give you the option to add further Properties to organise your Notes. You could use Date Created or Tags to indicate what your Note contains.
<example notes table with Date Created and Tags list>
Table Templates for your Notes
Using a Template will automatically populate your page with particular content. Make use of Templates if you have a particular structure you’d like to use regularly for your Notes.
1 Create a Row in your Table and add the structure and content you want in each Note
2 Open the Page Properties Menu (top right of the Page) and select ‘Save as Template’
3 Add a New Row into your Table
4 Open the Row up into full screen view. Select Template from the available Page Types and choose your Template
Default New Page Location #
You can set up your workspace to automatically add New Pages into a particular Location in your workspace. Open up Settings at the bottom of your Left Hand Sidebar and then choose the Location for all new Pages to be added to – this could be a Folder Page or a Table. When you add new Pages, they will automatically appear in the chosen Location.


