Portals are built in a similar way to Workspaces using Pages and Tables, and are then Published to share their contents with a wider group of Protolyst users.
Creating a Portal #
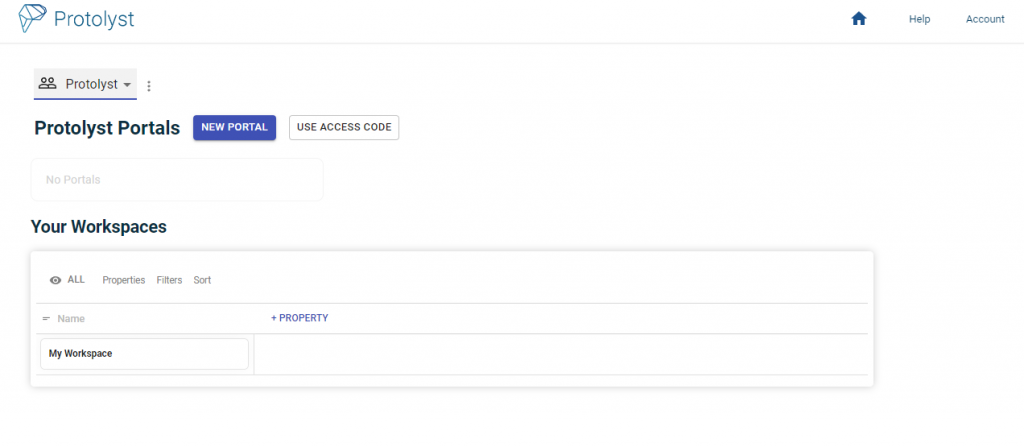
In your Protolyst Dashboard, across the top, above the list of your Workspaces, there’s a Portals Section, with ‘add New Portal’ and ‘Use Access Code’ buttons.
To get access to create Portals please contact us on hello@protolyst.com

This Portals Section is where you can browse all your Portals. To access an existing Portal that appears in this section, just select View.
Clicking the Add New Portal button prompts you to add a URL for your Portal
This will then open up the Portal Overview, where you can edit the Portal Title, add Imagery, add a summary of your Portal and create new Portal Projects (also called Sharespaces)
Portal Project Layout #
Once your Portal has been created, select ‘Create New Sharespace’ to create your Portal Project. Add a Name and this will open up your Portal, ready for you to start building the contents.
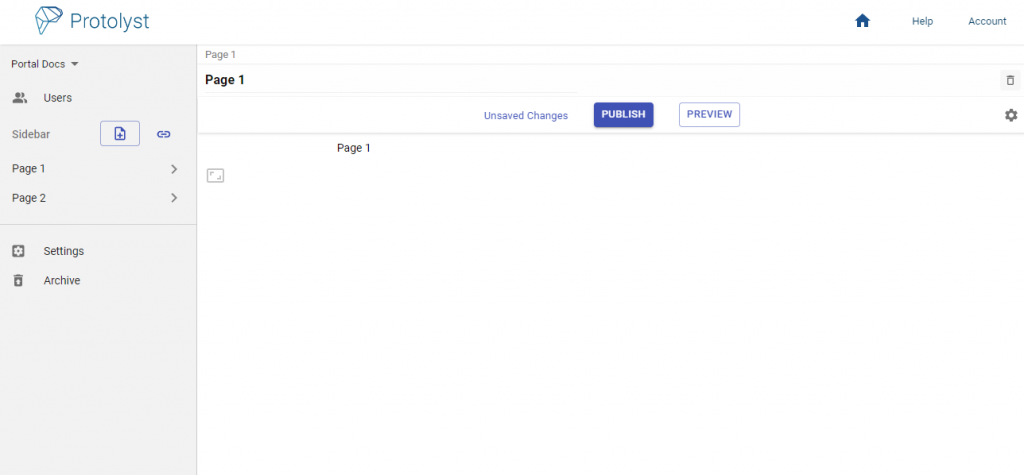
Portals have a very similar layout to Workspaces with an additional bar running across the top of each Page with ‘Publish’ and ‘Preview’ buttons.

Sidebar #
In the top left, we have the Portal Name, underneath it is Users – this pulls you through to a Table where you can see all the information about Users that you add to your Portal. There’s more information on the different Access Permisisons you can give to members of your Portal below – you can invite collaborators to support with building your portal, or Participants to view the contents of your portal.
This table can also be used to Capture and Display Information about your Users
The rest of the Sidebar is for organising the contents of your Portal. All your Pages and Tables added will appear here.
Portal Tables and Pages are created in a similar way to Workspace Pages and Tables, with some further features explained in this section.
Content developed in Portals must be published for Participants to view it
Settings #
At the bottom of the Sidebar are Settings. This area gives you options for this entire Portal Project.
Any Settings changed here apply to the current Portal Project. There are several Settings and Options here, and the key ones to note are:
‘Add People‘ button – Here is where you can add people directly using email addresses.
Anyone added that already has a Protolyst account will have the Portal appear in the Portals Section of their Dashboard. Anyone who doesn’t have a Protolyst account will receive an email inviting them to sign up to get access to the Portal.
‘Generate an Access Code‘ button – Creates an Access Code for people to enter when they sign up to Protolyst to give them Participant access to this Portal Project.
User Types and Permissions #
The Settings Area displays a Members Table list of everyone added to the Portal, and you can remove Members (using the Delete icon at the right side of the entry) as well as view and edit the Access Permissions of anyone added with the ‘Change Permissions‘ button:
- Admin – Admins have full editability of the Portal and it’s contents
- Contributor – Contributors can edit the Portal with some limitations
- Participant – Participants interact and engage with the ‘Published’ content of the Portal
Here you can also edit the Portal Name, and change settings to customise the appearance of Fonts in your portal and set the default location for New Pages added into the Portal, typically the Sidebar
Follow the links for information on the other settings underneath the Members Table in Settings:
- Default Sharespace, (coming soon)
- Export to Workspace, (coming soon)
- Portal Stage Property, (coming soon)
- Users Stage Property, (coming soon)
Account Settings #
In the top right, there are Home, Help and Account buttons, related to your personal account, the same as in Workspaces.
- ‘Home‘ will navigate you back to your personal dashboard
- ‘Help‘ will direct you to the Docs pages for further information
- ‘Account‘ is where you can update your email, password or sign out of Protolyst


