Reading the literature is an essential step in building a strong foundational knowledge for research projects. Building your knowledge can help you to identify research gaps, deepen your understanding of the field with awareness of the current state of research and spot opportunities to make innovative contributions to your field.
However there are far more papers published than it is possible to read. So for any papers that you do choose to read, it’s important that you effectively gather the details and info needed from the papers, so you don’t have to re-read them over and over!
On Protolyst, you can extract sections of text in your papers, then add your own thoughts and ideas to them by capturing Atoms. Each Atom you capture is accessible and viewable across your workspace, so you don’t have to have a paper or summary notes open. Additionally if you categorise your Atoms you can set up overviews of your information using Tables.
Scroll down for a step by step guide on setting this up in your workspace!
Every Atom can also be Labelled (Tagged or Connected) to different Topics. By adding Tags to each Atom, you can start to group them around different topics like Methods, Results or Conclusions to pool your information from many papers together based on their relevance to a Topic. Adding Tags saves you time as you don’t have to reorganise the information you’ve lifted out of the page into a document or spreadsheet, you just head to the Tag.
Collate Information by Topic #
On Protolyst you can extract your highlights and annotations from papers as Atoms and add them into a centralised searchable list. This step makes all the important information and details found inside a paper, available to you without needing to have that particular paper open.
Each Atom can be organised individually, so you can organise each piece of information under relevant topics or projects, without needing to duplicate or copy the information to another folder or file. To organise your Atoms, you can add Tags to connect the Atom to multiple Pages in your workspace. The Atom will display next to every page it has been Tagged to. So you can quickly take stock and see all the information you’ve ever come across that’s relevant to a particular Topic or Project, without needing to remember where you orginally read it.
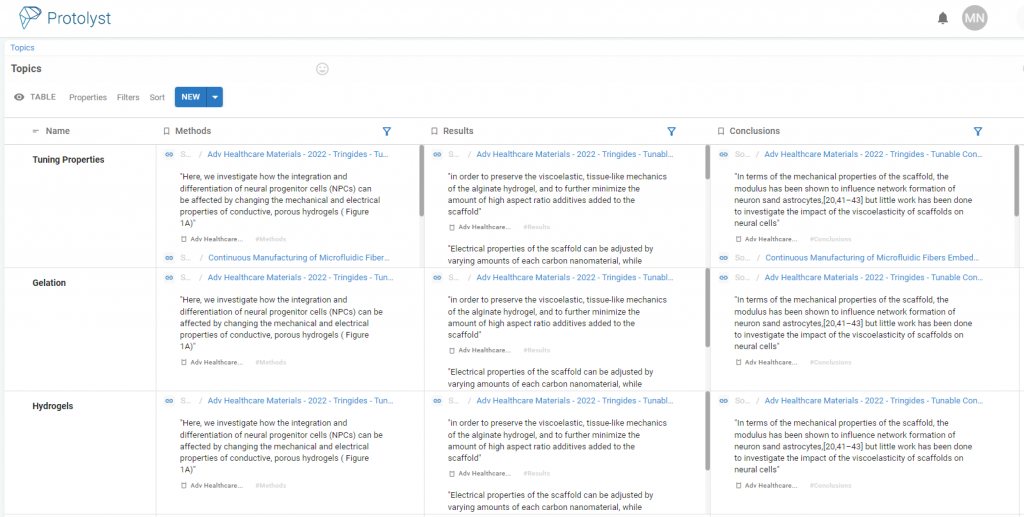
Using Tags also allows you to reconfigure your knowledge into different groupings to support you with reviewing and analysing the trends, themes and patterns as well as gaps in the field. You can set up Tables to get a gridded overview of all your information, and then separate out your Atoms based on the Tags that have been added to them.
Literature Tracker on Protolyst – Step by Step #
Here’s how to start building a system on Protolyst to organise information from papers. Below is an X step guide or you can watch a walkthrough over on YouTube.
Step 1: Set up a Sources Table for your Papers #
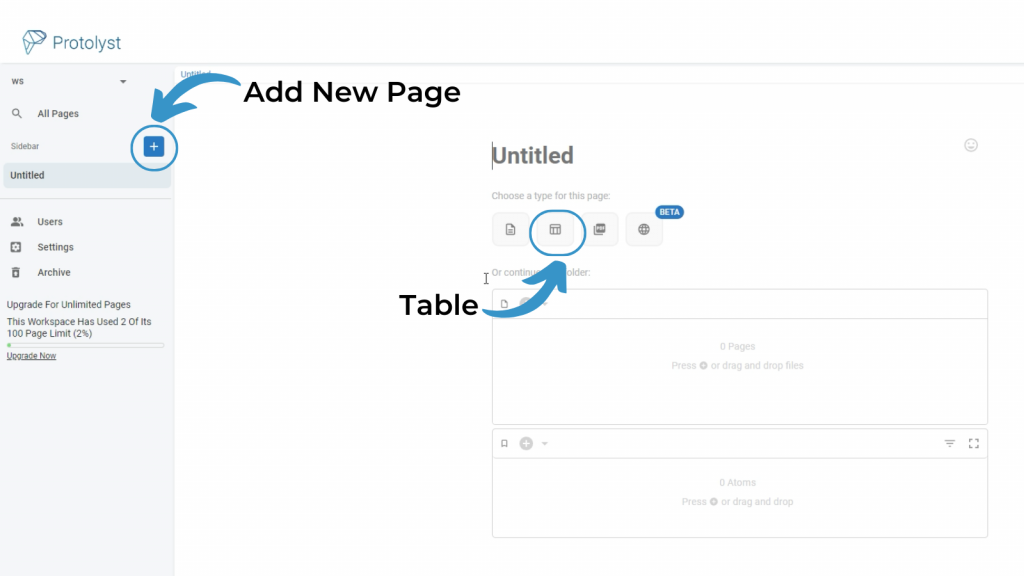
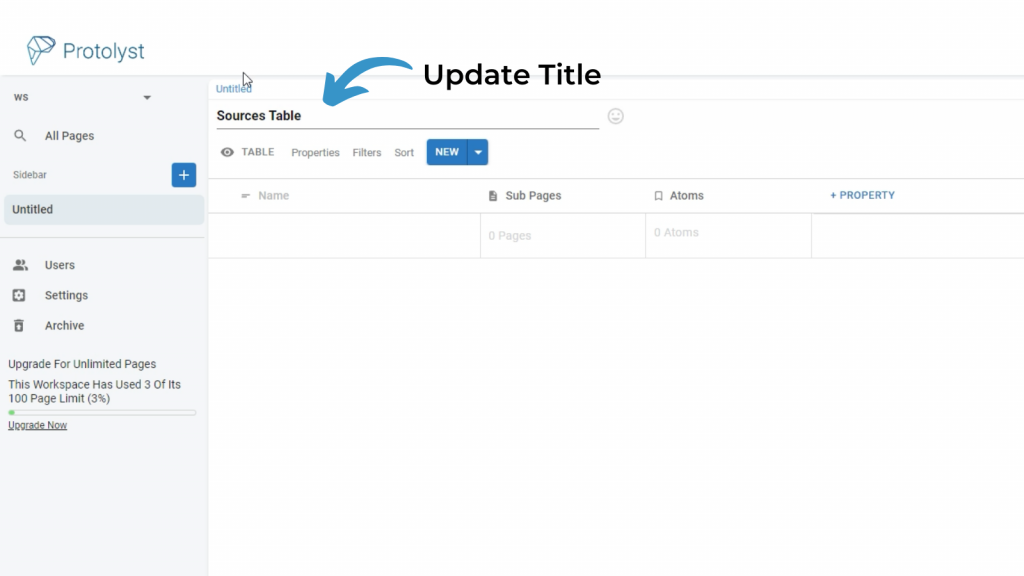
Add a New Table for all your Papers. Create a New Page using the Blue Plus Button at the top of your sidebar. In the New Page you can add a Title and choose the Page Type using the 4 Buttons. Select Table from the options.
By default a Table has 3 Properties; Name, Sub-Page and Atoms. Update the Title of your Table.
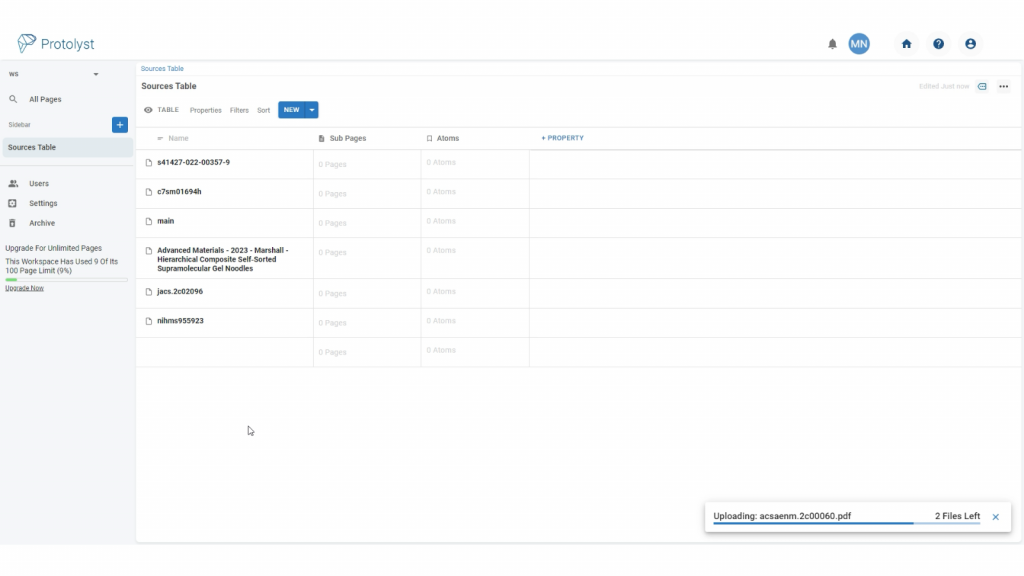
To upload papers into your workspace, drag and drop the PDFs onto the Table. Each one will upload as a separate row in your table.
Work Flow addition: You can now also use a Citations Property to automatically grab reference information for your papers!
Step 2: Set up a Tags Table #
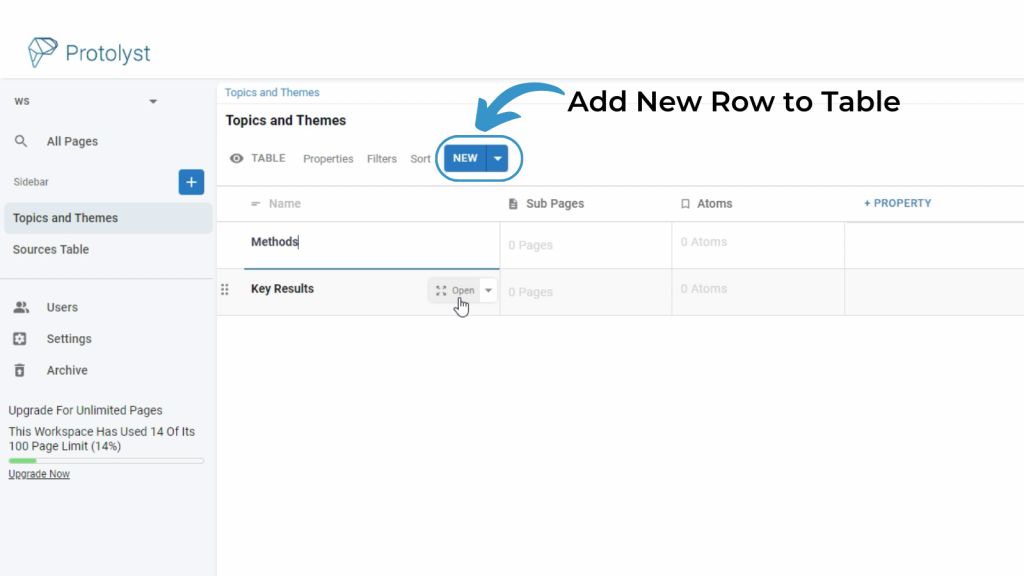
Create another Table for all the Topics and Themes which you’d like to collect your information around. This Table will hold all your Tags. Tags could be something specific to your project like hydrogels, acoustics or patterning, or concepts like methods, key results or limitations.
Add each Tag as it’s own Row to this Table
You can always add further Tags as you go!
Step 3: Read your Papers and Highlight Information #
Open up your papers in Protolyst to read them. As you come across important details and information you can highlight it and choose ‘Capture Atom’. Atoms lift the highlighted text out of the page so you can view and access it across your workspace.
Open up a Paper to read it, using the Open Button in the Table
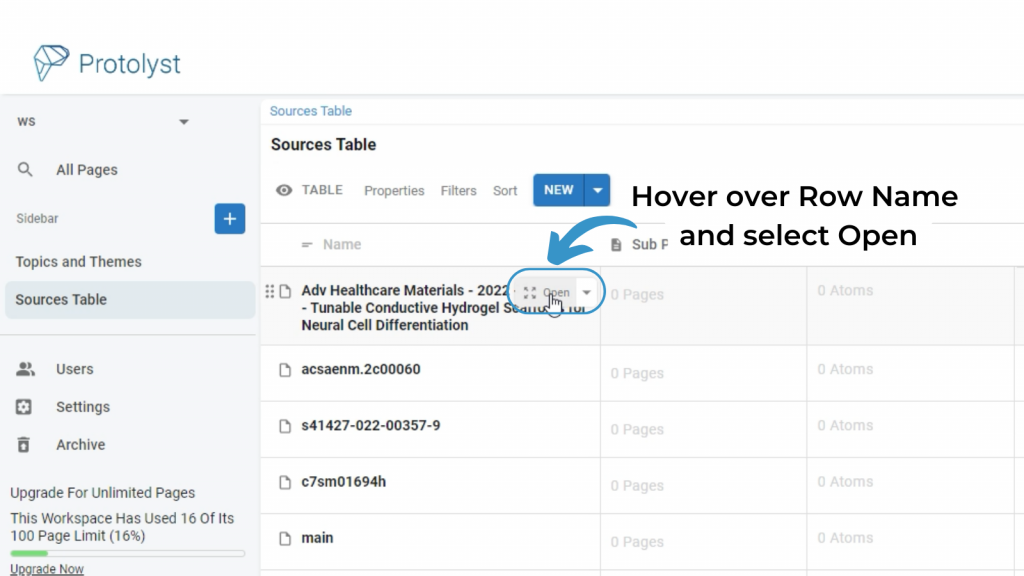
Once a Page is open you can Capture Atoms from it.
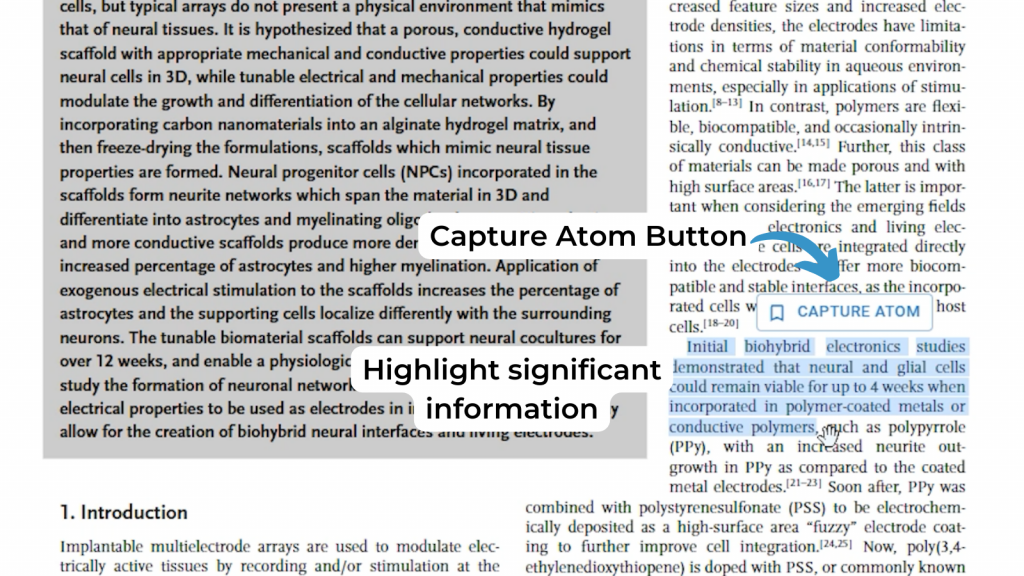
Once your Atom is Captured, a popup box will appear – the Atom Box. From here you can add annotations into the Atom box if you want.
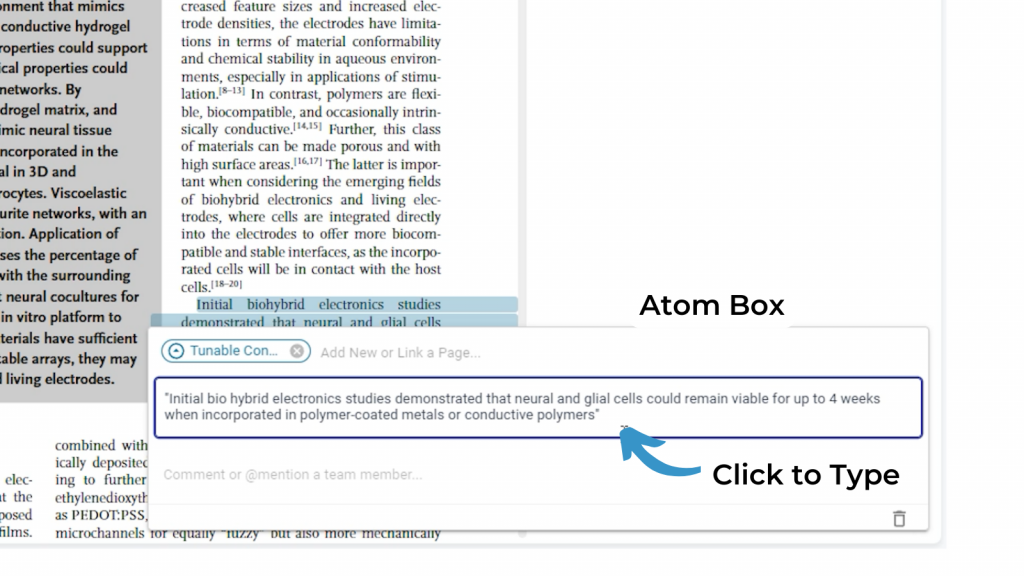
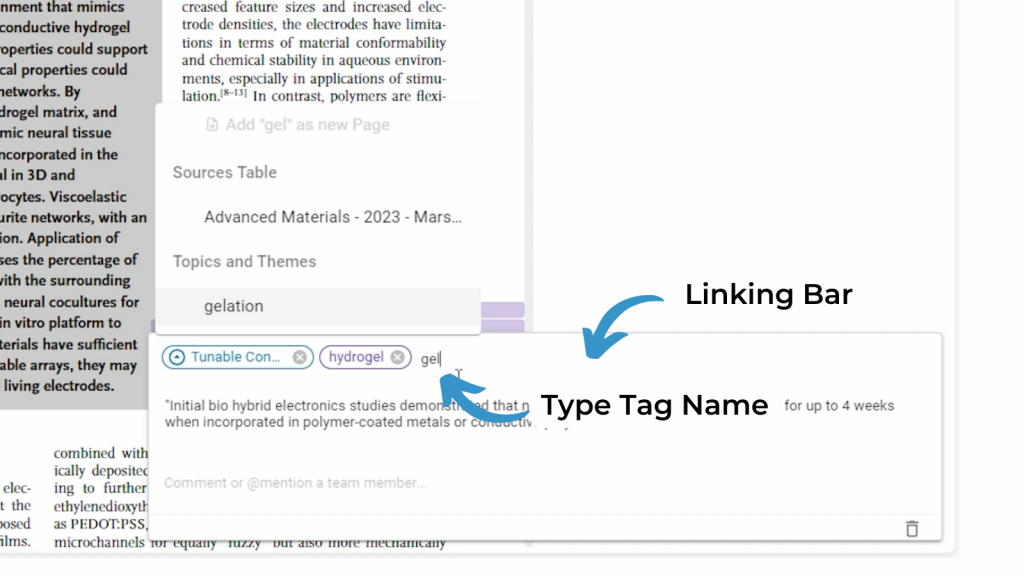
And you can also add Tags to connect that piece of information to a relevant Topic in your Tags Table. Your Atom will display for all the Pages it is Tagged to. Start typing into the Linking Bar above the Atom text, or scroll through the dropdown list of available Tags.
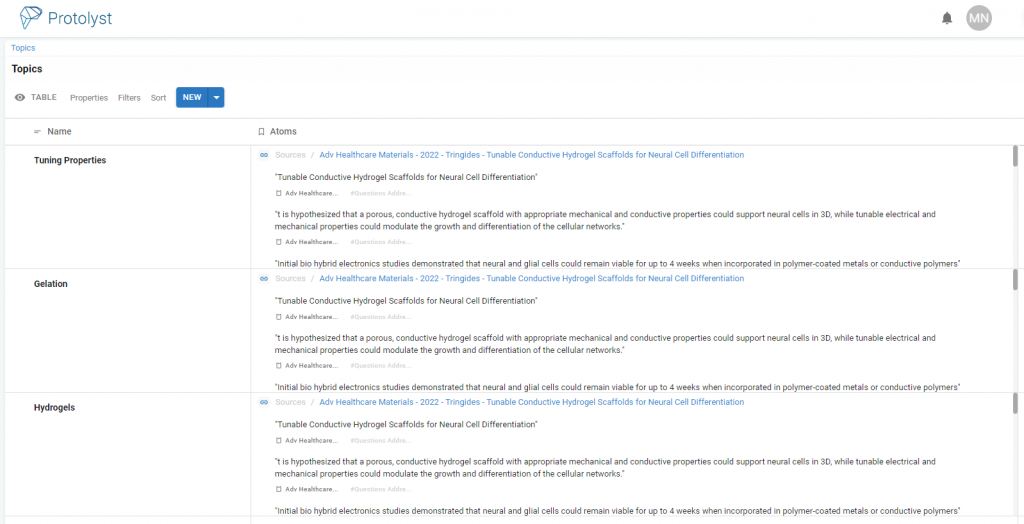
Atoms will display next to the Paper in your Sources Table in the Atoms property column, and will also display in the Atoms property column in the Tags Table next to any of the Tags you added to that Atom.
As you read papers and capture Atoms and continue to organise your Atoms with Tags, you’ll start to pool all the information relevant to a Topic from your entire literature library. Head to the Tags Table to view all the information corresponding to a particular Tag.
Adding New Tags
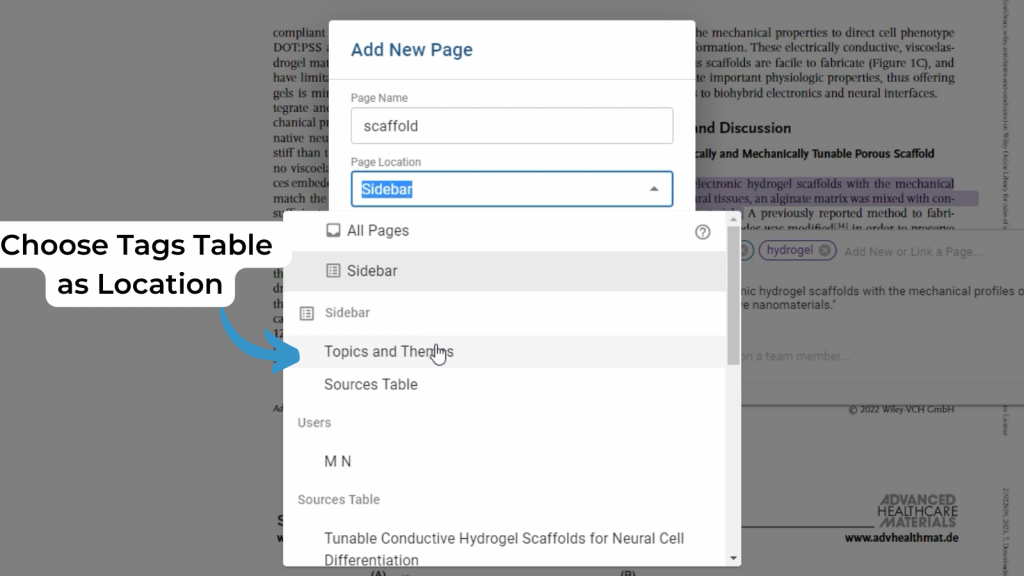
To add new Tags into your system, type out the name for your Tag in the Atom linking bar, then select ‘Add as New Page’
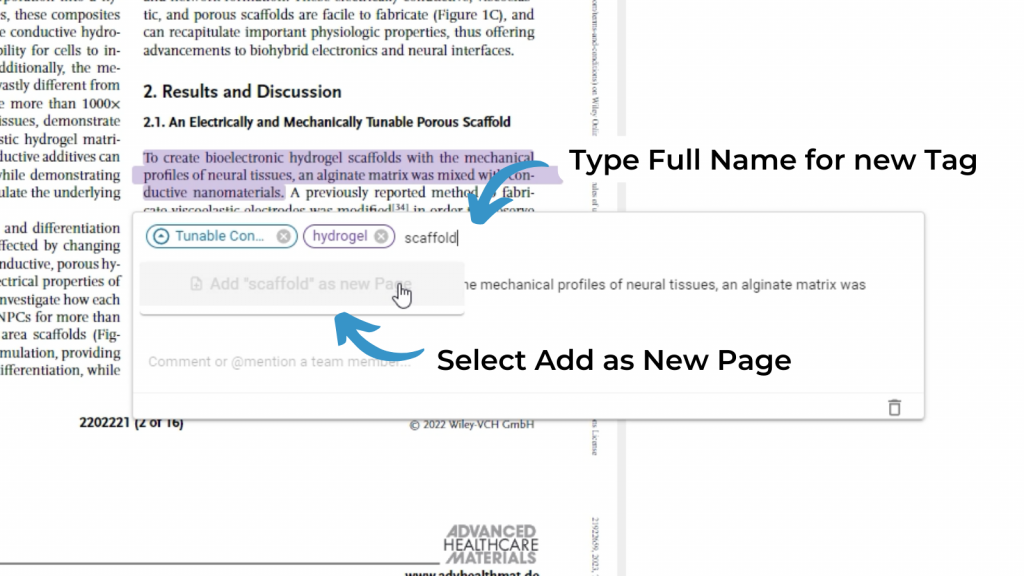
Then choose your Tags Table as the location for that new page.
Step 4: Set Up Information Overviews #
Where you’ve added Tags to organise your Atoms, you can set up your Tables to display particular information, based on the Tags you’ve added to your Atoms.
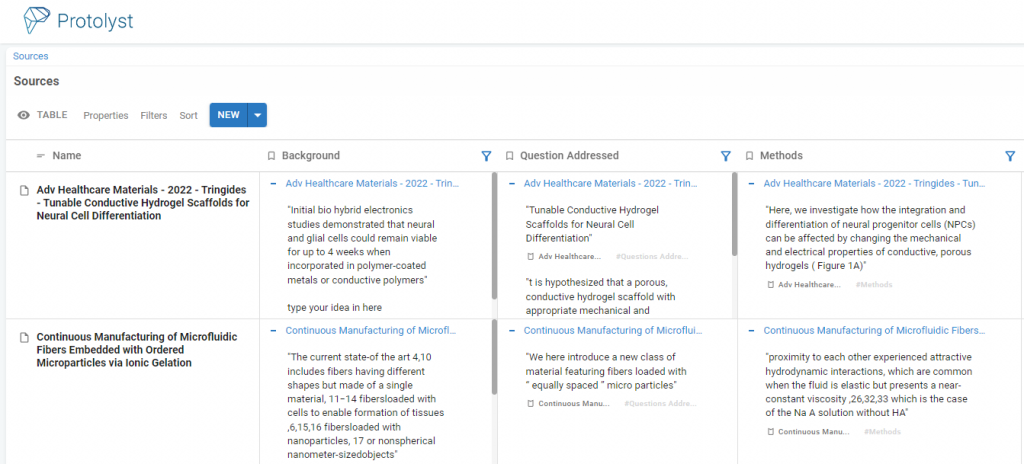
In your Sources Table you can separate out the Atoms you have captured in a source based on what they relate to such as Methods, Key Results etc.
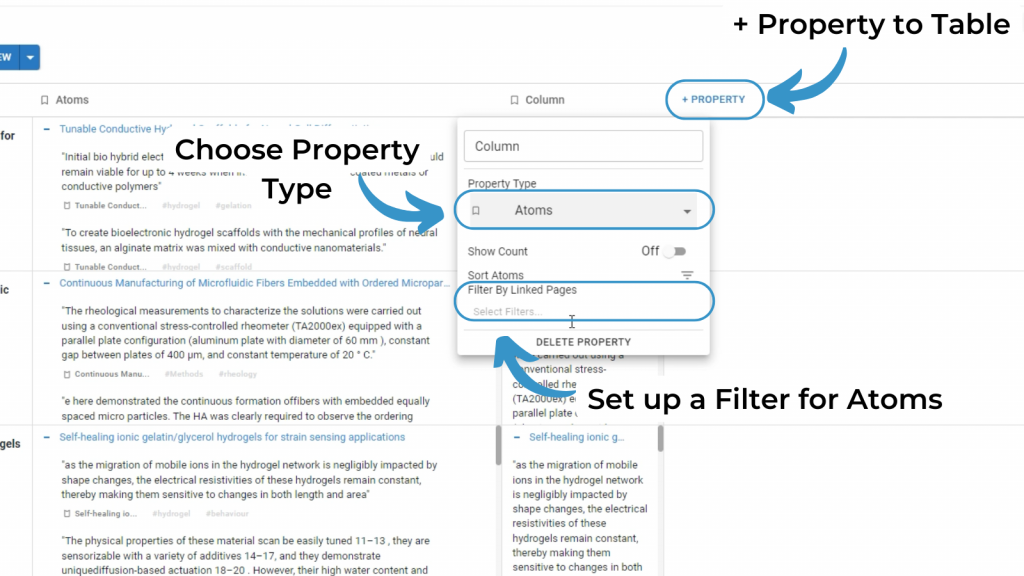
To setup a Table Overview add another Atoms Property and then set up a Filter. Open the Property Options by clicking on the Property Title. For the Atoms Property, there is a Filter option.
Filter by a Tag from your Tags table to display the Atoms captured in your source that have been Tagged with that particular Tag.
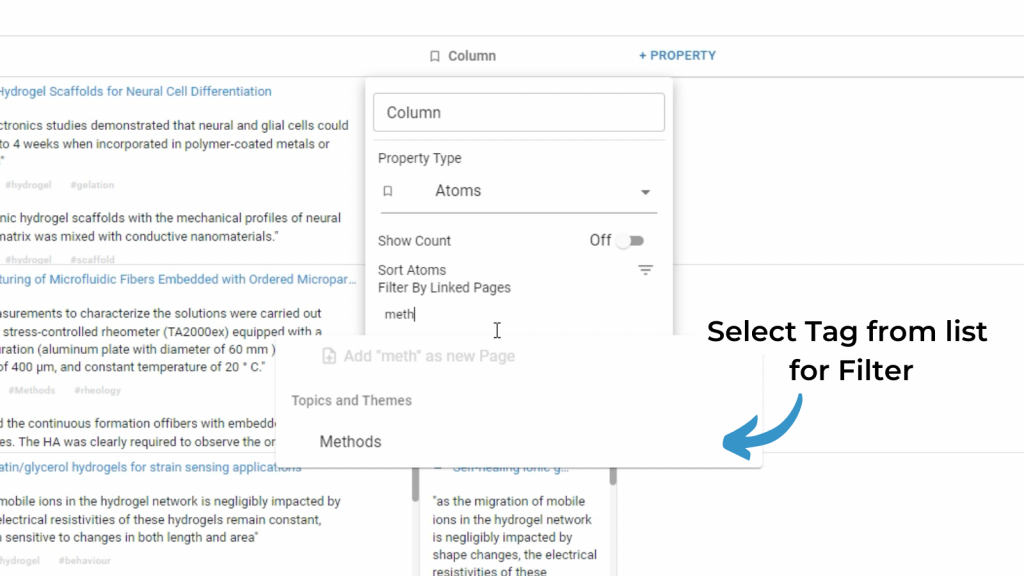
Filtering by ‘Methods’, will display all the Atoms you have captured and labelled (Tagged) Methods in that column.
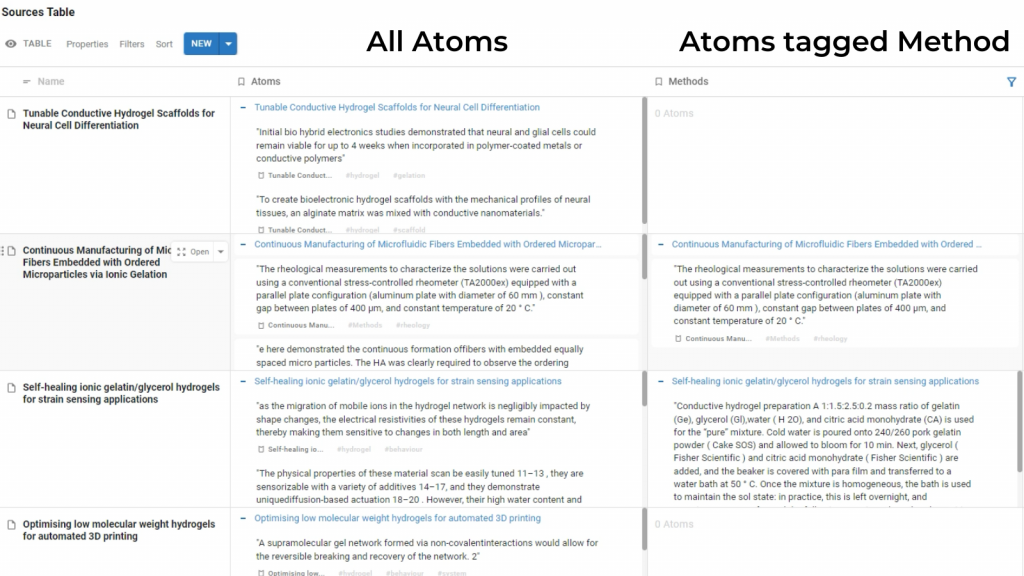
Setting up these overviews can help you to more easily take stock of information across multiple papers.
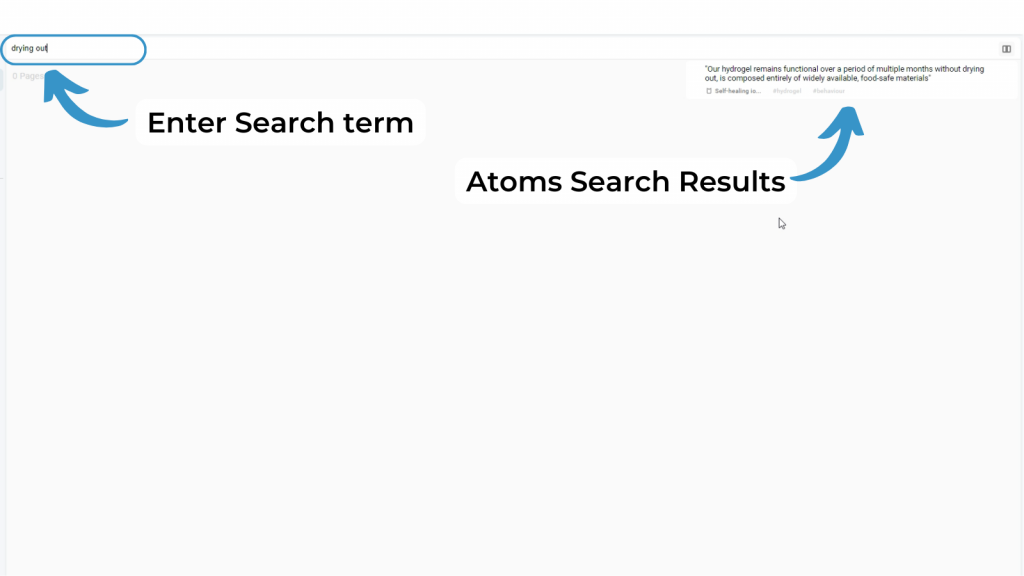
You can also search through all your Atoms by Keyword in All Pages search – useful to refind a nugget of information that you can half-remember!
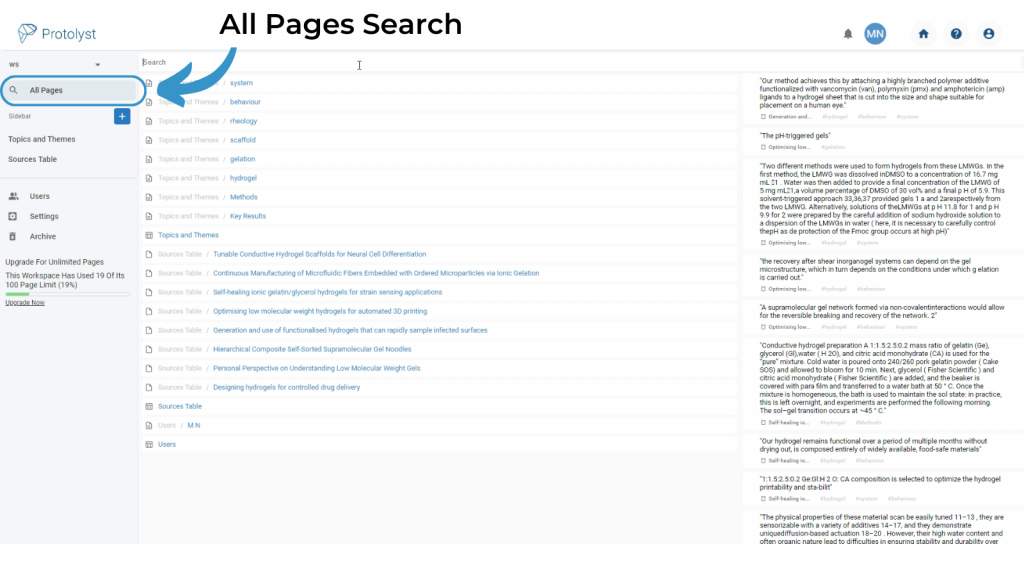
In All Pages, type a keyword to search through Page Titles and all your Atoms to locate that nugget.
What Next? #
Now that you’ve collected Atoms, organised them by adding Tags and used Filters in your Tables to get overviews or particular information, you can now use your Atoms. You can add a Text Editor Page to use your Atoms to start writing with references! Having those ideas added into the page can help ovecome that blank page and get moving. Take a closer look at Writing with your Atoms


